
Promotional emails from companies you don’t care about flooding your inbox? Getting a lot of spam? Worry no more.
As much as it is old, email marketing is continuing to become a stronghold for companies and a nuisance for customers. Almost every website these days requires your email in exchange for a perk or access to some part of the website. Worse, spam is subsequently rising.
This creates an influx of unnecessary emails in your inbox that, in most cases, drown the important emails.
However, if you’re an Apple user, you might be able to get rid of this problem. The company recently introduced a new feature alongside macOS Monterey and iOS 15— its new operating systems for Mac, iPhone, and iPad respectively—called Hide My Email aimed at combating spam and enhancing e-mail security.
What is Hide My Email
Hide My Email is Apple’s new privacy-focused offering on macOS and iOS that, well, hides your personal email address behind a unique, randomized one.
It automatically creates a temporary email address for you (that you can keep activated as long as you want) that forwards to your personal email. It’s convenient in the sense that you can use it in filling up web forms whose services are of no long-term importance to you.
You can then easily delete that temporary email if it starts receiving spam. This also eliminates the need to painstakingly unsubscribe to swathes of promotional emails.

Hide My Email, however, requires an active iCloud+ subscription to work. For those uninitiated, iCloud+ is simply a rebrand for paid iCloud plans that start at $0.99 in the US.
That said, you can create randomized email addresses on the spot while filling web forms and manage them within the iCloud settings on your device.
Hide My Email is built directly into Safari, Mail, and iCloud settings. This means it won’t work if you expect it to appear while filling forms in Chrome or Firefox.
Hide My Email also improves security by hiding your original email from companies that could be susceptible to data leaks. You can create as many randomized email addresses as you want and it’s unclear if Apple has set a limit.
A beta tester on Reddit tested it out by trying to create as many unique, randomized email addresses using Hide My Email. After 100 emails, however, a connection to iCloud began timing out suggesting the limit might be it. But, that could simply be a glitch, especially considering that Apple itself hasn’t shared official insight into the matter.
How to use Hide My Email to fill forms online
When you come across a form…
- Click on the field requiring your email address.
- An autofill popup should appear beneath the email field with an option suggesting to use Hide My Email.
- Click on the Hide My Email suggestion. A window should pop up with a randomized email address.
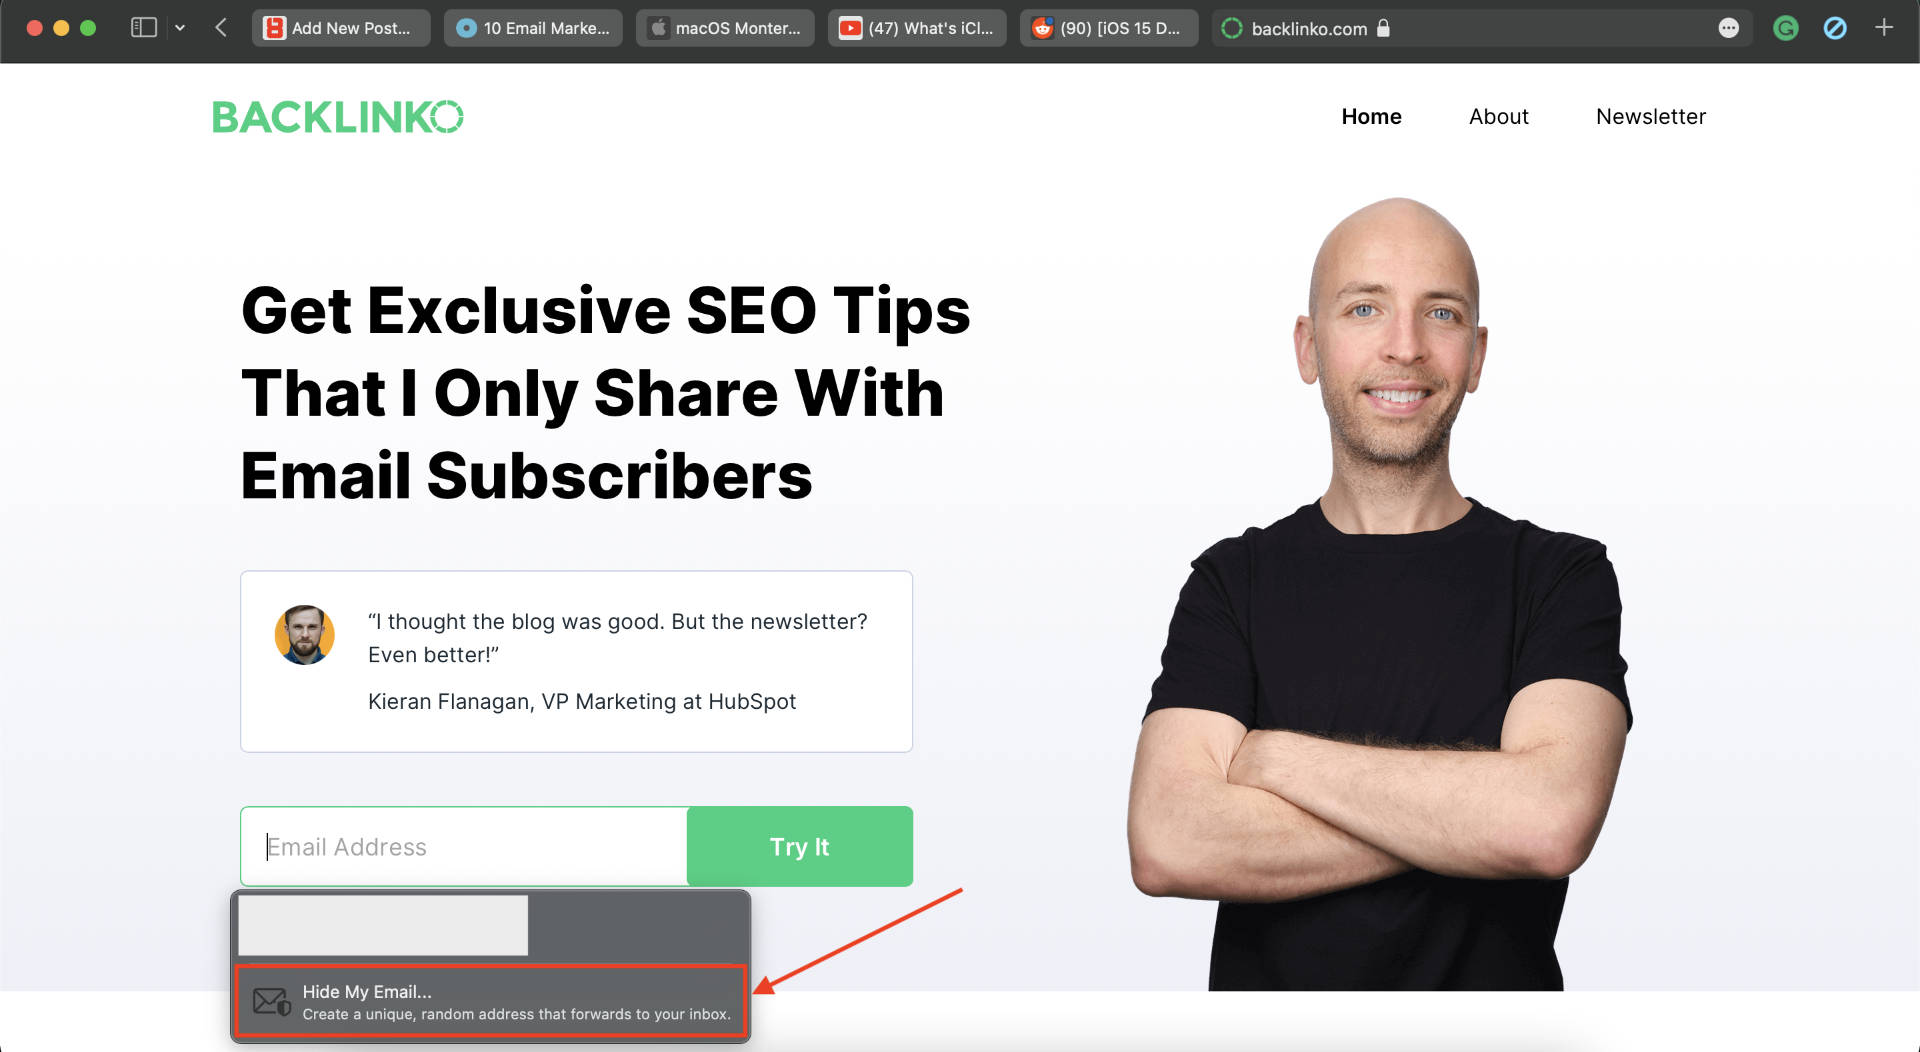
- You can either click the refresh button to generate another randomized email address or click Done to confirm using the originally suggested one.

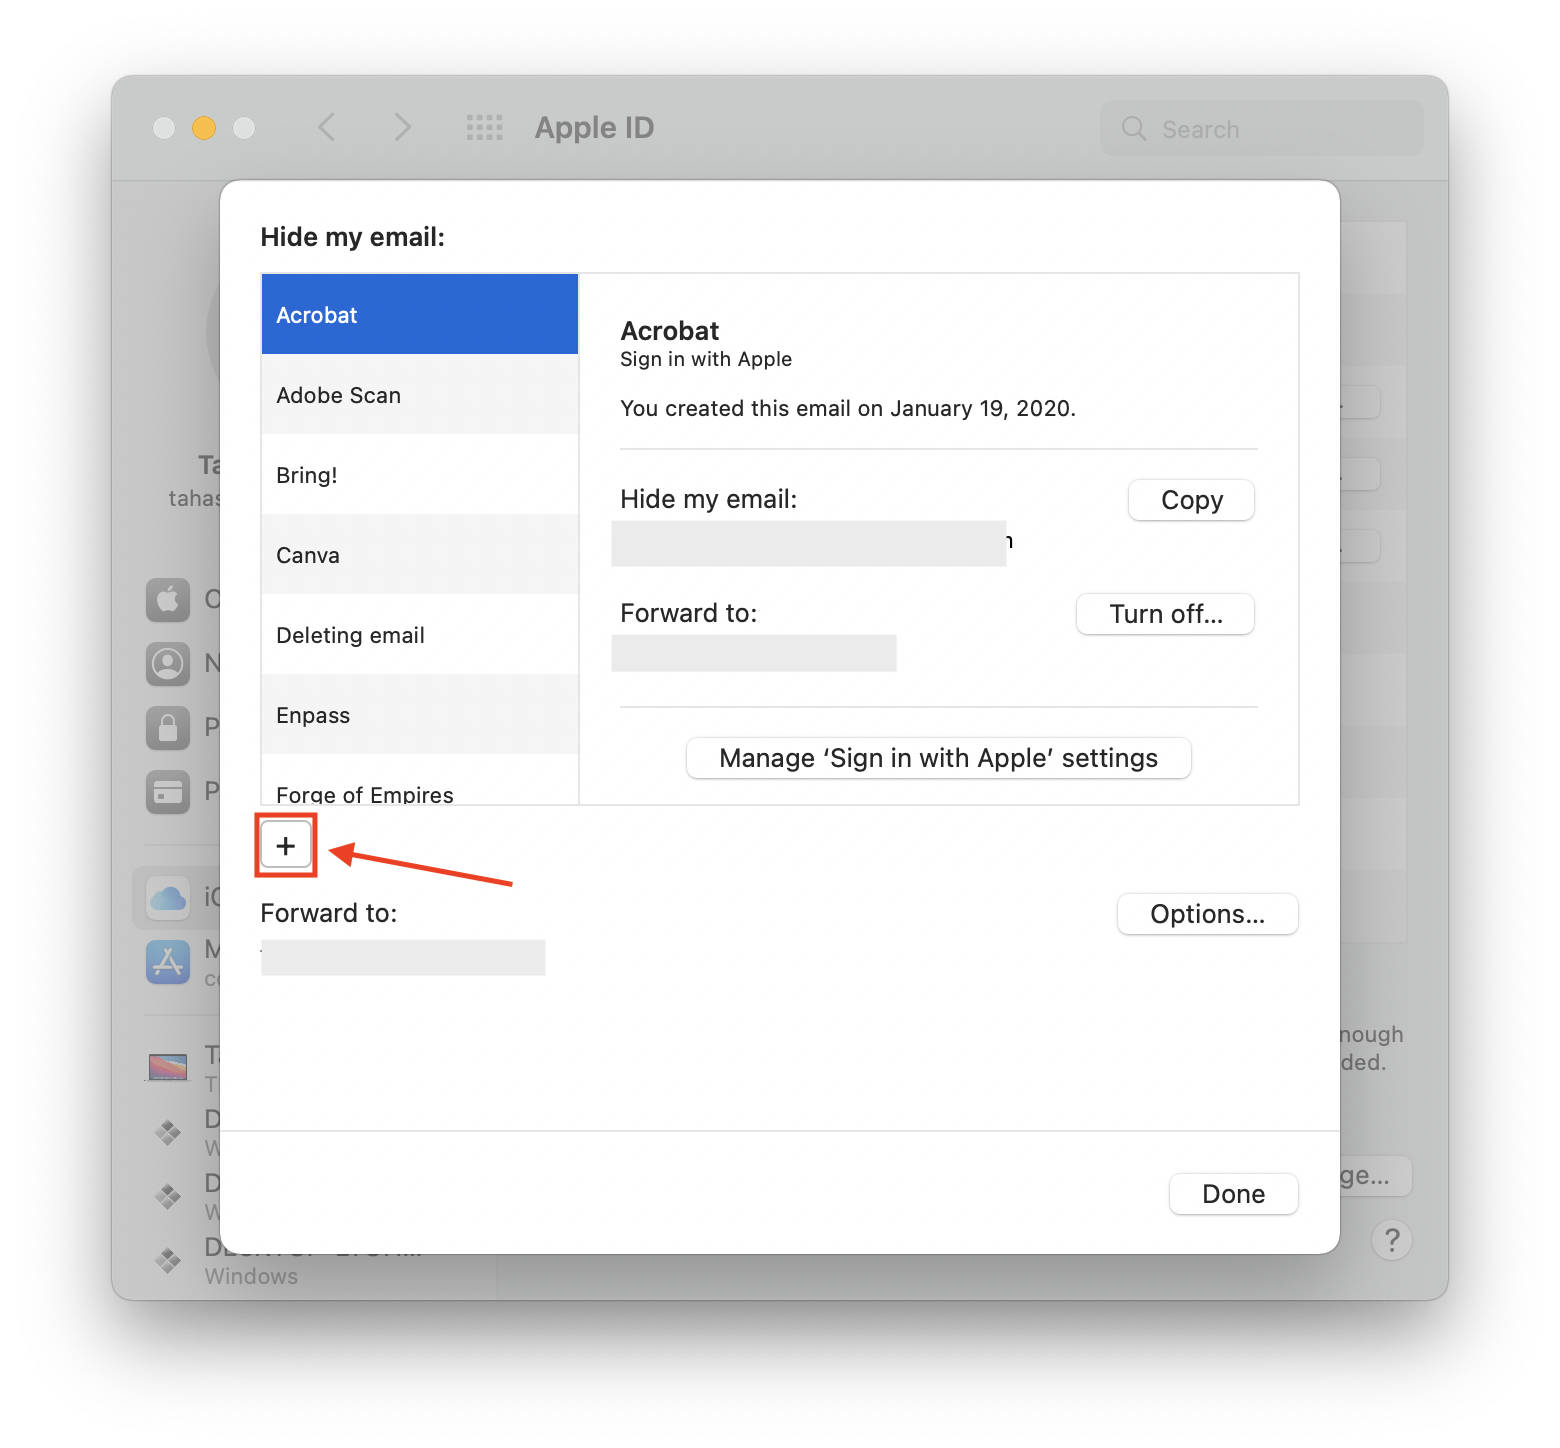
You can also create a new, randomized email address from iCloud settings:
- Head over to the macOS System Preferences by clicking on the Apple logo in the Menu Bar.
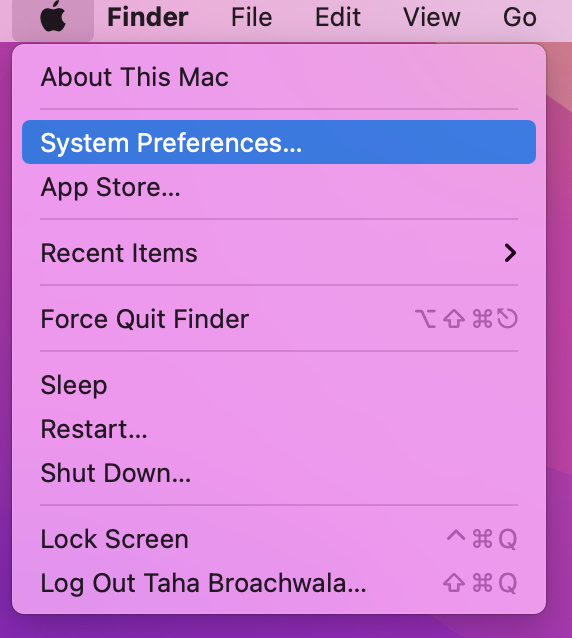
- Click on Apple ID.
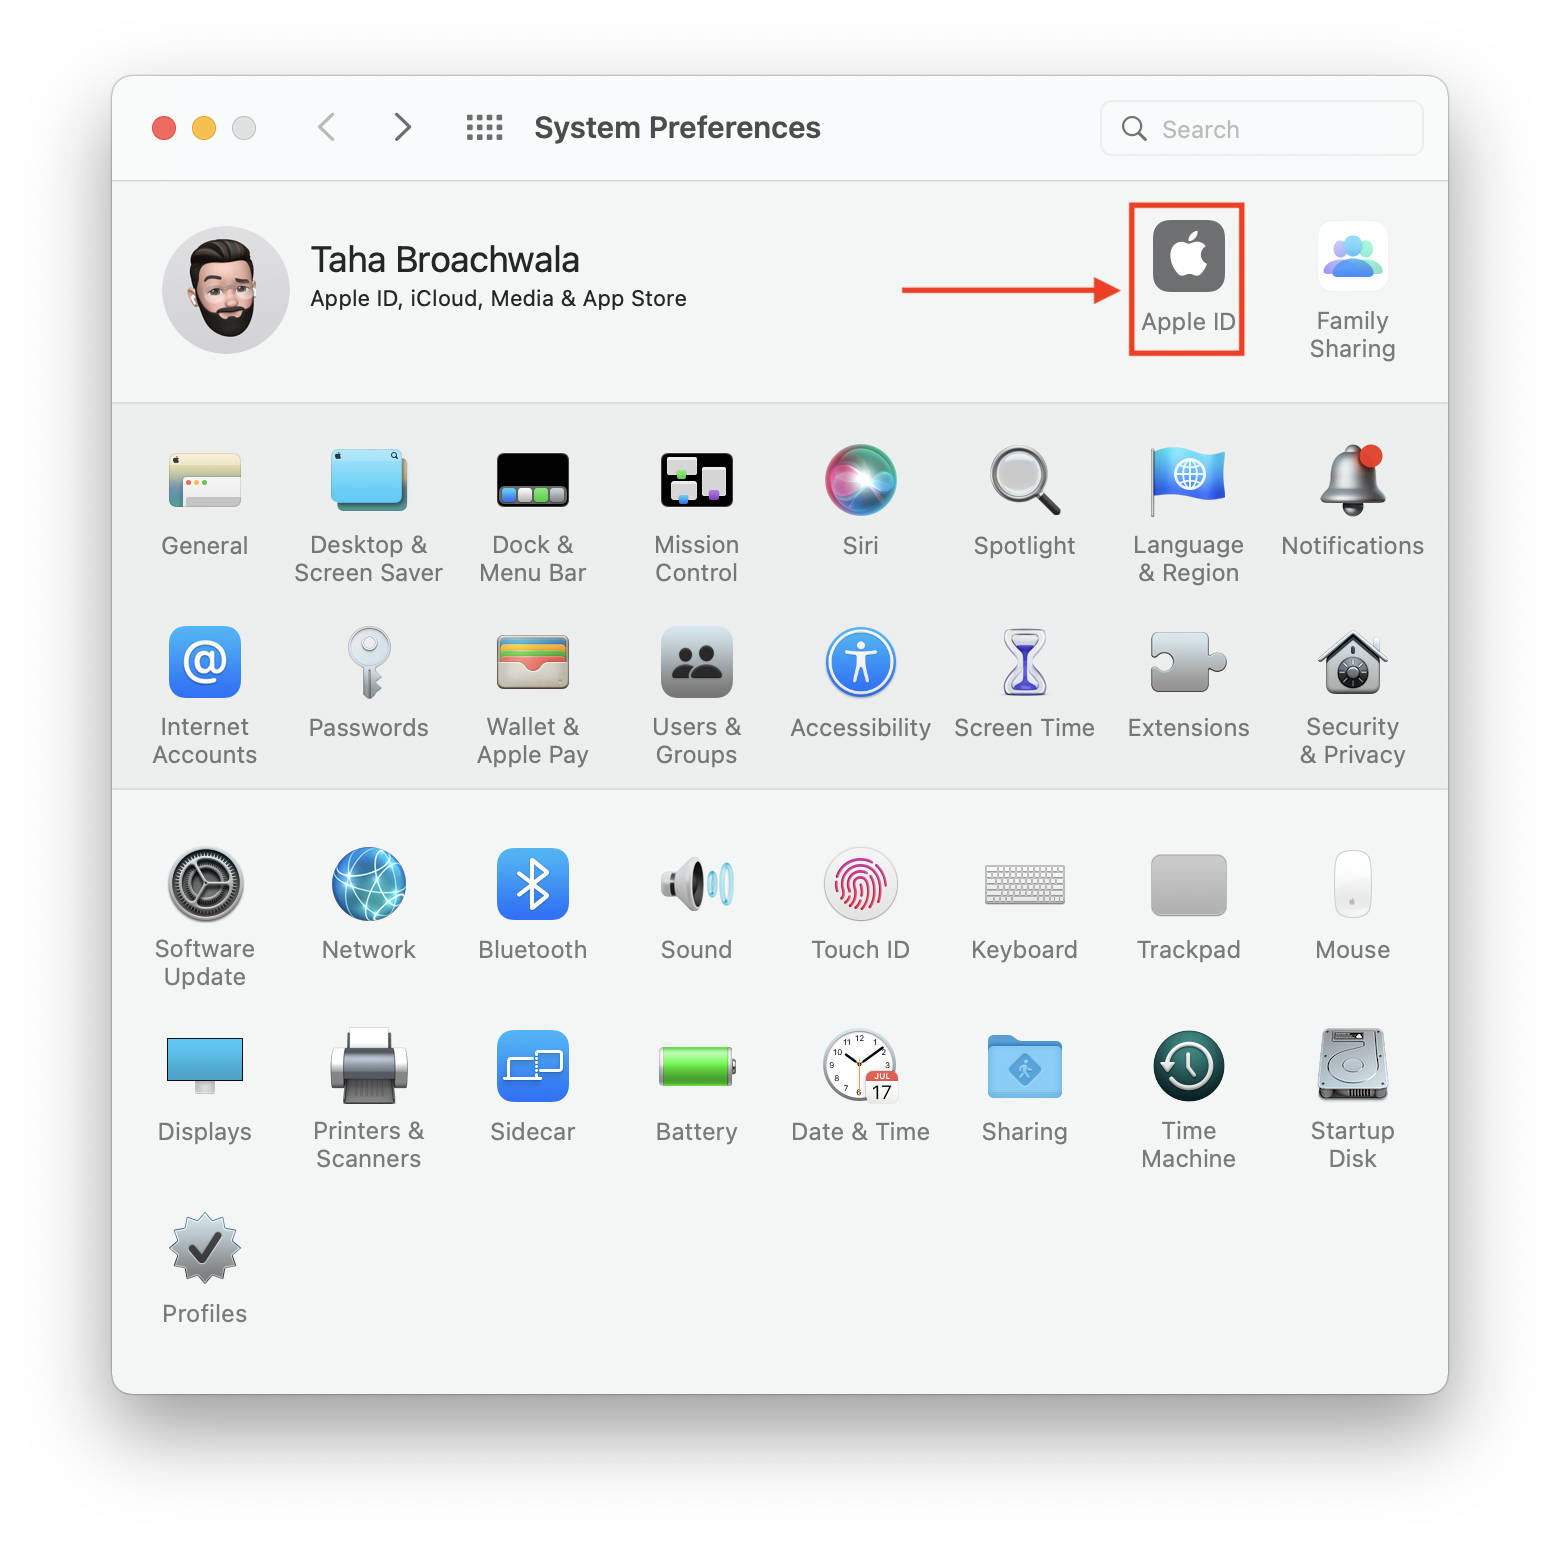
- Click the Options button beside Hide My Email. You might have to enter your Apple ID password.
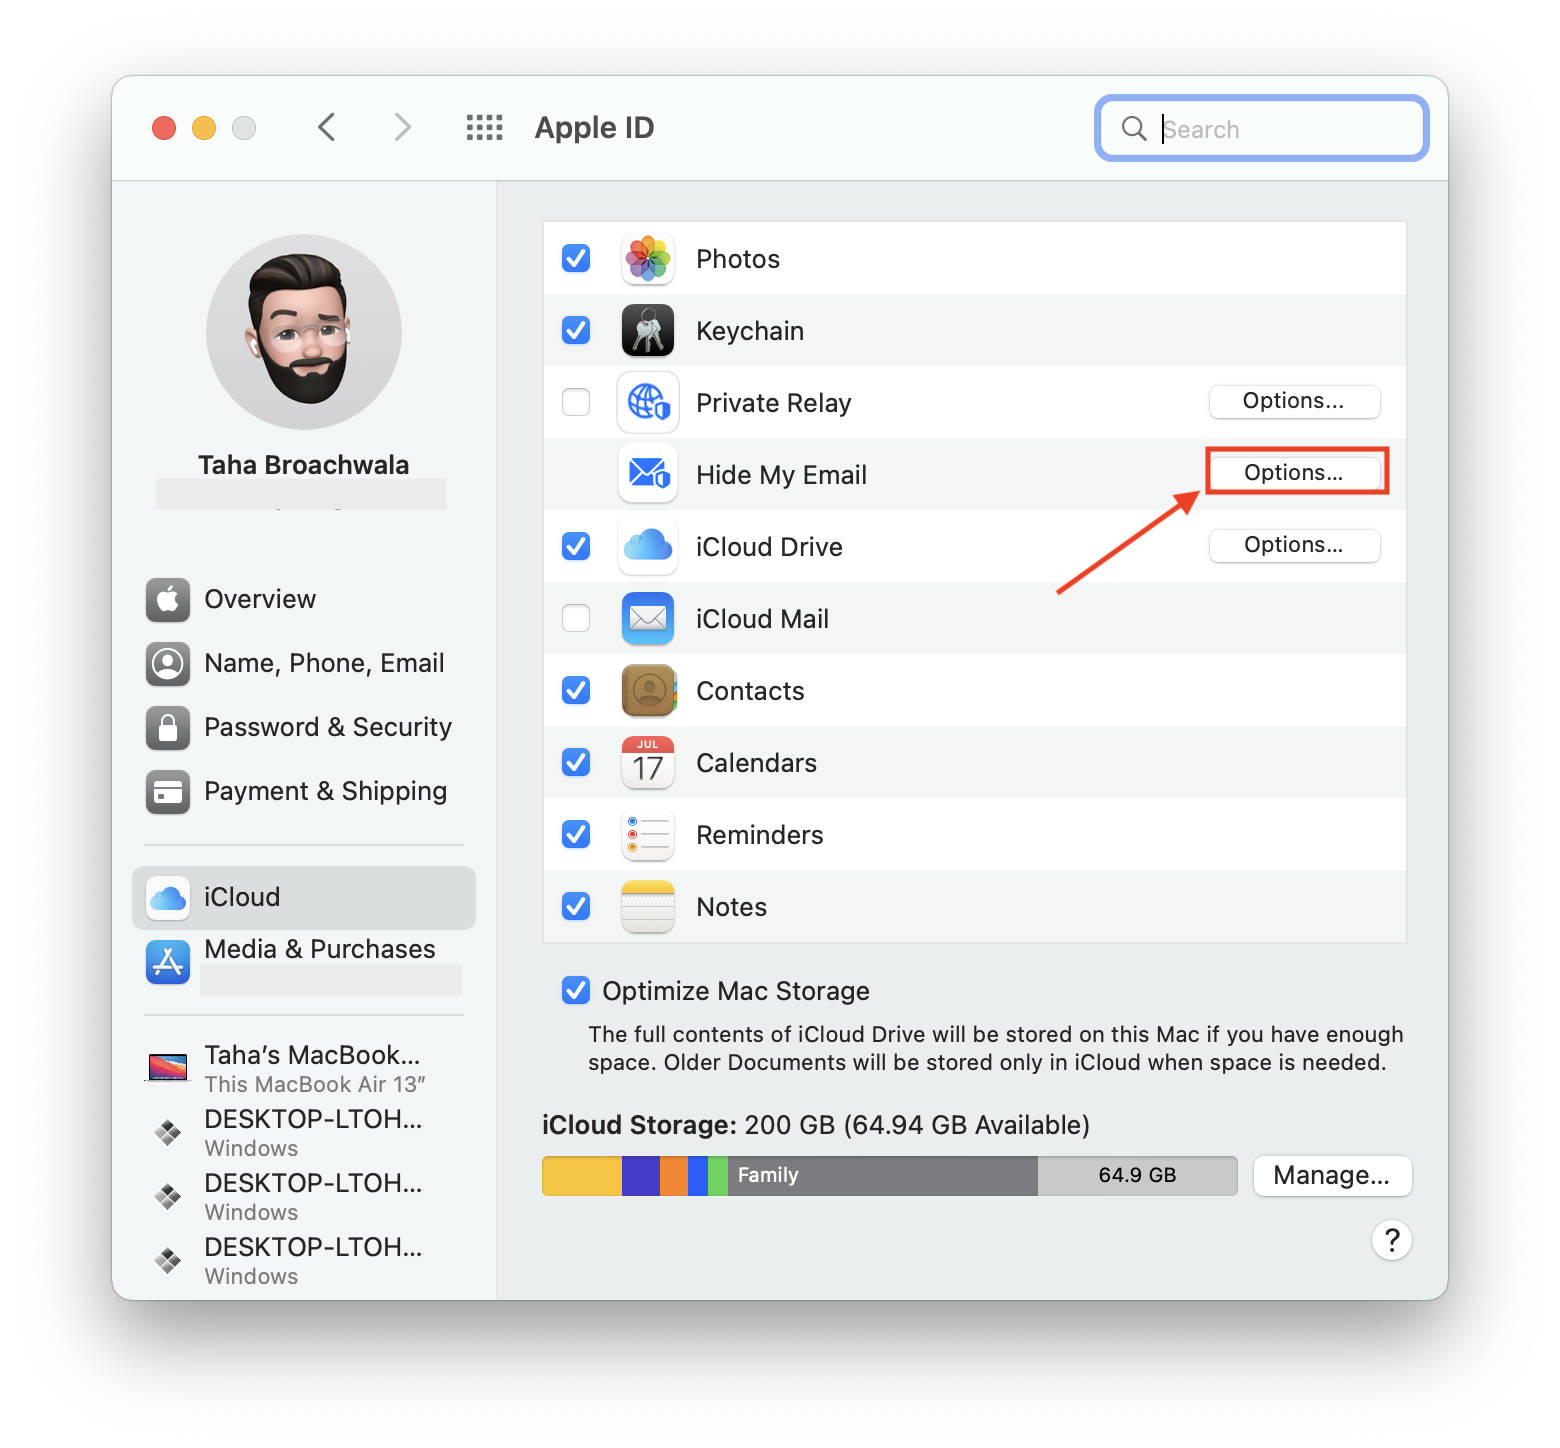
- Click the Plus icon beneath the list of emails.
- Then, enter the label and description for that email address and click Continue. It might help you remember what you use it for later; especially if you have multiple randomized emails set up.
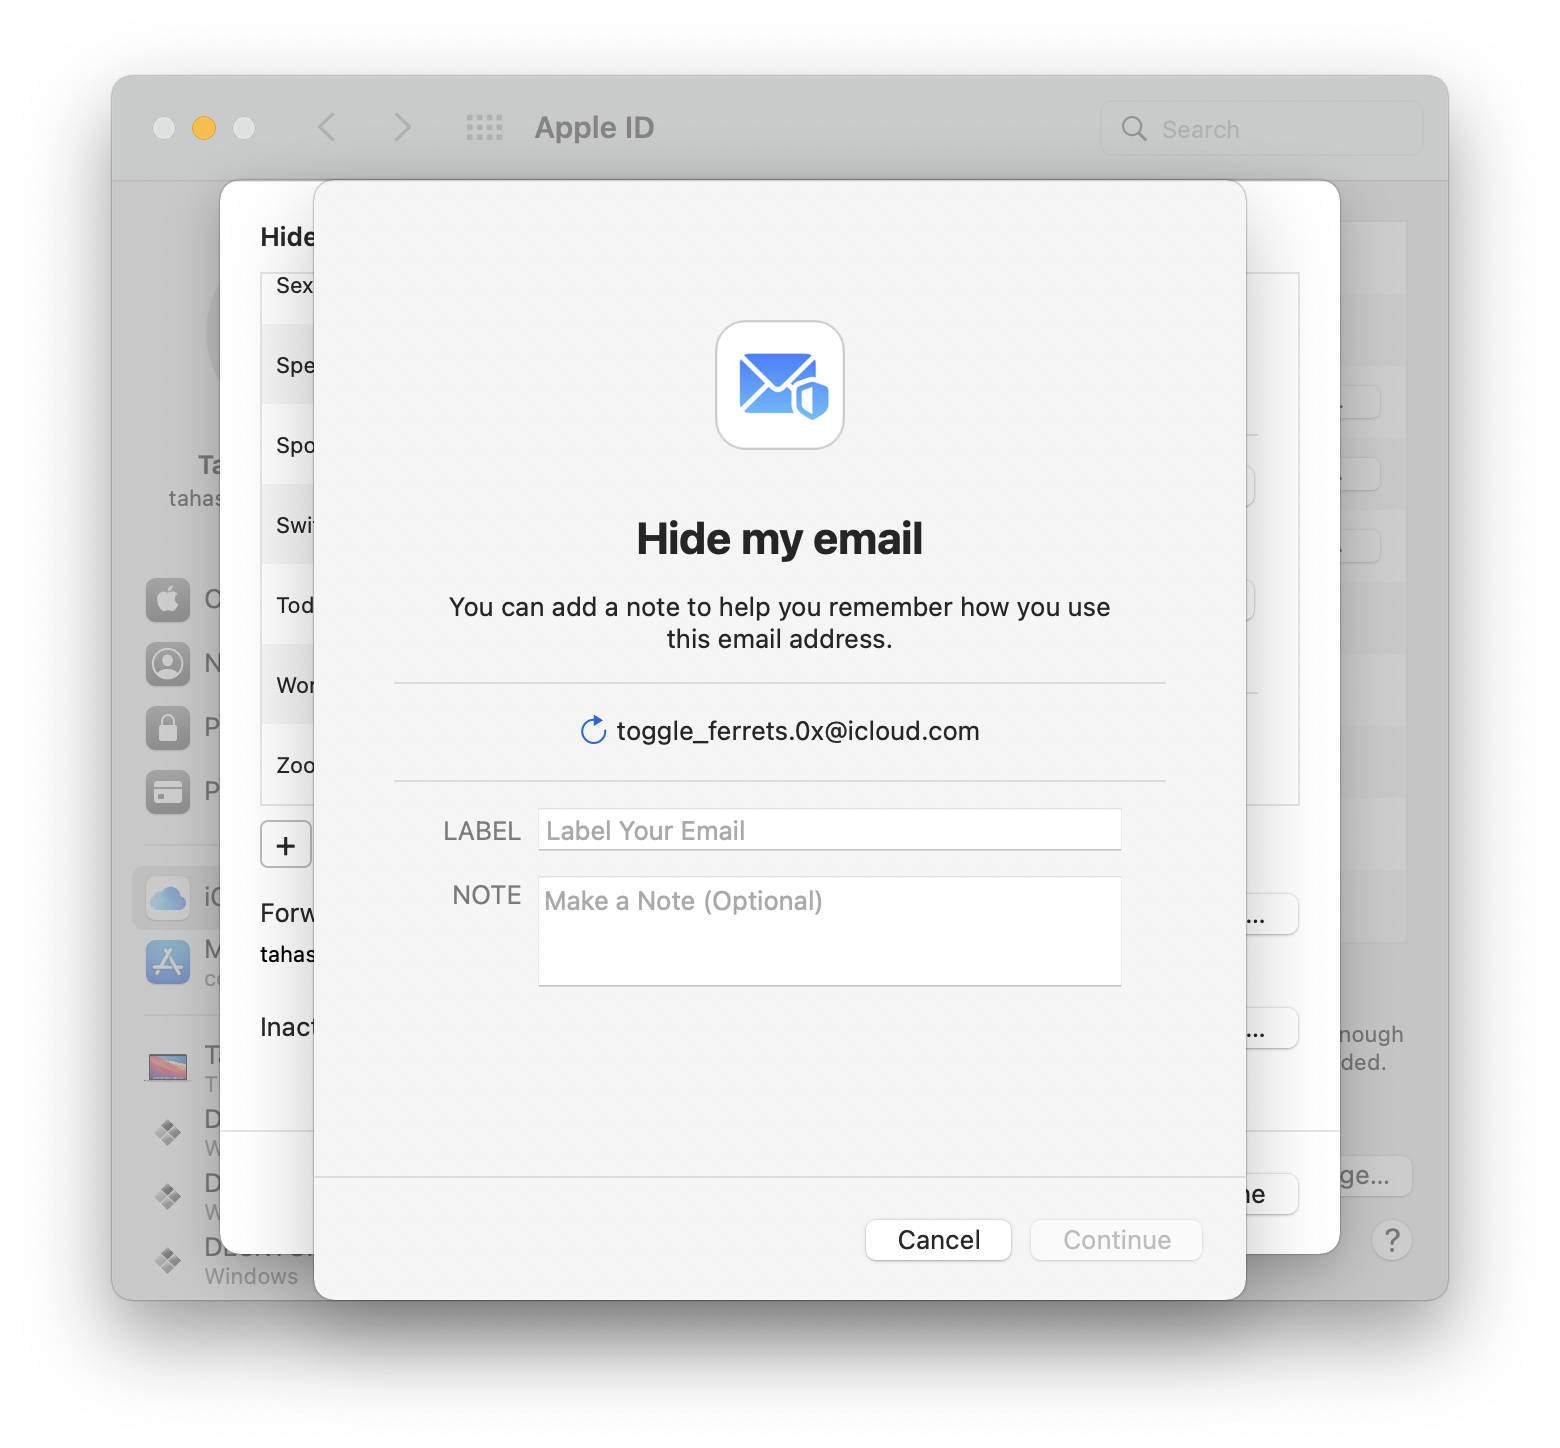
- Finally, click Done.
How to manage Hide My Email on macOS Monterey
You can easily manage the existing randomized email addresses you created while filling forms online from iCloud settings in the macOS System Preferences app. There, you can create a new randomized email (as shown in the previous section) or delete the randomized email address altogether.
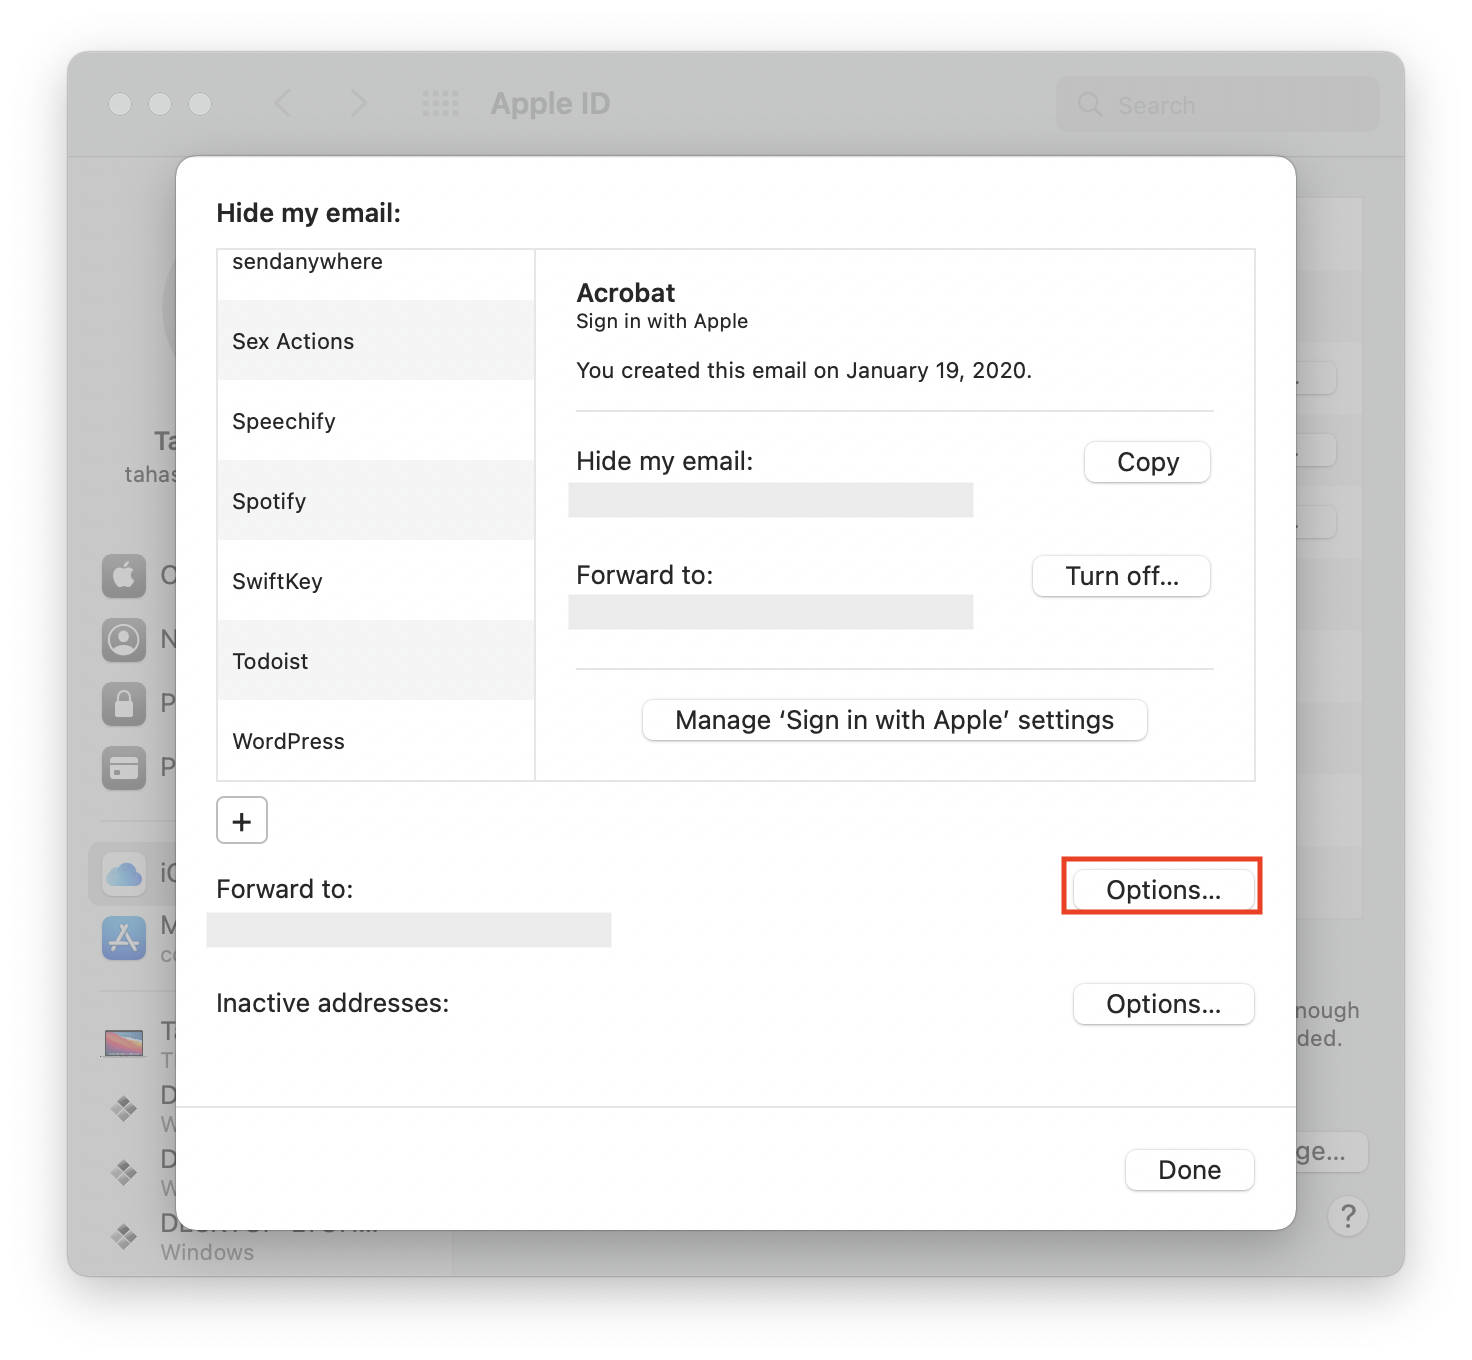
How to change the original email address that the randomized email forwards to
- Head over to the macOS System Preferences by clicking on the Apple logo in the Menu Bar.
- Click on Apple ID.
- Click the Options button beside Hide My Email. You might have to enter your Apple ID password.
- Click on Options besides the “Forward to” email address.
- Choose from the email addresses available. Note that original email addresses must be added to your system beforehand.
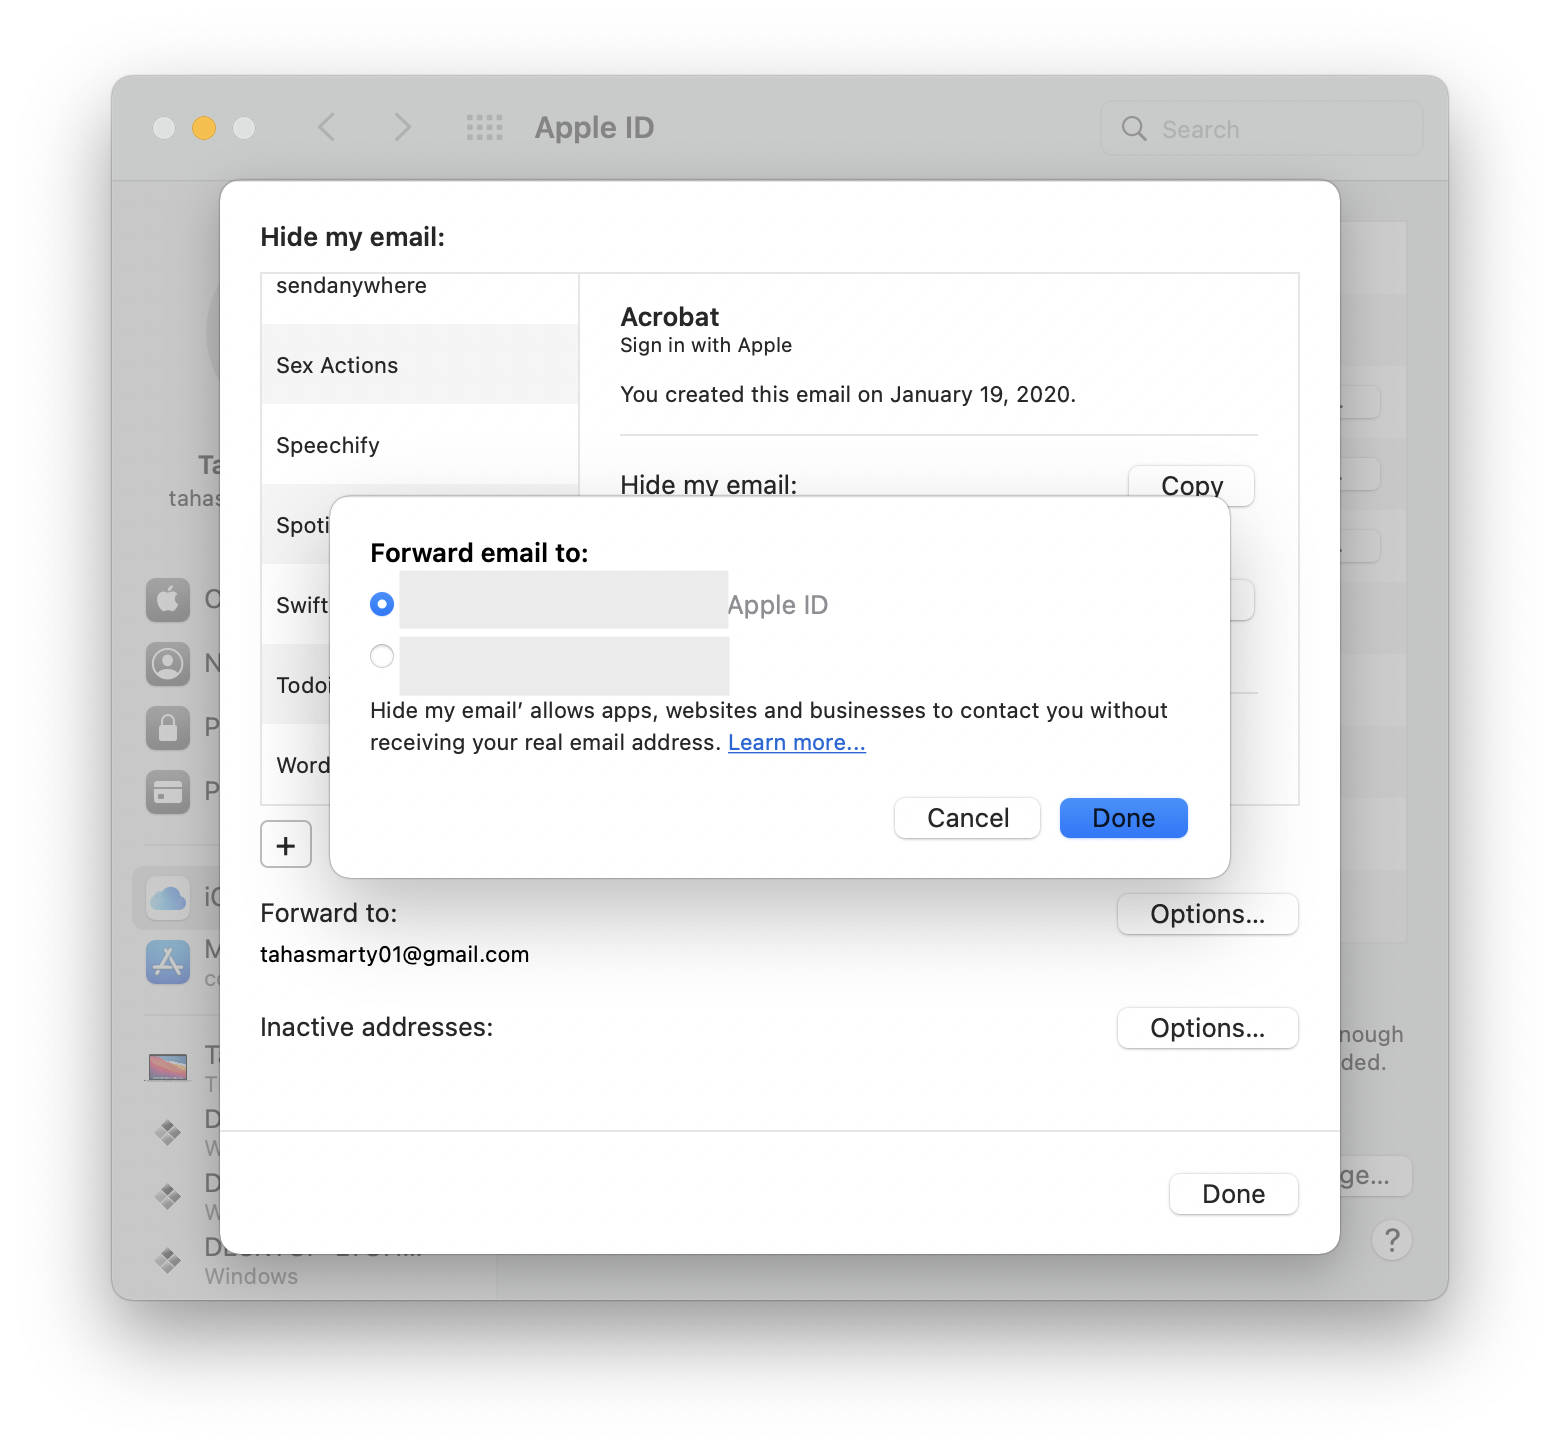
- Click Done.
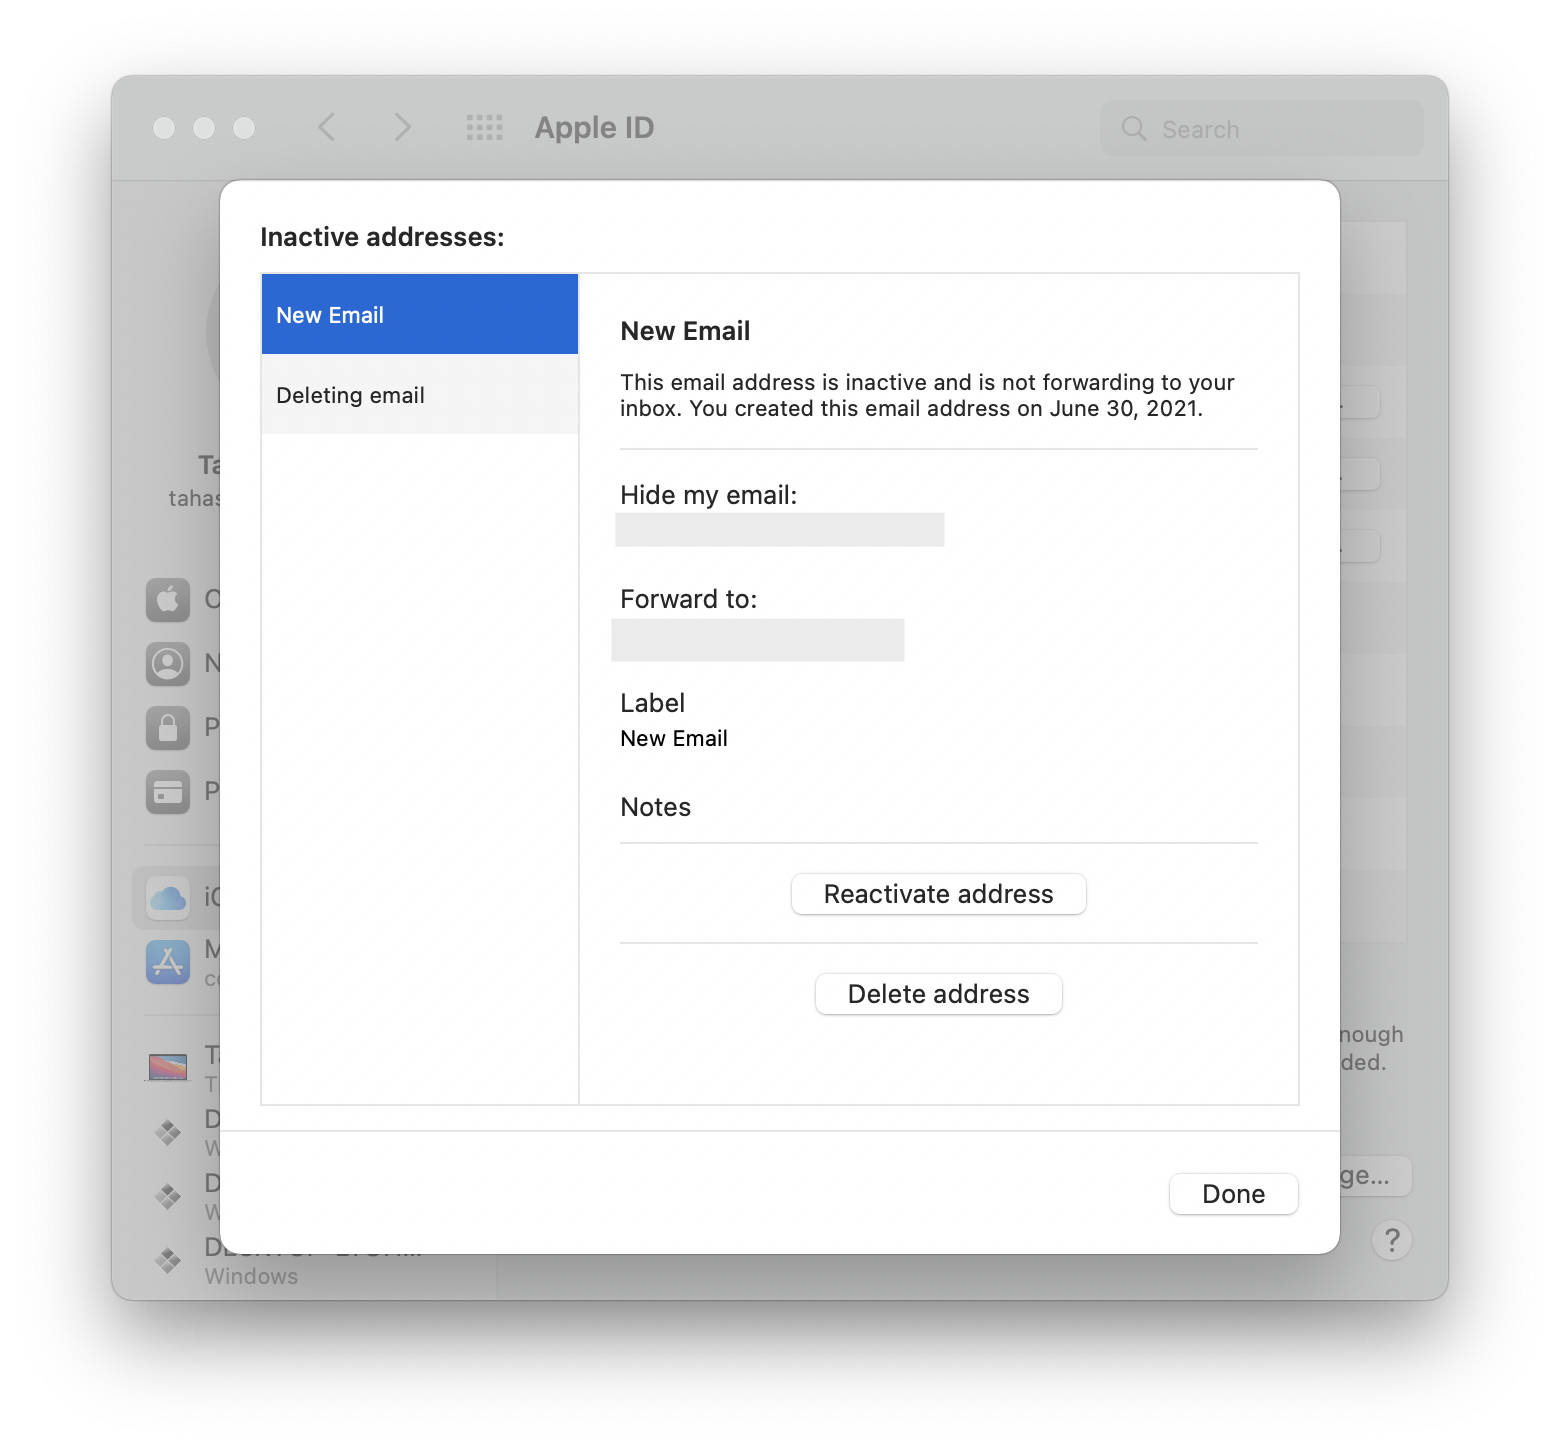
How to deactivate and delete a randomized email address you created earlier
- Head over to the macOS System Preferences by clicking on the Apple logo in the Menu Bar.
- Click on Apple ID.
- Click the Options button beside Hide My Email. You might have to enter your Apple ID password.
- Select the email address you want to deactivate.
- In the right-hand panel, scroll down a bit and click “Deactivate email address.”
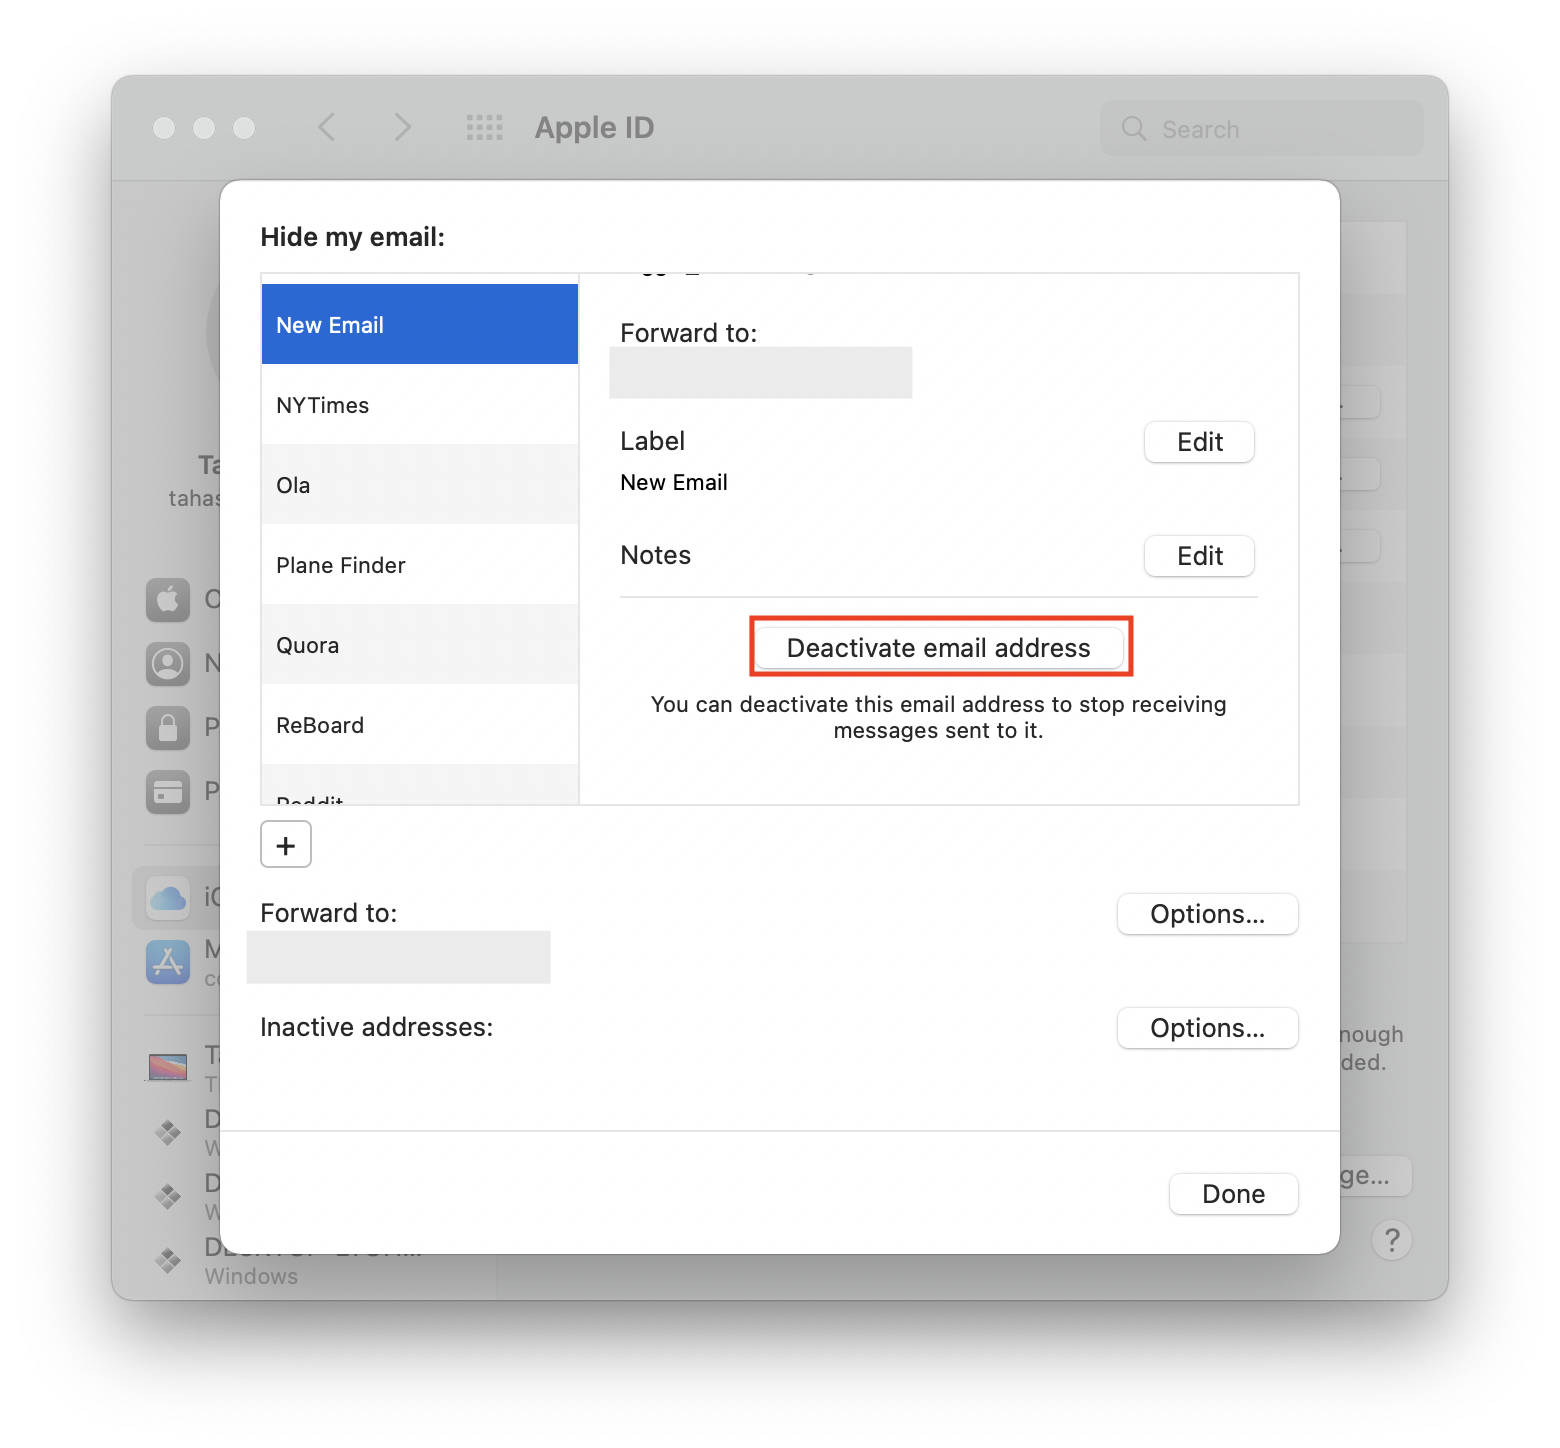
- When the prompt appears, click Deactivate.
- Then, click on Options besides “Inactive addresses.”
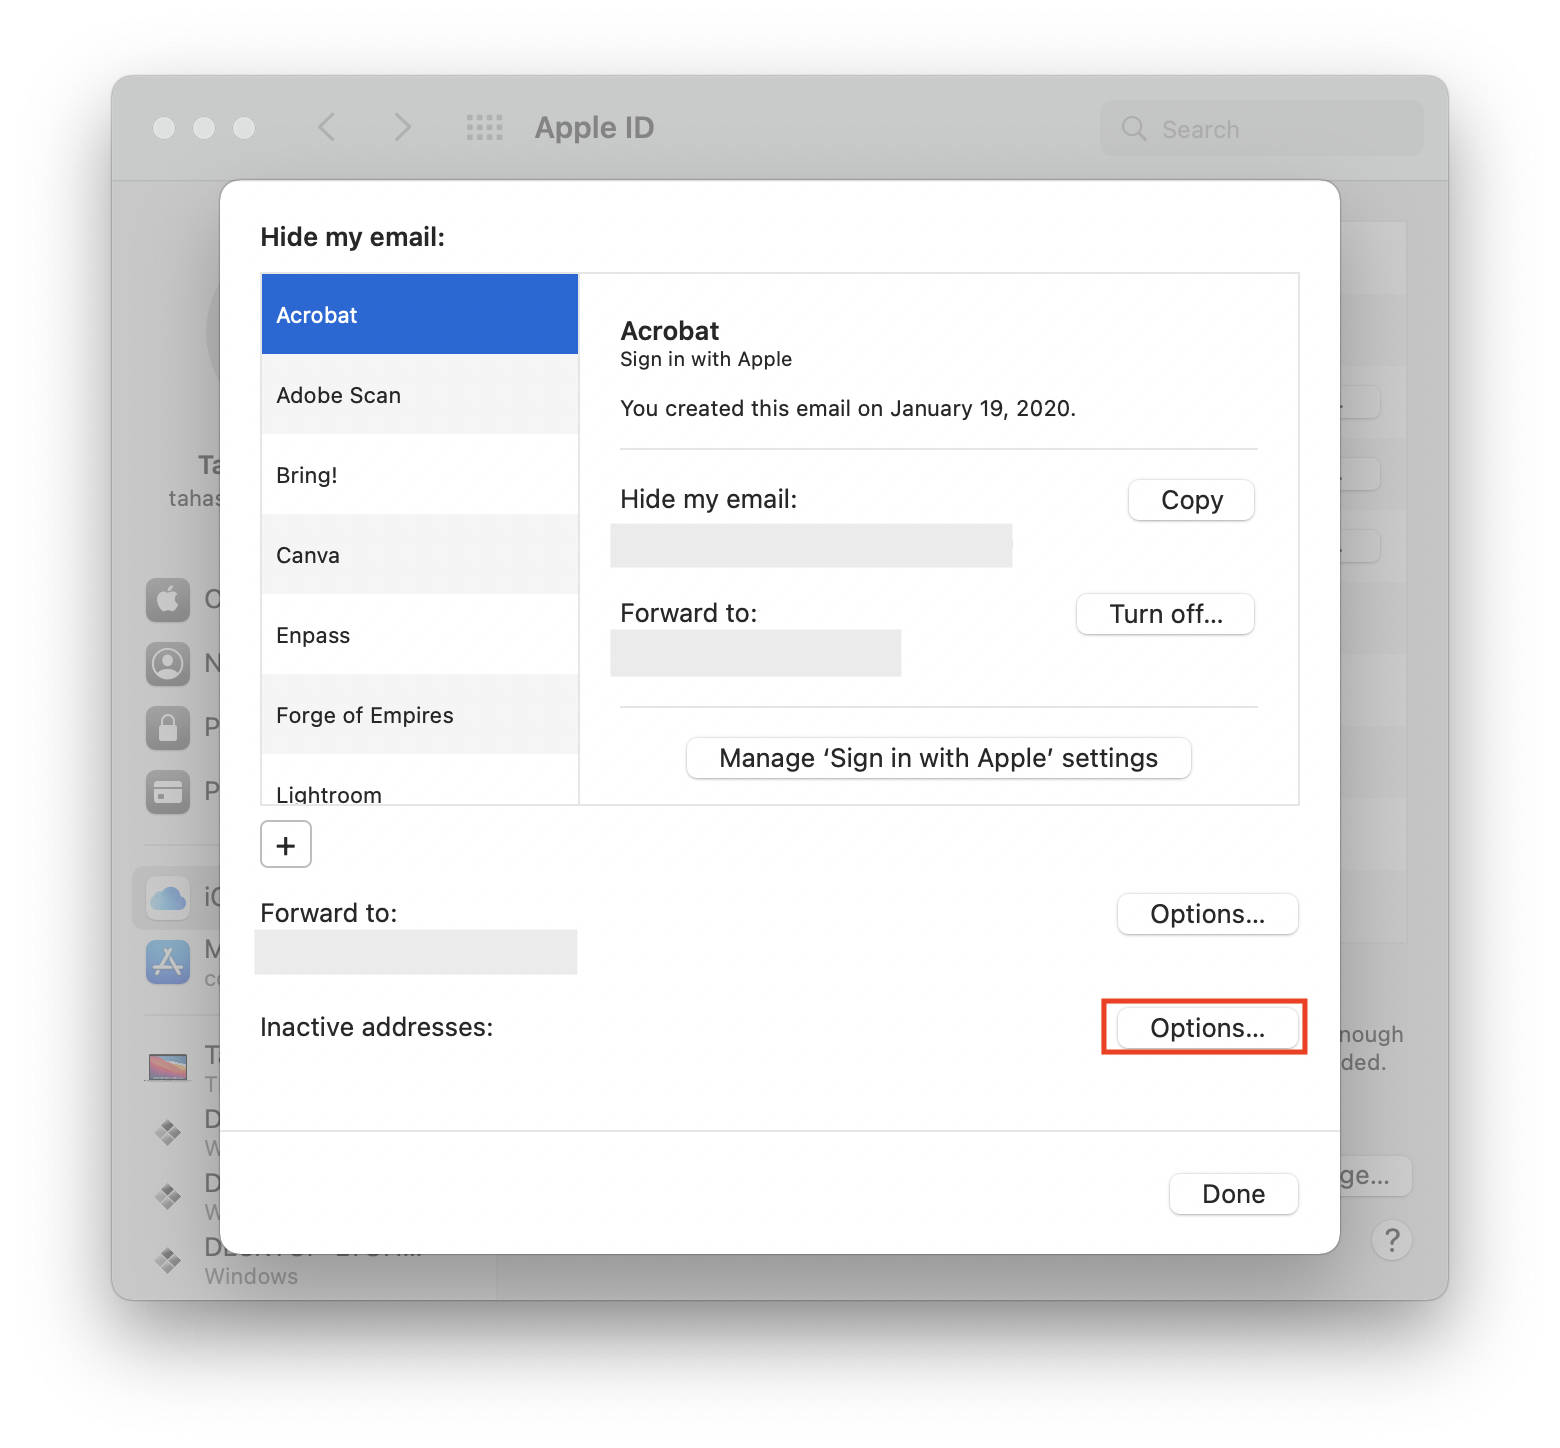
- Finally, select the address you want to delete and click Delete.
Final Thoughts
Email security and protection from spam are essential these days. It increases trust in communication as it shifts focus away from promotional emails and brings a sense of sanity back into your inbox.
With now being able to hide your email on your iPhone, iPad, and Mac, you might not have to sign up to third-party services that offer just that. Moreover, hiding your email will protect it from spam and phishing attacks and keep it private.
Other macOS Monterey Guides you should check out:
- 100+ Fascinating Mac tips and tricks you need to check out!
- How to permanently show Menu Bar in full-screen mode on Mac
- How to share saved passwords on Mac running macOS 12 Monterey
- How to customize the mouse pointer in macOS 12 Monterey
- How to use Tab Groups in Safari in macOS 12 Monterey
- How to use Quick Note in macOS 12 Monterey
- How to AirPlay to Mac from an iPhone/iPad, mirror screen, and stream content
- How to mute notifications temporarily on macOS Monterey and iOS 15
- How to hide your IP Address in Safari on macOS Monterey and iOS 15
- How to enable and customize Focus filters on macOS Monterey
- How to turn on Auto-reply for Focus on macOS Monterey and iOS 15
- How to turn off ‘Shared With You’ in macOS Monterey and iOS 15
- How to add and manage Tags in Notes in macOS Monterey and iOS 15
- How to use Live Text on Mac running macOS Monterey
- How to use Private Relay on macOS Monterey
- How to add VoiceOver Image Descriptions in the Preview app in macOS Monterey
- How to Enable Low Power Mode on your Mac and How it Works!
- How to enable Mail Privacy Protection on macOS Monterey and iOS 15
- How to translate any text on your Mac running macOS Monterey
- How to change Playback Speed of Voice Memos in macOS Monterey
- How to add animated Memoji on your Mac’s login screen
- How to create Smart Lists in Reminders on macOS Monterey
- How to disable Universal Control on macOS Monterey
- How to ‘Skip Silence’ in Voice Memos on macOS Monterey
- 50+ Coolest Siri Shortcuts for your Mac running macOS Monterey
