
When the internet originally went mainstream, people were excited to convert their day-to-day shenanigans into virtual tasks. The fact that you could finally send a message to your loved ones instantly—and it would be received just as fast—was purely transcendental.
Of course, that feeling is lost on us now, thanks to the oversaturation of media and the evolution of the internet itself. A video conference with more than 50 people at a time these days is loathed by many rather than being admired.
However, very few at the time thought that such convenience would today be served at the expense of privacy. ISPs, data brokers, and even Governments meddle with it for their own benefits.
ISPs use it to sell users’ browsing data—including the websites they visit—to data brokers who use this pool of data to target personalized ads. Worse, ISPs sometimes also give in to censorship requests for a monetary benefit. All of this is vastly detrimental to our privacy and is pushing us toward a collective sense of paranoia, making the internet a less than blissful place to be.
Thankfully, you can use a VPN to get around ISPs tracking you online. But, even VPN providers have proven to be untrustworthy in the past what with countless data breaches and intentional brokering of users’ browsing histories.
What gives, then? That’s where iCloud’s new Private Relay feature in macOS Monterey and iOS 15 swoops in.
What is iCloud Private Relay
Private Relay is Apple’s latest iCloud offering as a part of its new iCloud+ rebranding. Its objective is to mask your IP address through a basic networking security arrangement so that the IP address, as well as your browsing history, is oblivious to your ISP as well as other external factors.
As for a background explanation of how Private Relay works, it encrypts your browsing data and passes it through two relays. The first relay randomizes the IP address so that no one can trace it back to your system and the second relay decrypts the encrypted data in order to make it comprehensible to the website you are trying to browse.

Private Relay effectively helps ISPs and trackers from locating you and monitor your web usage. The best part is that Apple says, unlike other such systems, Private Relay will have a minimal speed impact.
Furthermore, if you’re confused about simply calling it just another VPN, it’s not. Private Relay, first off, isn’t available system-wide and only works in Safari on your Mac, iPhone, and iPad. It also doesn’t let you choose a specific location as is the case with run-of-the-mill VPNs. Last, but not least, it can be disabled by countries, ISPs, and telecom giants.
There are also other minor intricacies signifying the difference between a VPN and Apple’s iCloud Private Relay that are better suited for an in-depth explanatory post on the subject.
It’s especially worth noting that iCloud+, of which Private Relay is a feature, is a paid iCloud plan that starts at $0.99 per month in the United States. So, if you haven’t subscribed to any paid iCloud storage plan yet, you won’t be able to use Private Relay.
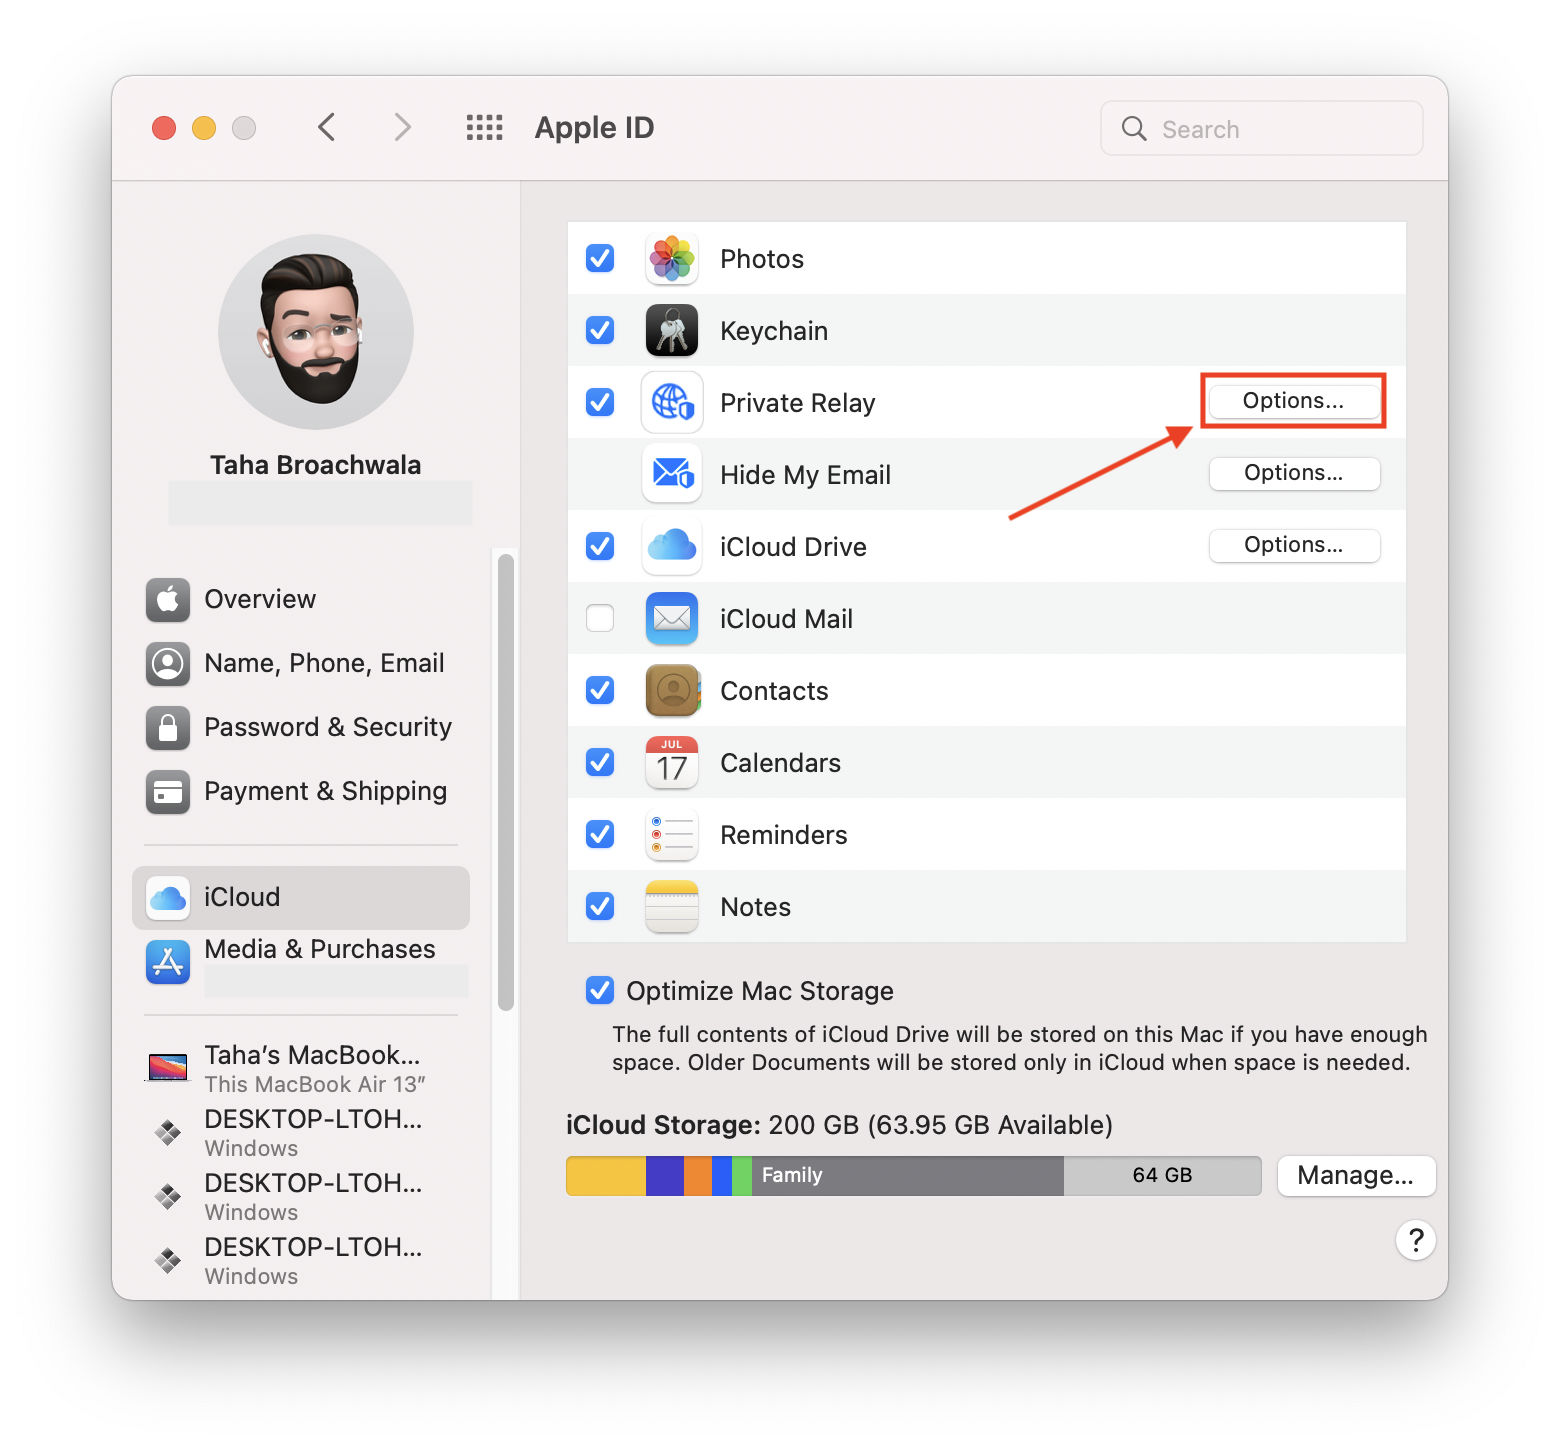
How to enable or disable iCloud Private Relay on macOS Monterey
- Head over to the macOS System Preferences by clicking the Apple icon in the menu bar.
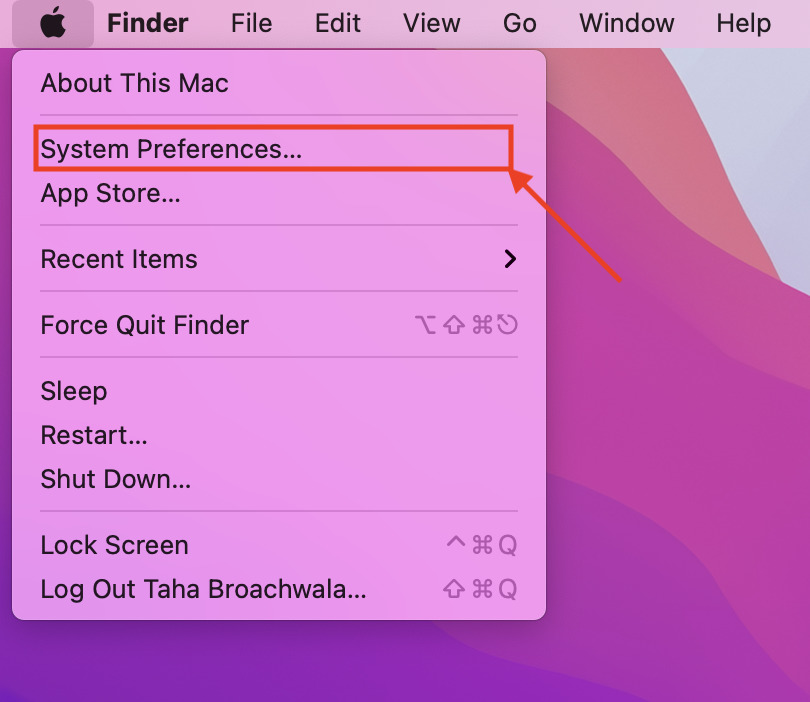
- There, click on the tab that indicates “Apple ID.”
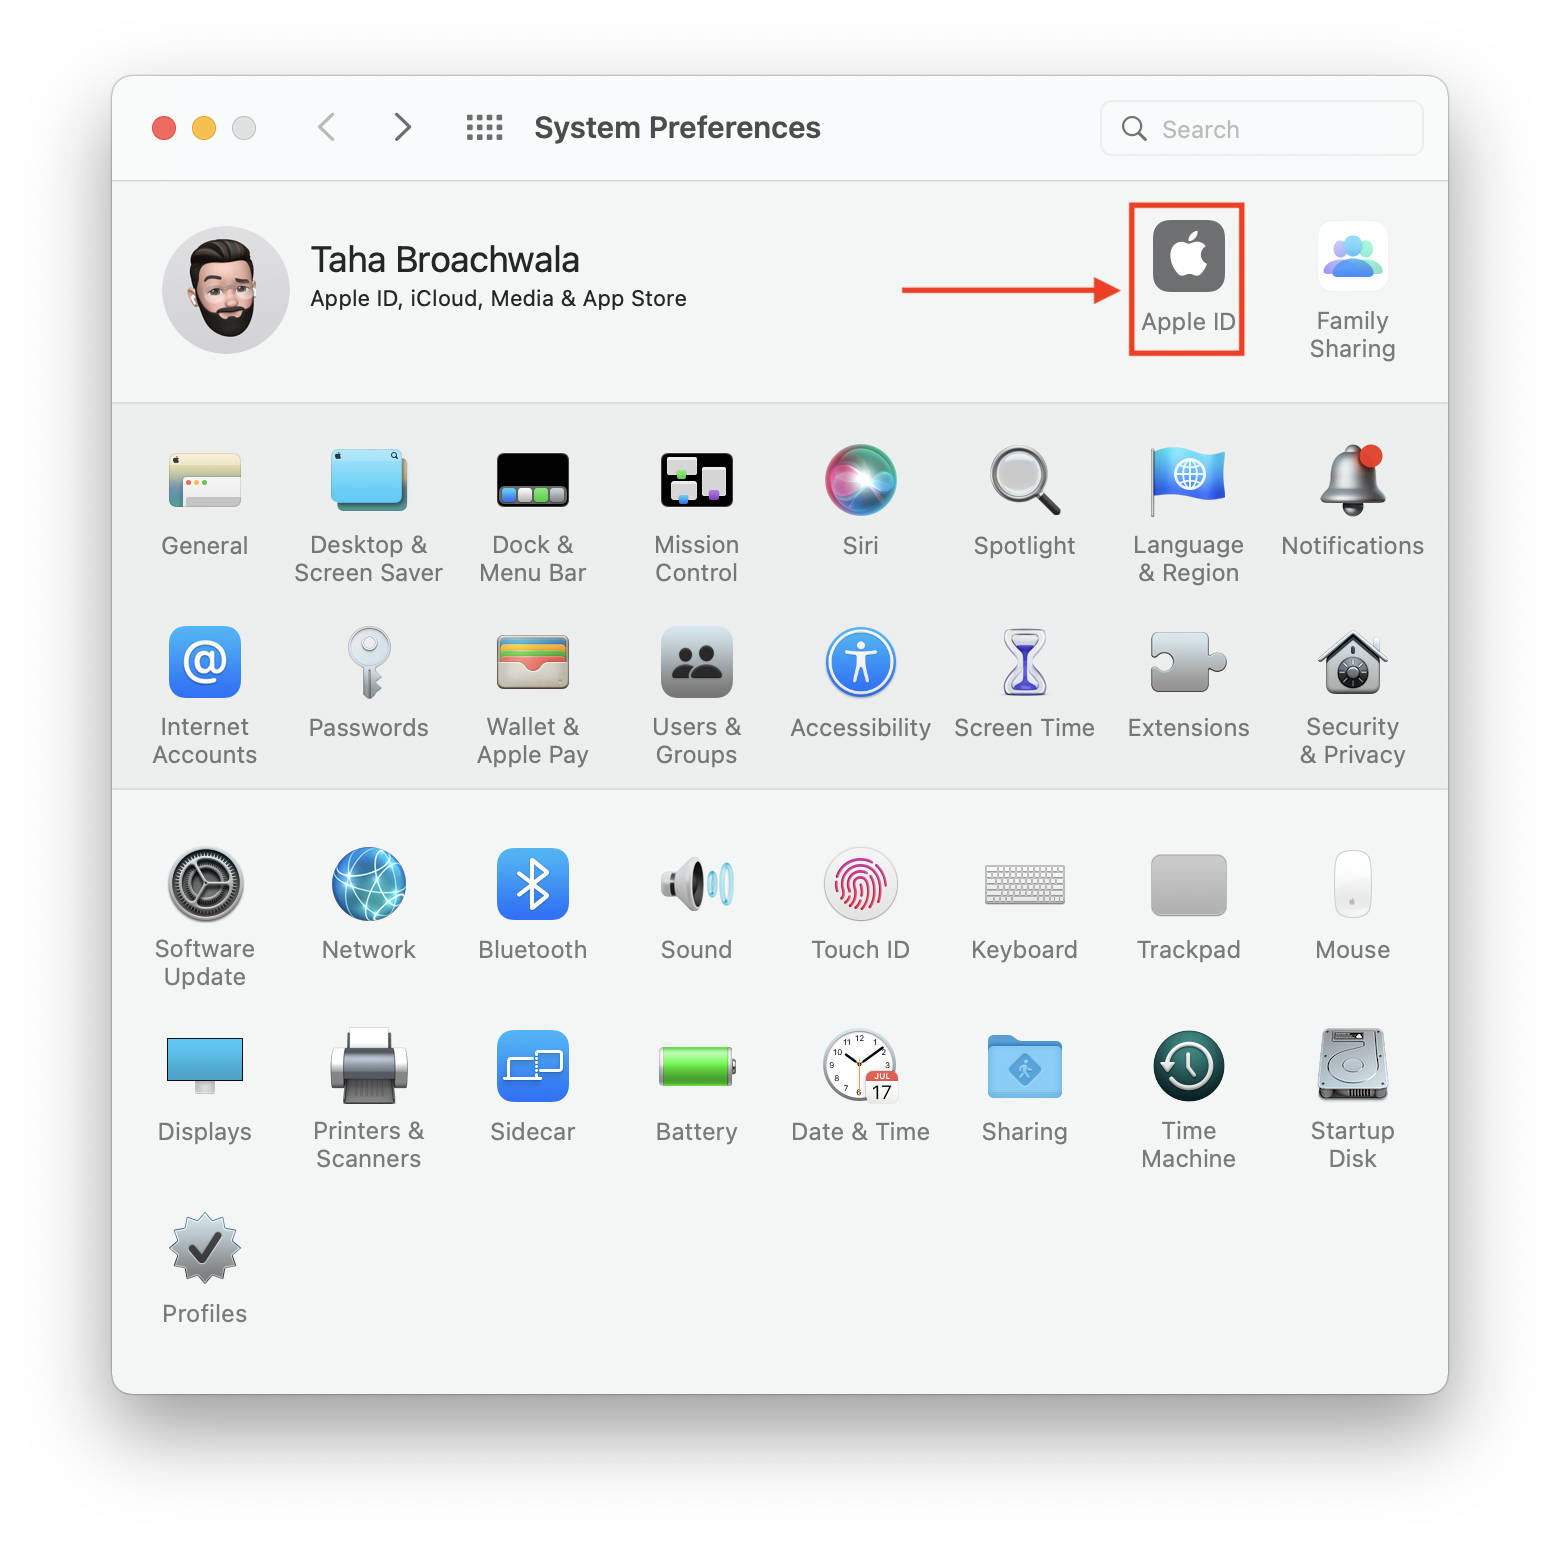
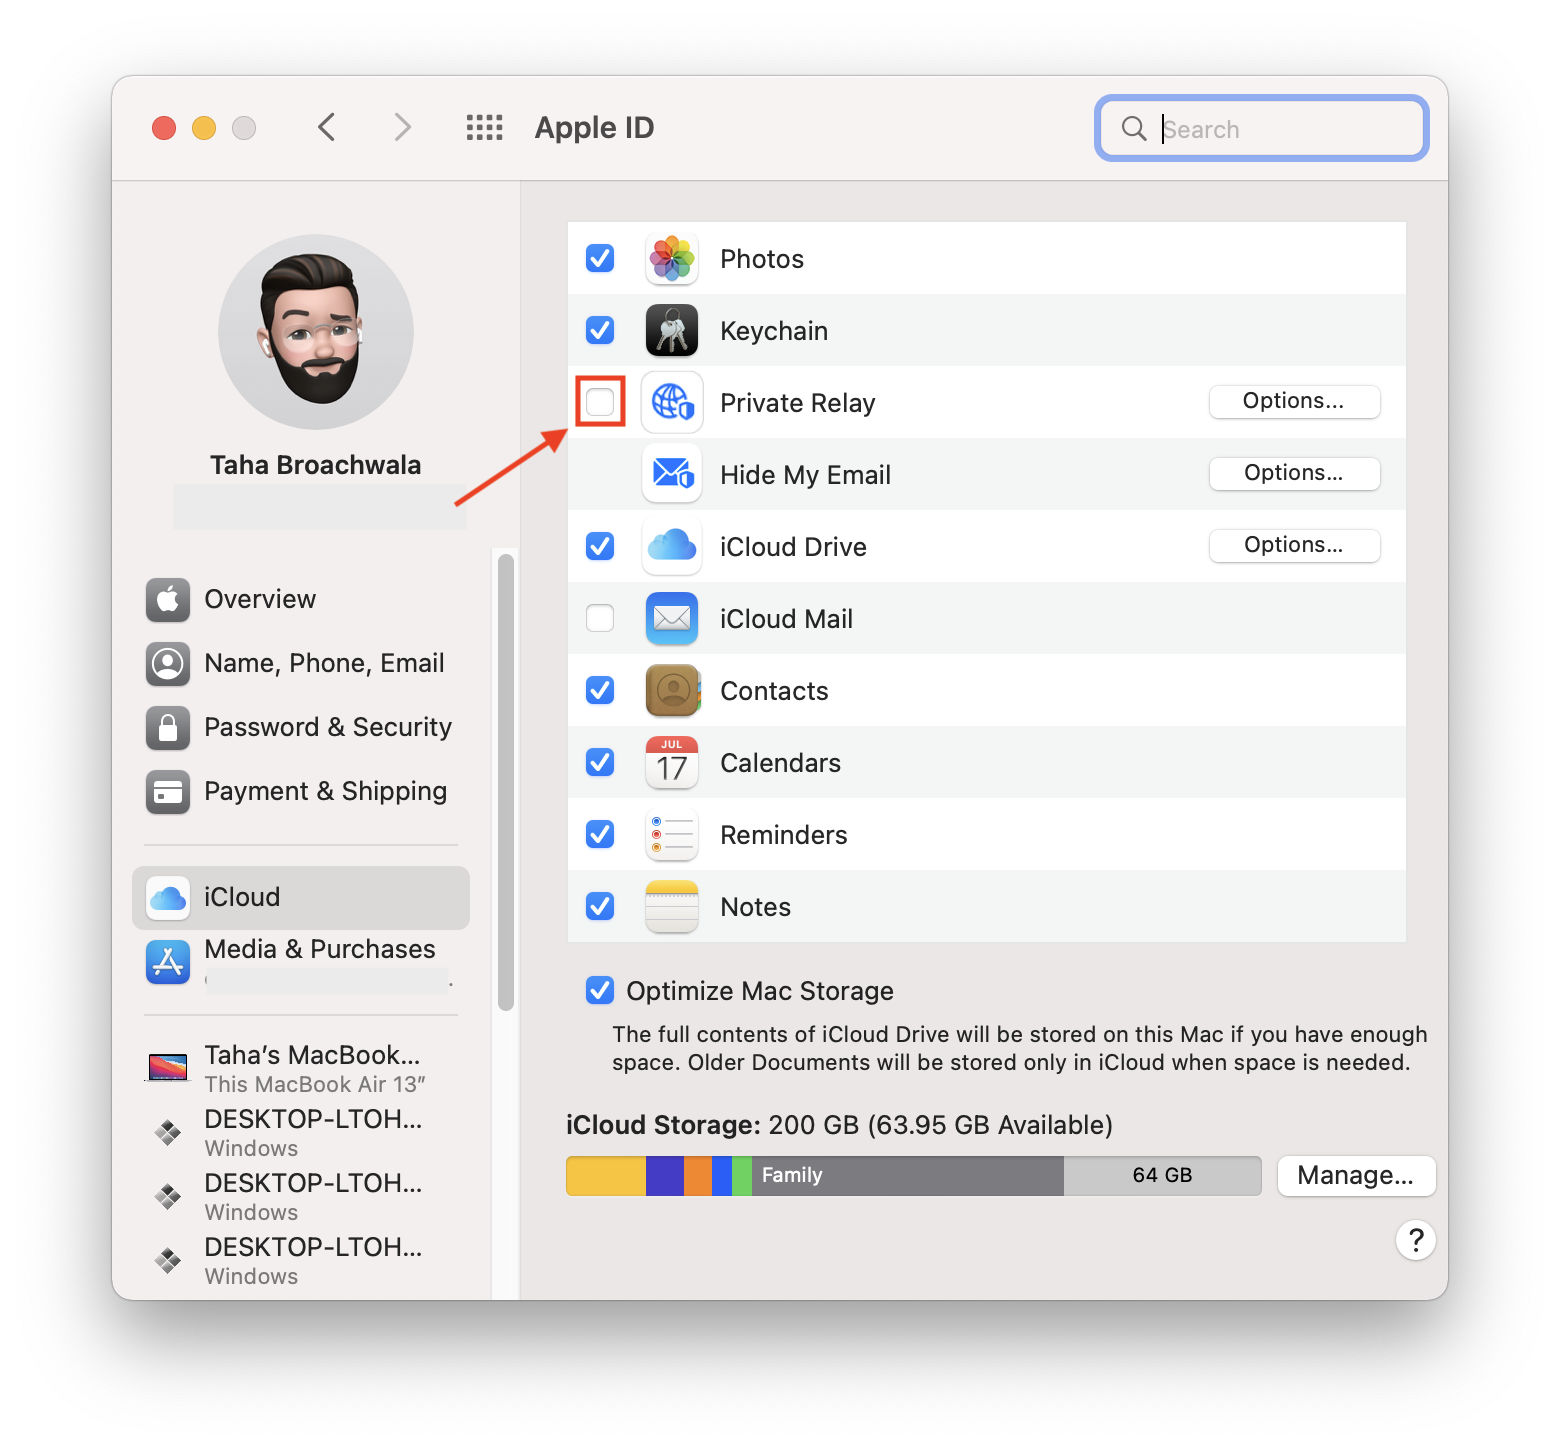
- Your iCloud settings might take a while to load. Once they’re loaded, tick the checkbox beside the label that says “Private Relay.”
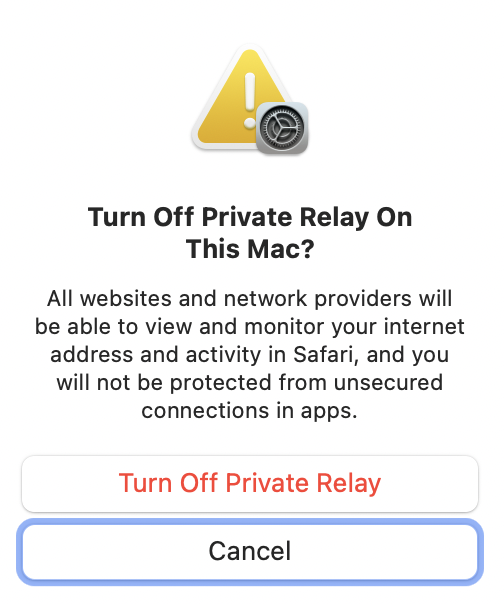
- In order to disable it, simply untick the box and click “Turn Off Private Relay” when the prompt appears.
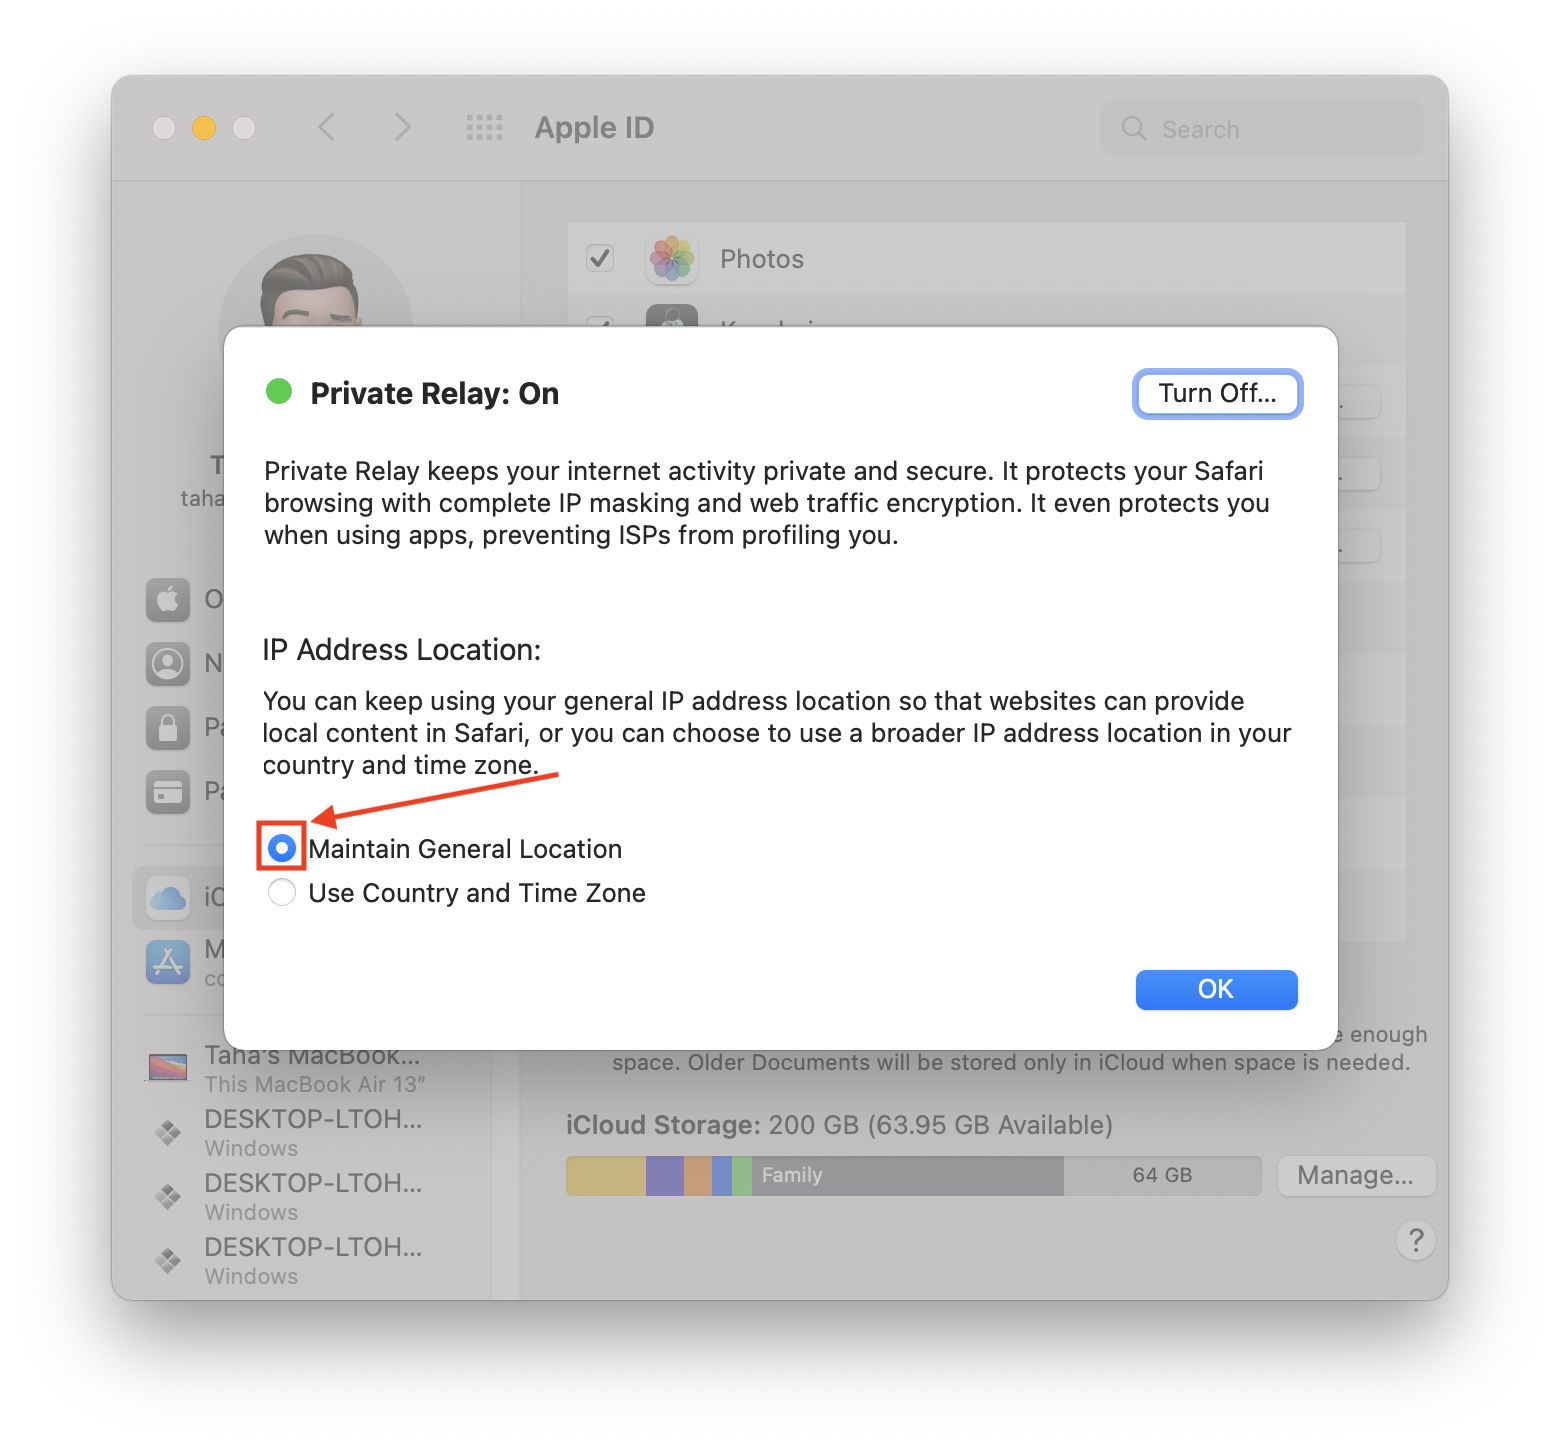
How to manage IP Address location in Private Relay on macOS Monterey
Private Relay, aside from securing your IP address from ISPs and immoral online trackers, also lets you choose how you want your IP address to disclose your location. There are two options:
- Maintain General Location
- Use Country and Time Zone
Choosing to maintain your general location will ensure that websites can serve you content and services based on your general location (albeit, not pinpointed to your exact location) while also masking your IP address.
On the other hand, choosing to use country and time zone will zoom out your IP address to a broader location, making it even harder for someone to monitor you or create advertising profiles based on your general location.
That said, here’s how you can change your IP address. It’s quite simple, really.
- Head over to the macOS System Preferences by clicking the Apple icon in the menu bar.
- There, click on the tab that indicates “Apple ID.”
- Your iCloud settings might take a while to load. Once they’re loaded, click on the “Options” button beside the label indicating Private Relay. Note that the location options will only surface if Private Relay is enabled.
- Under the label that says “IP Address Location,” choose either of the two location options available by clicking on them.
Final Thoughts
Private Relay is an interesting new proposition in macOS 12 Monterey and iOS 15 that I foresee a lot of people using. Although, once again, it’s worth noting that Private Relay is not immune from government and telecom requests to shut it down for a particular region.
That said, it’s already not available in a host of different countries including China, Belarus, Egypt, Columbia, Kazakhstan, Saudi Arabia, South Africa, Turkmenistan, Uganda, and the Philippines.
With the combination of an uptick in people wanting to hold on to their privacies and Apple’s devices dispersed in the hands of millions, Private Relay is, in fact, one of the biggest moves Apple has ever made.
That is, if it works as expected and people let it work.
Other macOS Monterey Guides you should check out:
- 100+ Fascinating Mac tips and tricks you need to check out!
- How to permanently show Menu Bar in full-screen mode on Mac
- How to share saved passwords on Mac running macOS 12 Monterey
- How to customize the mouse pointer in macOS 12 Monterey
- How to use Tab Groups in Safari in macOS 12 Monterey
- How to use Quick Note in macOS 12 Monterey
- How to AirPlay to Mac from an iPhone/iPad, mirror screen, and stream content
- How to mute notifications temporarily on macOS Monterey and iOS 15
- How to hide your IP Address in Safari on macOS Monterey and iOS 15
- How to enable and customize Focus filters on macOS Monterey
- How to turn on Auto-reply for Focus on macOS Monterey and iOS 15
- How to turn off ‘Shared With You’ in macOS Monterey and iOS 15
- How to add and manage Tags in Notes in macOS Monterey and iOS 15
- How to use Live Text on Mac running macOS Monterey
- How to use Hide My Email to combat spam and secure your email on Mac
- How to add VoiceOver Image Descriptions in the Preview app in macOS Monterey
- How to Enable Low Power Mode on your Mac and How it Works!
- How to enable Mail Privacy Protection on macOS Monterey and iOS 15
- How to translate any text on your Mac running macOS Monterey
- How to change Playback Speed of Voice Memos in macOS Monterey
- How to add animated Memoji on your Mac’s login screen
- How to create Smart Lists in Reminders on macOS Monterey
- How to disable Universal Control on macOS Monterey
- How to ‘Skip Silence’ in Voice Memos on macOS Monterey
- 50+ Coolest Siri Shortcuts for your Mac running macOS Monterey
