Apple recently released macOS Monterey in beta capacity to developers. It brings along a bunch of useful, new features. One of the little-known features is that you can now customize the on-screen pointer’s appearance.
For a long time, Windows users have been able to customize their mouse pointers with different color options and even icons. Mac users, on the other hand, had to make do with the same old black pointer with a white outline alongside a gloved hand pointer that appears while clicking on hyperlinks.

However, now, with macOS 12 Monterey, Apple has added the ability to customize the pointer. It doesn’t yet match the customization options offered by Windows, but it’s an improvement. In that, you can now change the color of the pointer and of its outline.
That said, in this post, we’ll take a quick look at how to change the color of the pointer on macOS 12 Monterey.
How to customize the on-screen mouse pointer in macOS 12 Monterey
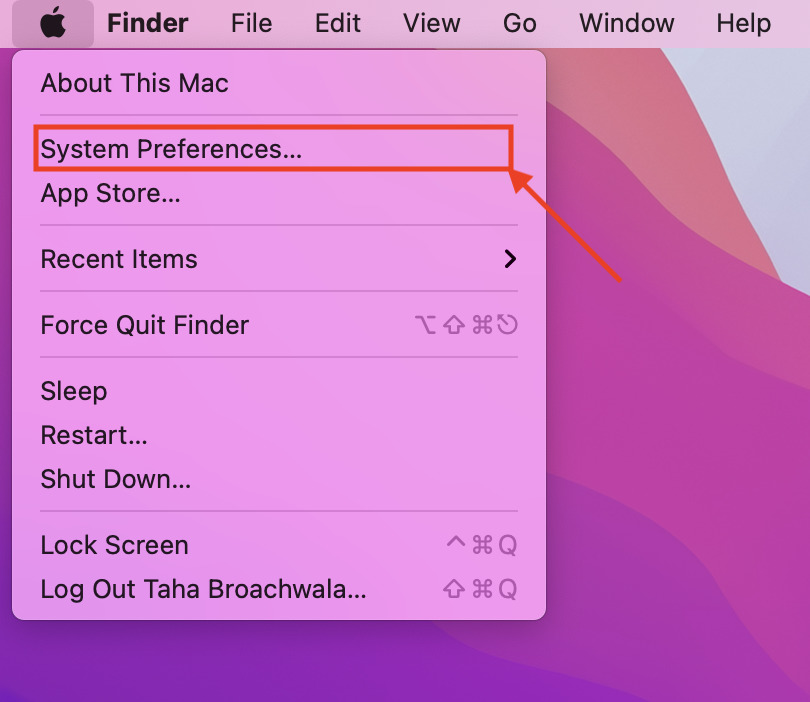
- Head over to System Preferenes by clicking on the Apple logo on the macOS Menu bar.

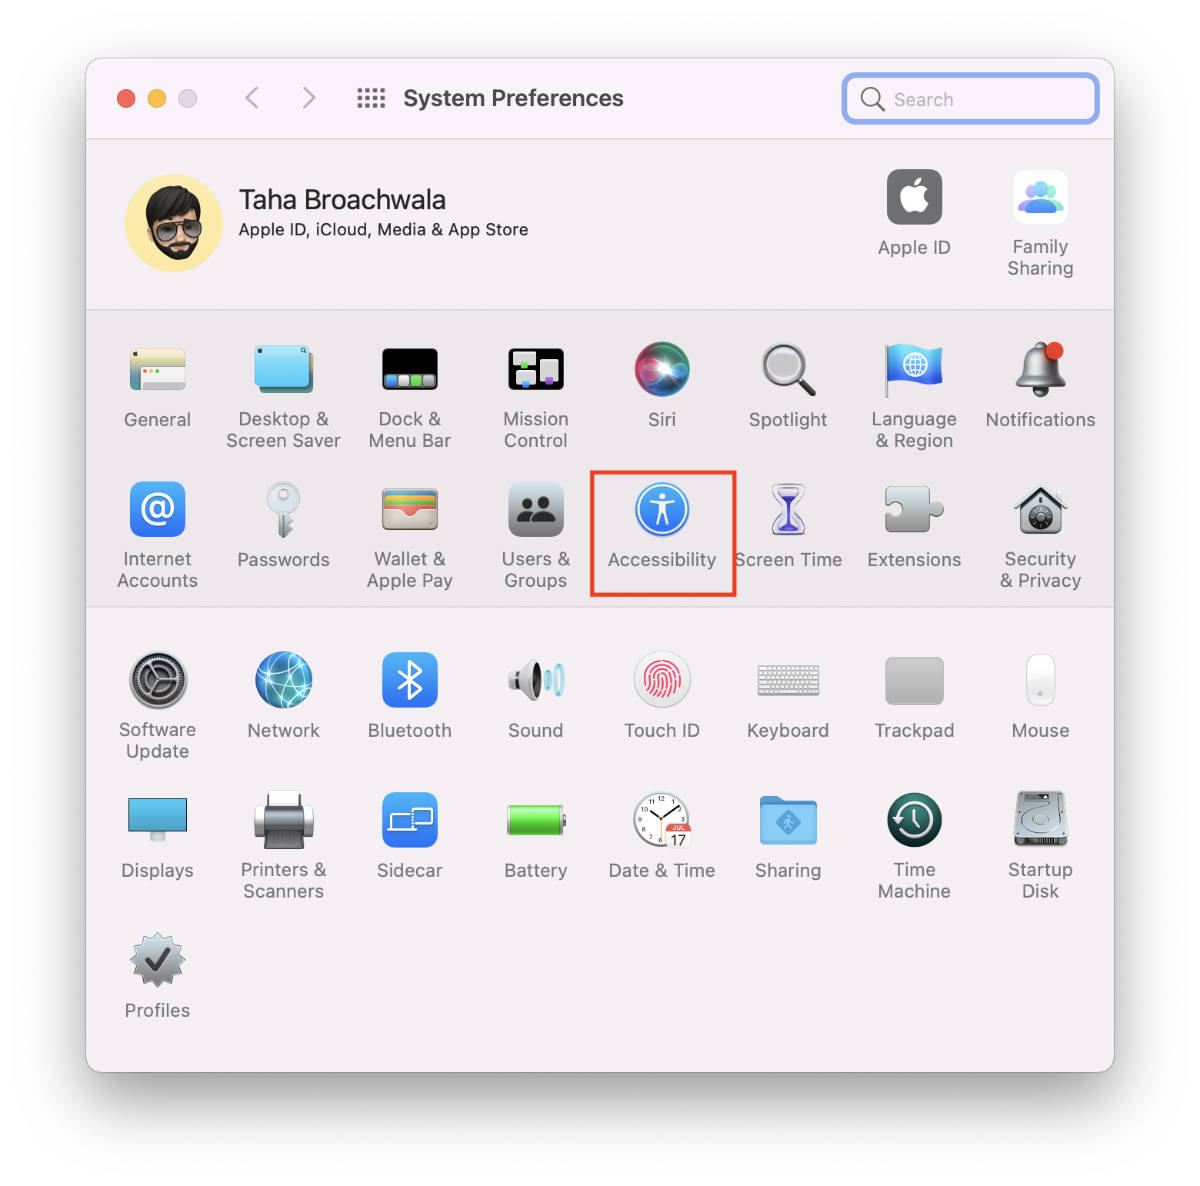
- Go to Accessibility.

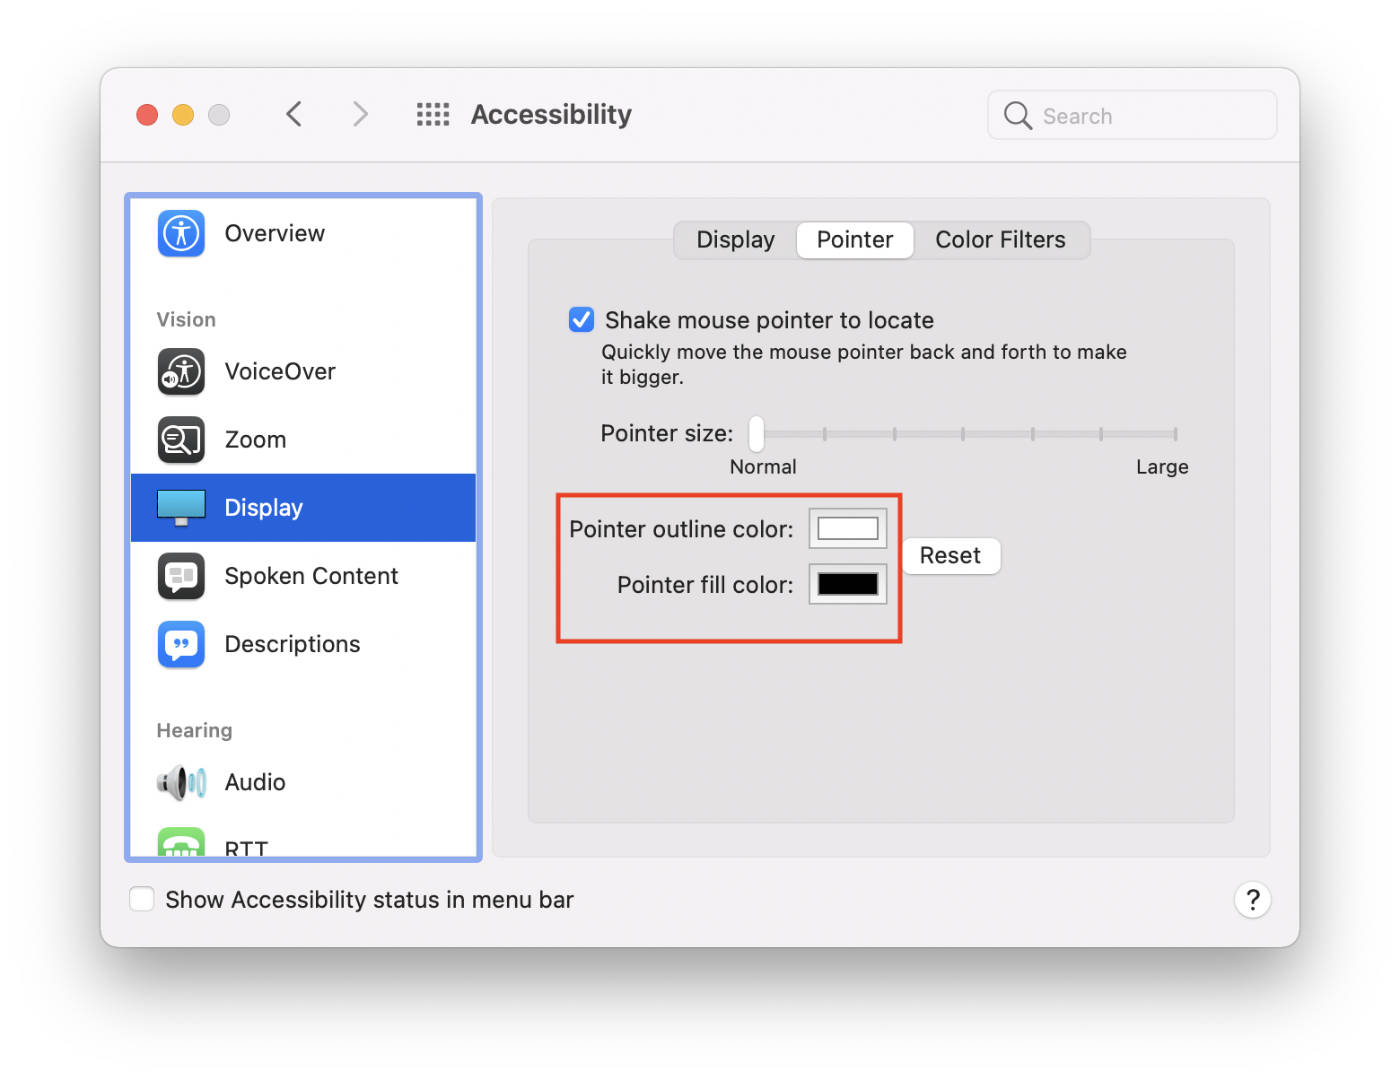
- Under the section labeled Vision, click on Display.

- Switch to the Pointer tab.

- Here, you can change the pointer color as well the color of its outline.

Final Thoughts
If you plan on reversing your customization, you can easily do so by hitting the Reset button in the Pointer tab within Display accessibility preferences.
Nevertheless, now that you can change how the pointer looks, it’s also useful for people with disabilities so that they can see the pointer with much more clarity than macOS allowed before. Plus, you can always tweak it to match your wallpaper.
Other macOS Monterey Guides you should check out:
- 100+ Fascinating Mac tips and tricks you need to check out!
- How to AirPlay to Mac from an iPhone/iPad, mirror screen, and stream content
- How to permanently show Menu Bar in full-screen mode on Mac
- How to share saved passwords on Mac running macOS 12 Monterey
- How to use Tab Groups in Safari in macOS 12 Monterey
- How to use Quick Note in macOS 12 Monterey
- How to mute notifications temporarily on macOS Monterey and iOS 15
- How to hide your IP Address in Safari on macOS Monterey and iOS 15
- How to enable and customize Focus filters on macOS Monterey
- How to turn on Auto-reply for Focus on macOS Monterey and iOS 15
- How to turn off ‘Shared With You’ in macOS Monterey and iOS 15
- How to add and manage Tags in Notes in macOS Monterey and iOS 15
- How to use Live Text on Mac running macOS Monterey
- How to use Hide My Email to combat spam and secure your email on Mac
- How to use Private Relay on macOS Monterey
- How to add VoiceOver Image Descriptions in the Preview app in macOS Monterey
- How to Enable Low Power Mode on your Mac and How it Works!
- How to enable Mail Privacy Protection on macOS Monterey and iOS 15
- How to translate any text on your Mac running macOS Monterey
- How to change Playback Speed of Voice Memos in macOS Monterey
- How to add animated Memoji on your Mac’s login screen
- How to create Smart Lists in Reminders on macOS Monterey
- How to disable Universal Control on macOS Monterey
- How to ‘Skip Silence’ in Voice Memos on macOS Monterey
- 50+ Coolest Siri Shortcuts for your Mac running macOS Monterey

