Time for some Mac tips and tricks.
macOS may seem like a simple operating system upfront. But the truth is that it’s actually really powerful in the sense that you can do almost anything you’d expect a computer to do. There are tons of hidden features and utilities you don’t know about that may make your life with a Mac much easier.
With reliance on computers increasing due to the ongoing pandemic, it’s essential you employ the smartest way to use your Mac and be more productive so that you stand out from the rest.
That said, let’s get straight to the point: here’s a list of more than 100 fascinating Mac tips that you might not know about. Some of these tips also exclusively apply to macOS Monterey. If you’ve got some tips and tricks that aren’t listed below, reach out to us in the comments section at the end of this post.
Table of Contents
- Spotlight
- App-specific tricks
- Safari Tips and Tricks
- Networking Tips and Tricks
- Video Tips and Tricks
- Finder and QuickLook Tips
- Text and Clipboard Tips
- Menu Bar Tips and Tricks
- Printing Tips and Tricks
- macOS Terminal Tips and Tricks
- Honorable mention (not sponsored)
- Window Management Tips and Tricks
- Preview app Tips and Tricks
- Miscellaneaous Tips and Tricks
- Other macOS Monterey Guides you should check out:
Spotlight
Find a file by searching for its kind
Spotlight has many a trick up its sleeve. One of them is the ability to search for a kind of file. It’s not always absolutely transparent as to what file you need to access at the moment. In such cases, instead of wasting time thinking, you can simply use Spotlight to search for the kind of file you are looking for.
To do this, type this in the Spotlight search bar: kind: “type of file you’re looking for”
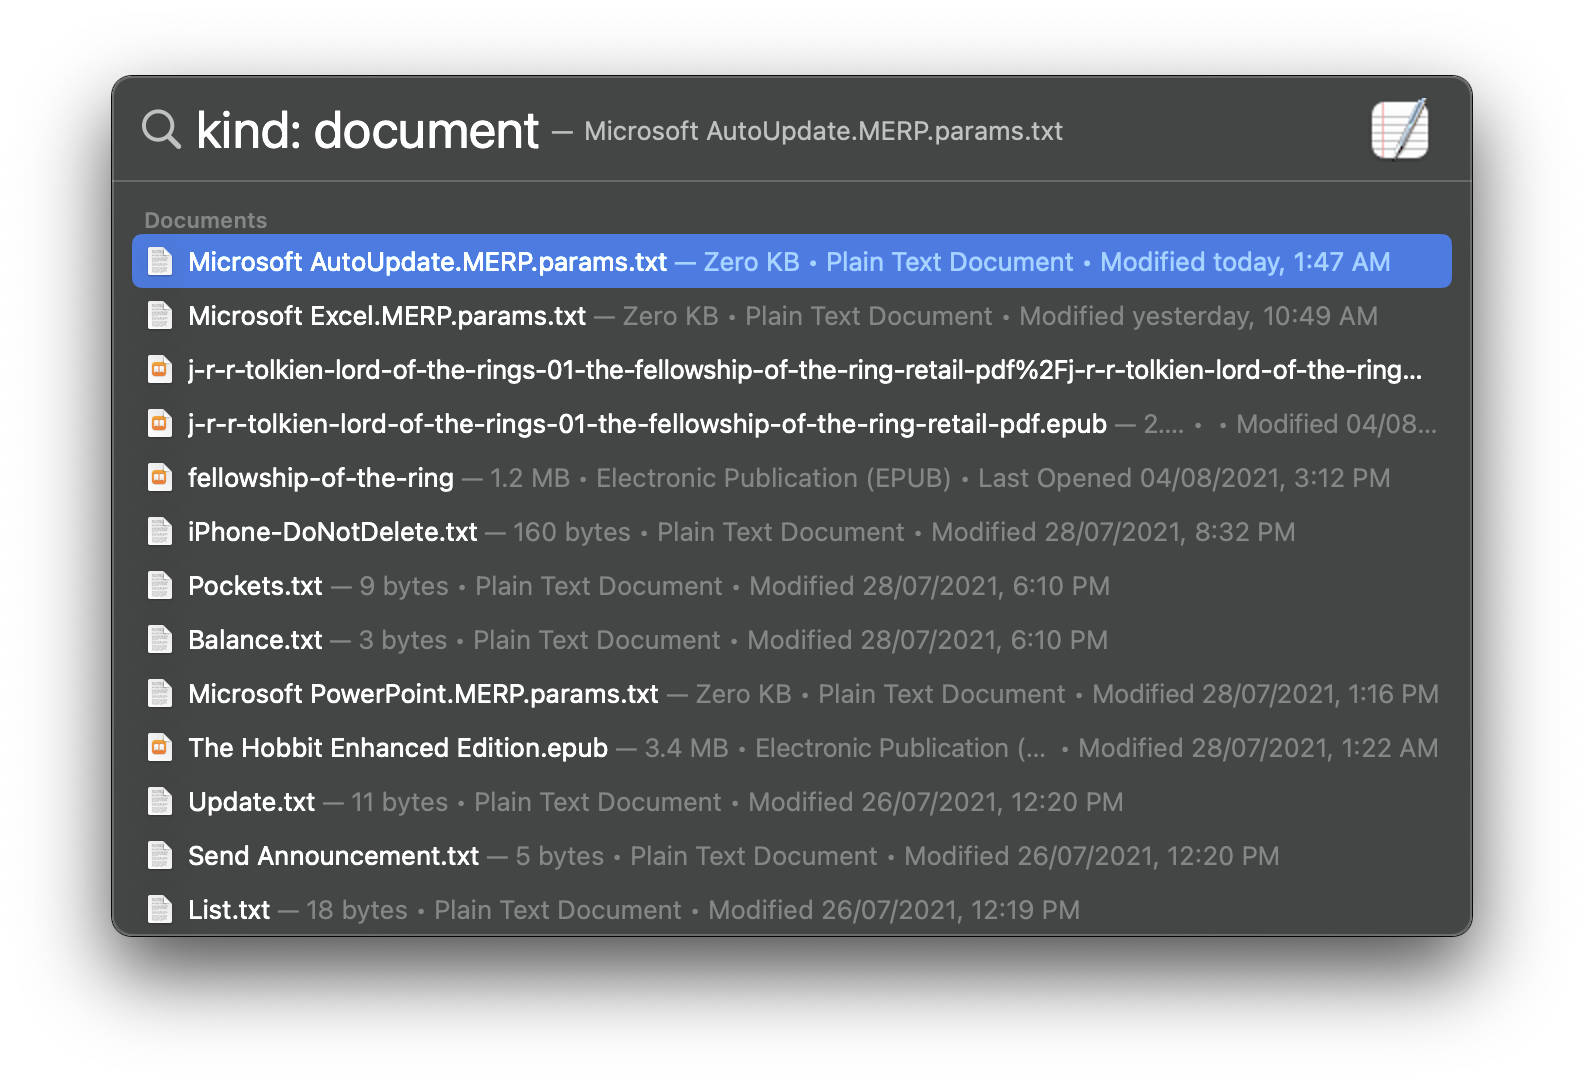
For instance, in my case, I wanted to search for images, and running this query with the term “images” resulted in a list of images stored on my Mac. Similarly, you can, for example, type in an app’s name and it will return a list of all the files that work with that app.
Use Spotlight’s natural language processing to locate files
Spotlight is more intelligent than it seems on the surface. It understands and is capable of processing natural language to search for files. For instance, you can simply type in the words “a screenshot from yesterday” and it will list all images it thinks is a screenshot and were last edited yesterday.
App-specific tricks
Full screen lyrics in the Music app
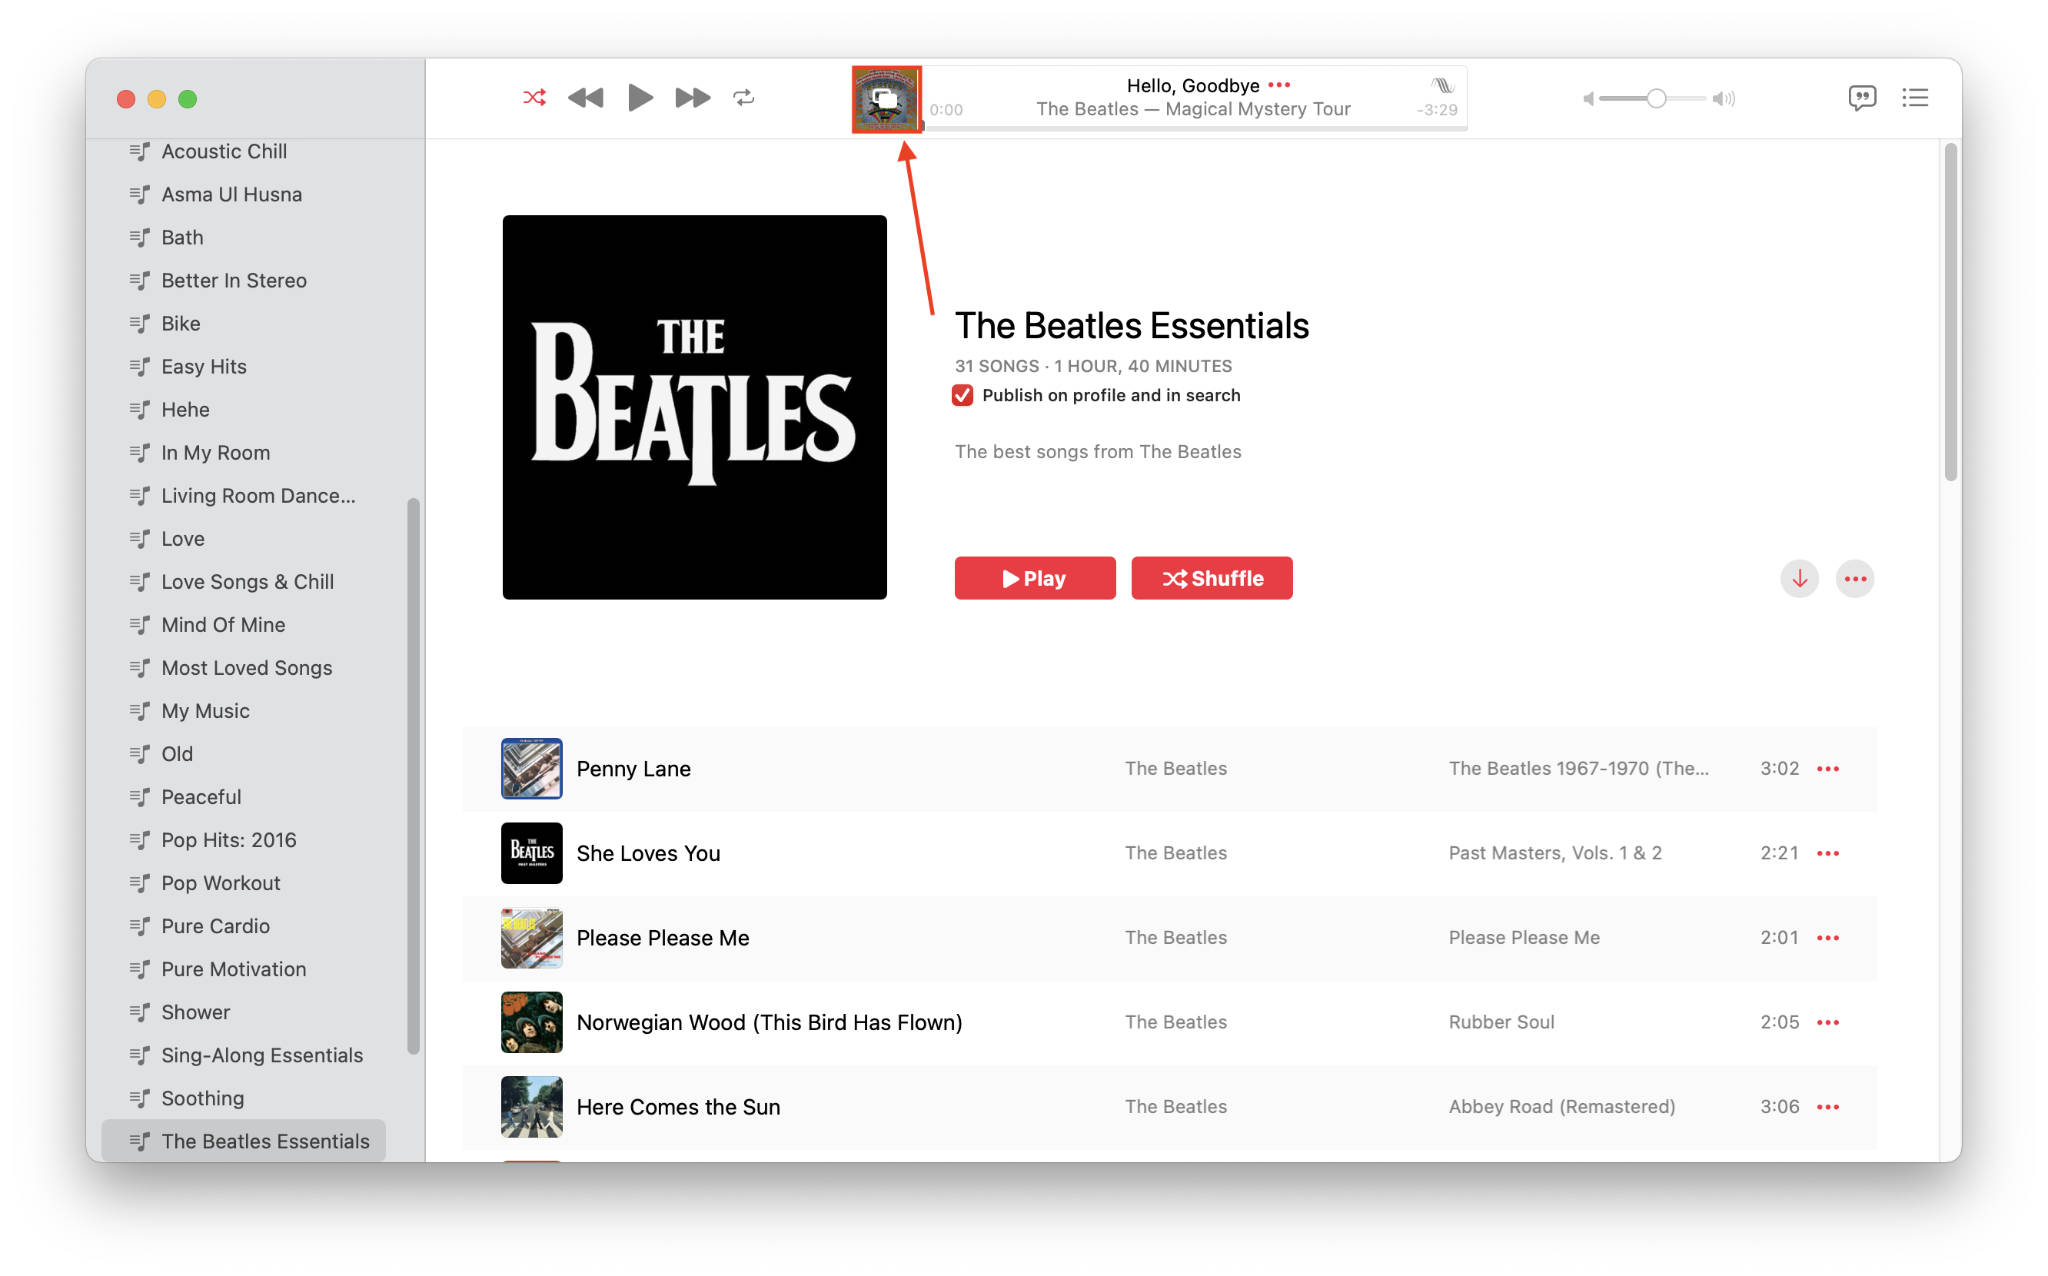
Want to kick back and enjoy some music? The Apple Music app might just do the trick. It comes with a little-known experience that displays lyrics in full-screen as the song plays on. The music is accompanied by colorful, mesmerizing visuals that take proper advantage of the gorgeous retina display on your Mac.

In order to access full-screen lyrics, first, play a song in the Apple Music app. You can pause it for the rest of the duration of this process; which isn’t very long. Then, click on the album art in the now playing interface as shown in the image below.
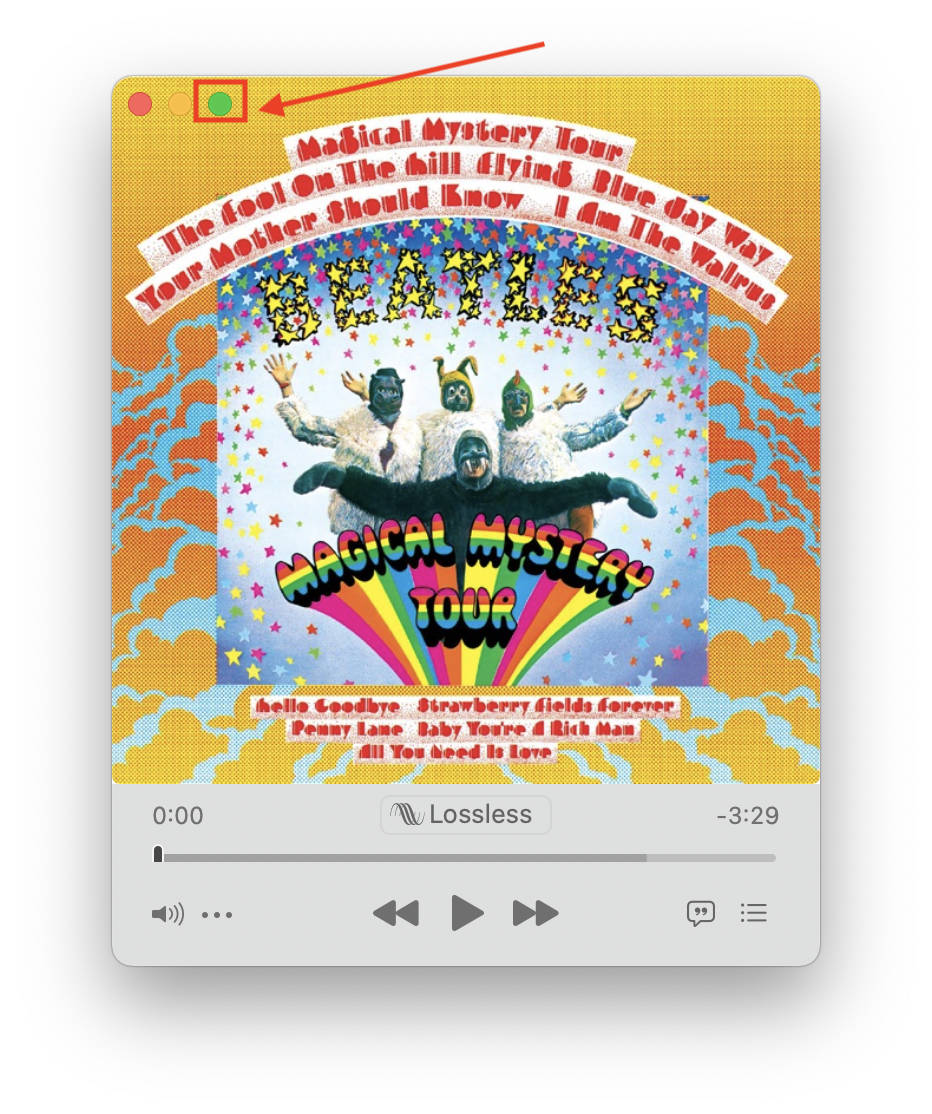
Finally, maximize the screen by clicking the green button in the top left corner of the window.
Safari Tips and Tricks
Safari is the browser that comes pre-installed with macOS. And just like any other browser, it too has some tips and tricks up its sleeve not many people know.
Quickly reopen your last closed tab
It’s annoying when you accidentally hit the close button on the tab while trying to switching to it. Thankfully, you can simply press the Command + Shift + T Key combination to reinstate the tab.
Note that repeatedly using this combination will keep opening tabs that you had closed as long as Safari can remember them in memory.
Handle website-specific settings
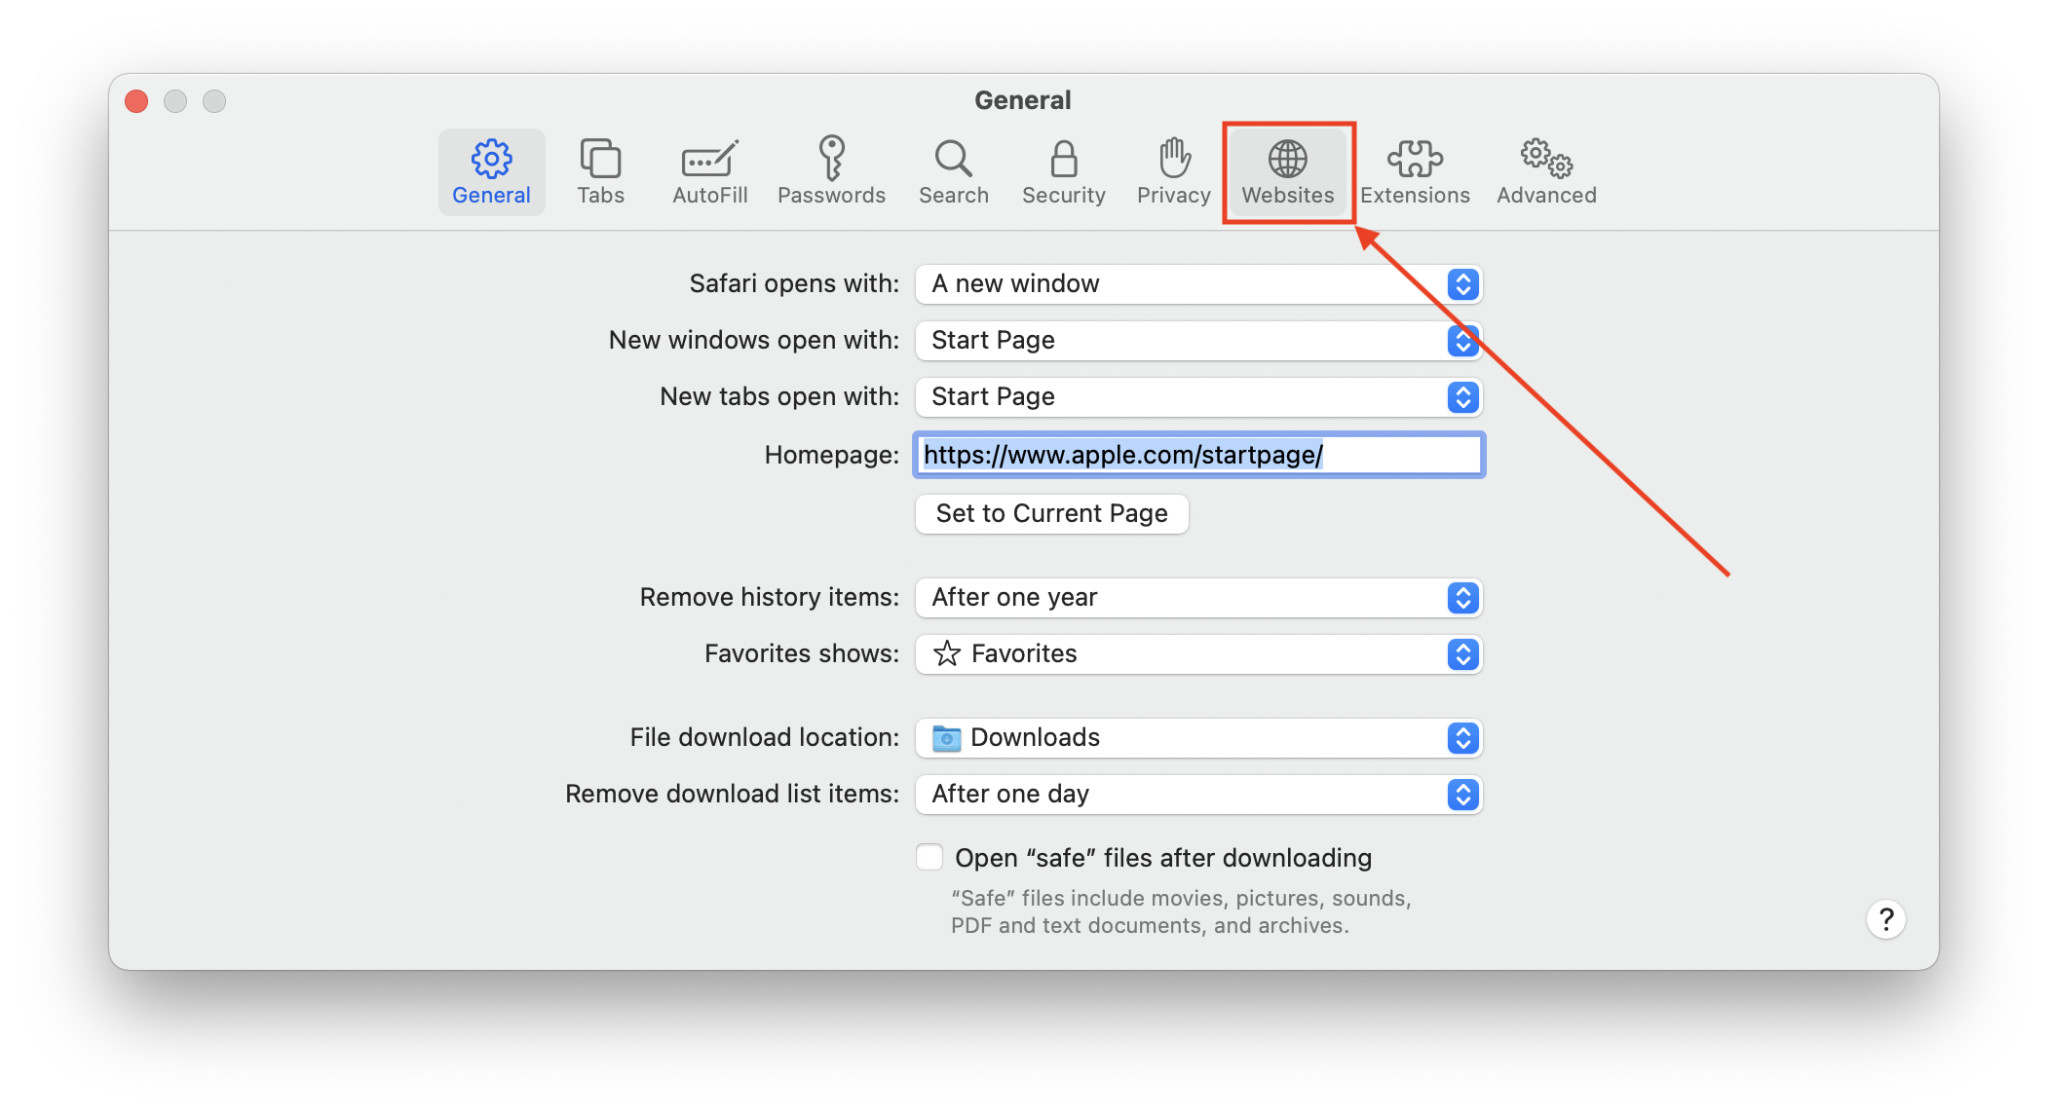
Safari lets you change settings for individual websites. The settings include enabling reader mode automatically whenever available, enabling or disabling content blockers, Auto-Play, popup window blocker, and other permissions such as camera and microphone.
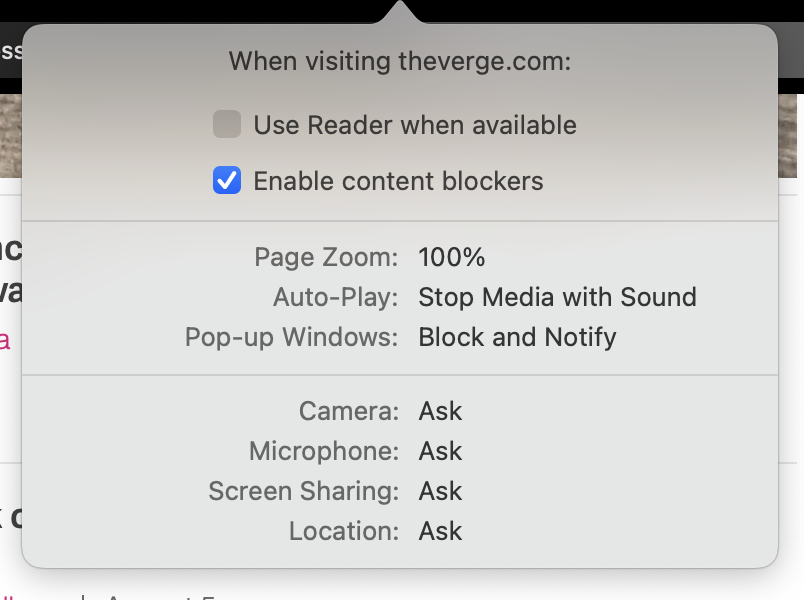
The best part is that Safari remembers the settings you change for that website. So, the next time you load that website, it will follow your setup.
Here’s how to change individual website settings: click on the Safari label in the Menu Bar while browsing a website. Then, click “Settings for .”
Fill web forms smartly
I’m going to say this right away: there’s no easy way to fill a form than to painstakingly filling it once and then using Auto-Fill every other time. Or so I thought…
It turns out there is a smarter way of filling web forms.
Naturally, you’d tend to press the Tab key to jump to the next field. But when it comes to dropdowns, the Tab key is hardly useful.
Okay, here’s the trick: when you get to a dropdown list by pressing Tab and it’s highlighted, type as if it’s a field and Safari will automatically choose the item from the list for you. For example, if a dropdown menu is demanding your birth year, you can type, say, 2001 to automatically have Safari choose the same from the list.
This tip comes in handy especially while filling a form with numerous dropdowns.
Basic Safari keyboard shortcuts
Trudging through Safari with a mouse pointer is good. But what’s even better is you can begin using it proficiently just by learning some quick keyboard shortcuts.
- Command + T: Open a new tab
- Command + W: Close a tab
- Command + N: Open a new window
- Shift + Command + N: Open a new private window
Access the smart search field (URL Bar) in Safari instantly using keyboard
There are often times when you need to access the URL bar in Safari. This is especially true when you’re browsing intensively. However, having to move the mouse pointer to the URL bar every time you need to access it soon gets frustrating.
Thankfully, all you need to do is press Command + L on the keyboard to access the URL bar instantly.
Note that this keyboard combination not only enables the cursor in the URL Bar but also highlights the URL so that you can copy it or type something else instead of it.
Browse through web forms in the opposite direction using the keyboard
Most of us know that you need to press Tab to go to the next field while filling a web form. But many don’t know the fact that you can jump to the previous field by hitting the Shift + Tab key combination.
Access Safari’s Tab Overview quicker than ever
Tab Overview in Safari is a handy feature that offers a collective view of all the open tabs in a window. It gives you a decent perspective if you’re overwhelmed while doing research spanning numerous tabs.
Like many functions, Tab Overview also has its own keyboard shortcut making it easily accessible: Command + Shift + \.
Access Safari browsing history even after clearing it
There’s a loophole in macOS that lets you regain access to your Safari browsing history even after having deleted it, in case there’s something you absolutely need to find there.
While on Desktop, press Command + Shift + G to summon the Go To dialog. Then, type “~/Library/Safari/” (without quotes) and press enter.
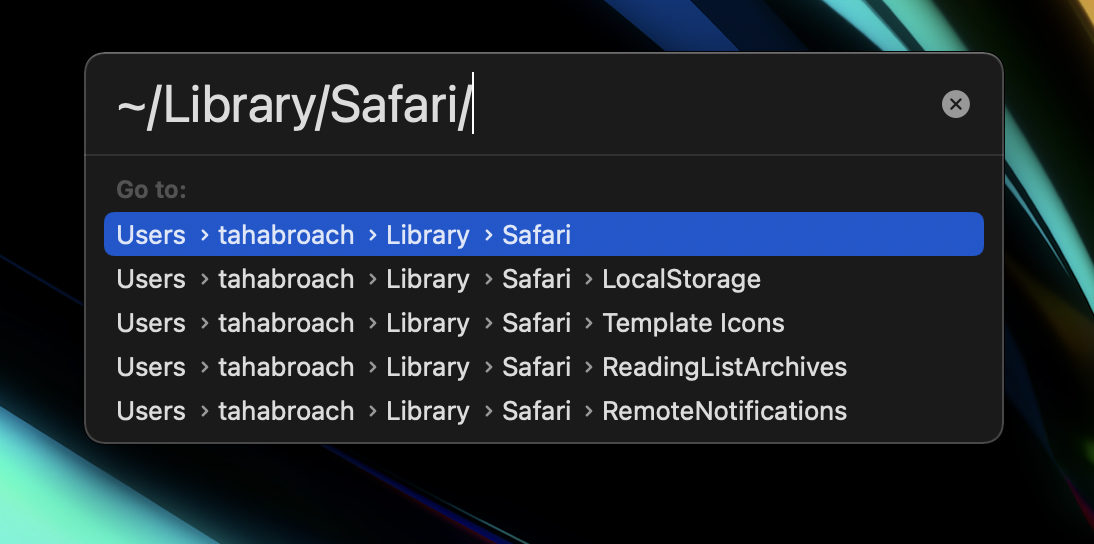
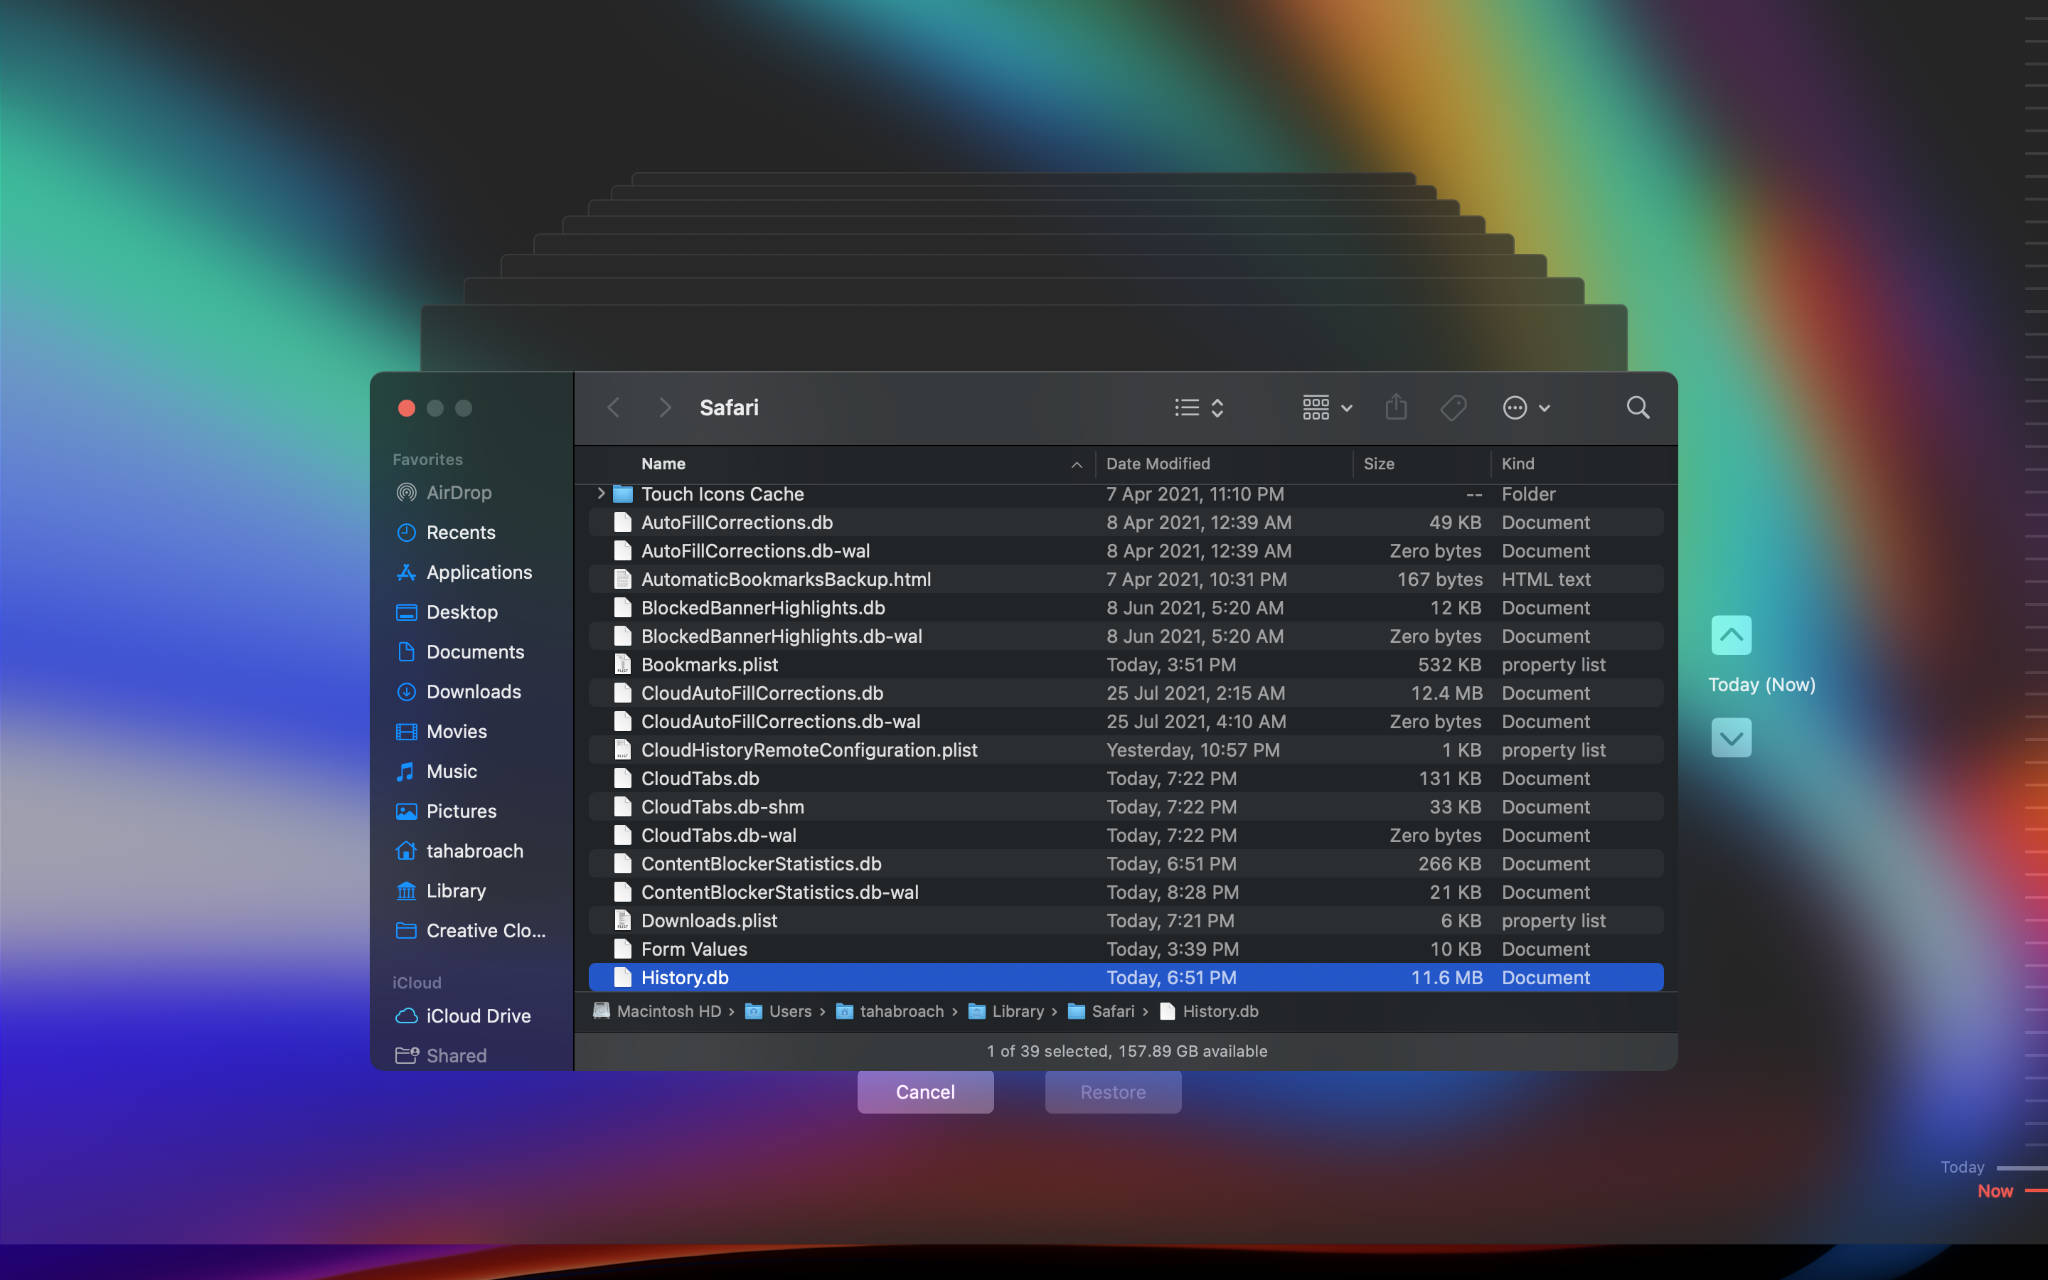
This should open a folder in Finder containing several files. There, locate the file “History.db” and select it.
While the file is selected, click the Time Machine icon in the Menu Bar. Then choose “Enter Time Machine.”
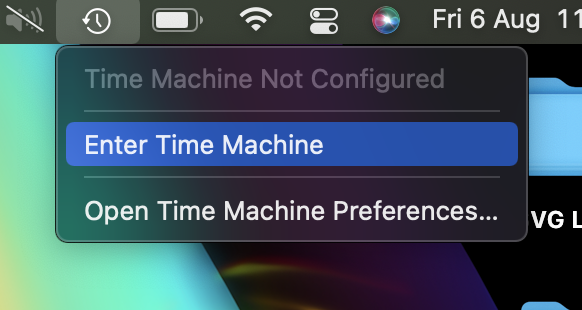
Finally, browse through older versions of the file and click Restore.
Switch to the next tab in Safari
If you want to quickly shift to the next tab, press the Command + Shift + ] key combination.
Access dropdown menus more conveniently
When you come across a dropdown menu while filling a form using your keyboard, you can simply press the Spacebar to get into the dropdown list. Then, use the arrow keys to move up and down list elements.
Add a website to the dock for quick access
If you visit a website regularly, did you know that you can save it to the dock for quick access? Here’s how:
- First, head over to the website you want to save to the dock in Safari.
- Then, hover over the Safari Smart Search Field (the URL Bar) until an encircled plus “+” icon appears. Drag that icon to the dock.
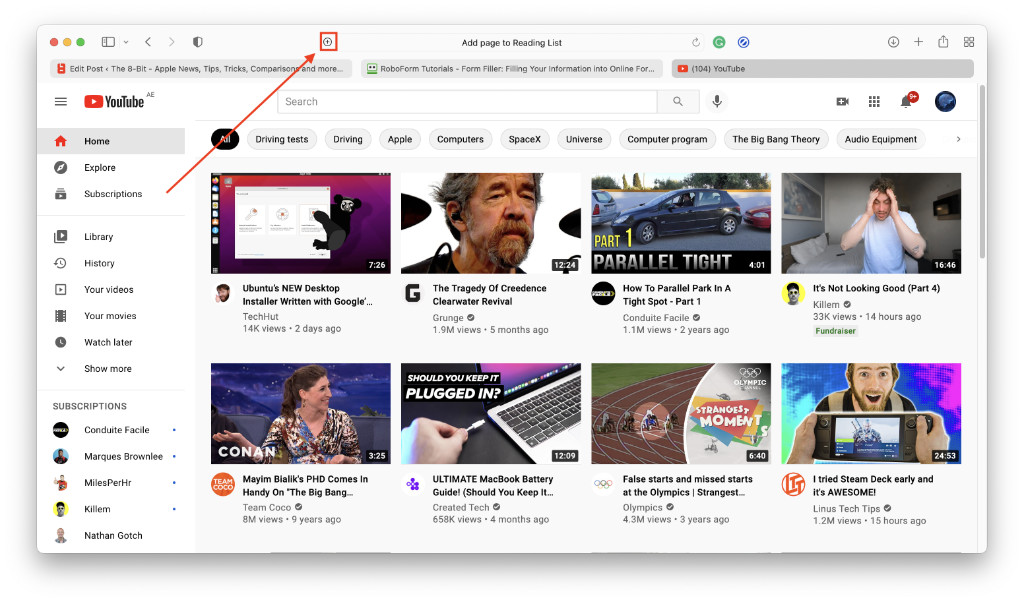
- The website will appear as a globe icon in the dock beside the Downloads folder. However, if you want to kick things up a notch and make the shortcut to the website feel just like other apps in the dock, you can change its icon. Read along for steps on how to do that…
- If you want to change the icon of the website shortut from a globe to that website’s logo, instead of dragging the icon into the dock, drag it onto Desktop.
- Now, head over to Google’s Image Search and type in the name of the website followed by the word “logo.” For instance, for YouTube, you will need to search “YouTube logo.”
- Then, under Google’s search bar, click on Tools - Color - Transparent. Once the images are done reloading, choose the appropriate image and save it to your desktop.
- Right-click on the image you just now saved onto Desktop and choose Copy.
- Now, getting back to our website shortcut on the desktop, right-click on it and select “Get Info.”
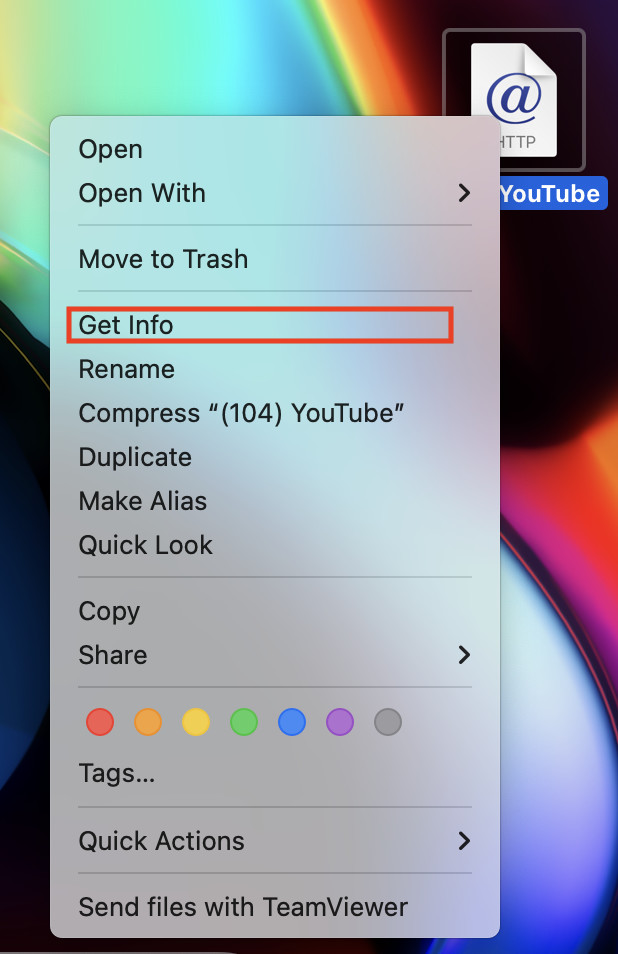
- While the “Get Info” dialog is open, click on the icon in it until it gains a slight blue outline.
- While the icon is highlighted, press Command + V to paste the image you copied earlier into the icon. The image will replace the icon and you can close the “Get Info” dialog box.
- Lastly, all you need to do is drag the website shortcut from the desktop to the Dock and it will appear just like other apps, in its own logo.
Toggle checkboxes by using the keyboard
Simple! Press Spacebar to place a tick on a checkbox in a web form.
Stop websites from automatically playing videos in Safari
There is no shortage of annoying websites that automatically play video in the background even when you’re not actively using that tab. While Safari automatically mutes the audio, the video keeps on playing in the background hogging unnecessary bandwidth.
Thankfully, there’s a solution: head over to Safari Preferences by clicking on the Safari label and choosing Preferences.
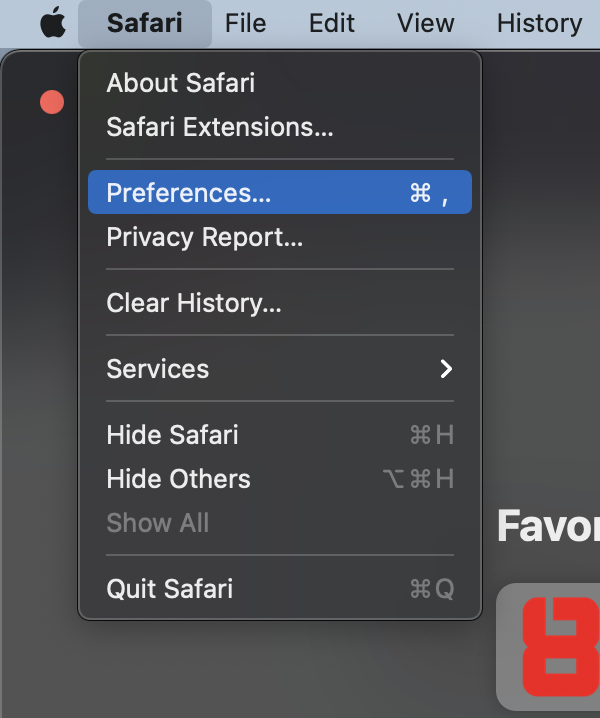
There, head over to Websites.
Choose the AutoPlay tab in the left sidebar and finally choose “Never AutoPlay” from the dropdown menu in the bottom right corner of the window.
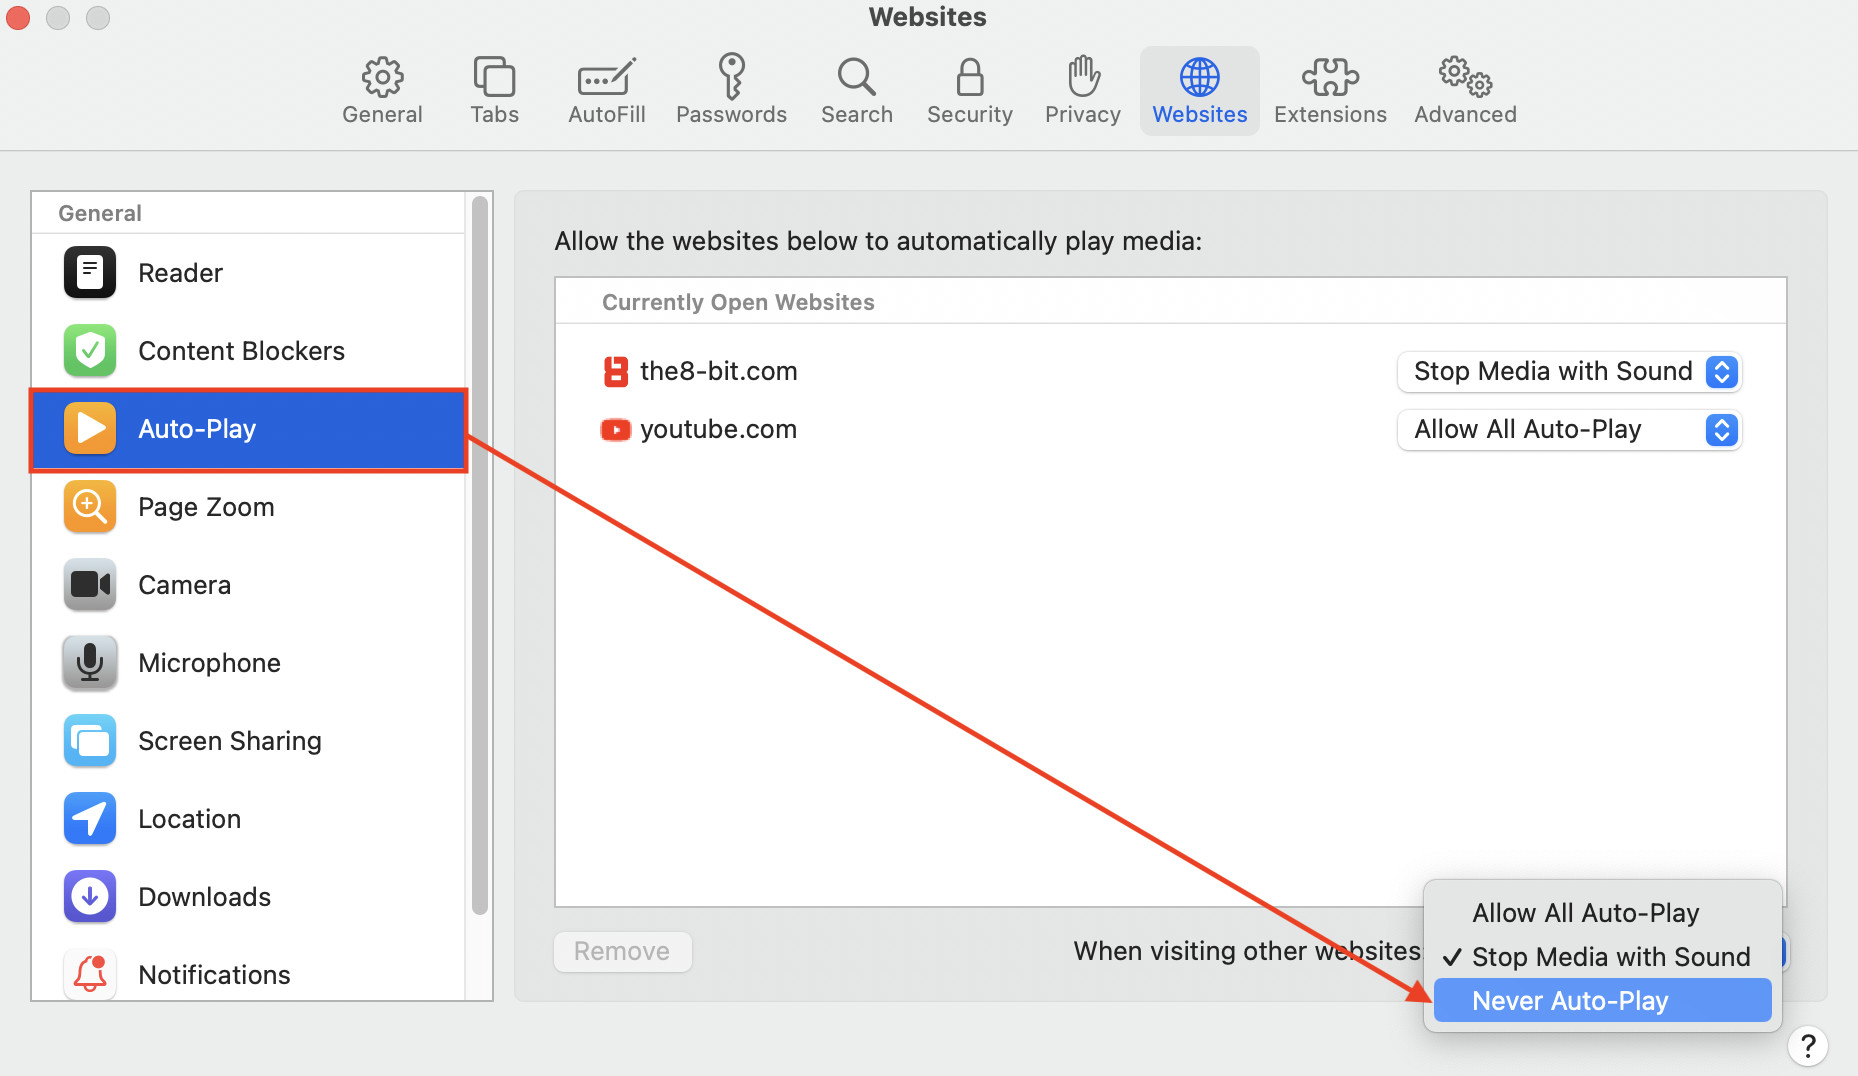
This should save you a lot of bandwidth as well as improve your browsing performance as inactive websites will no longer hog performance through auto-playing videos.
Instantly create a new Tab Group (macOS Monterey only)
If you are running macOS Monterey, Safari has an option to huddle tabs in groups. While it takes a good deal of mouse clicks to create a new tab group, it takes only about a second if you do it with your keyboard.
Simply press Control + Command + N and it will create a new Tab Group. Note that, however, you’ll still need to name the Tab Group before using it.
Networking Tips and Tricks
Share your Mac’s screen with another Mac
Did you know Apple has included options in macOS to let other devices control your Mac remotely?
Head over to System Preferences - Sharing and tick the Screen Sharing option in the sidebar to enable Screen Sharing for your Mac.
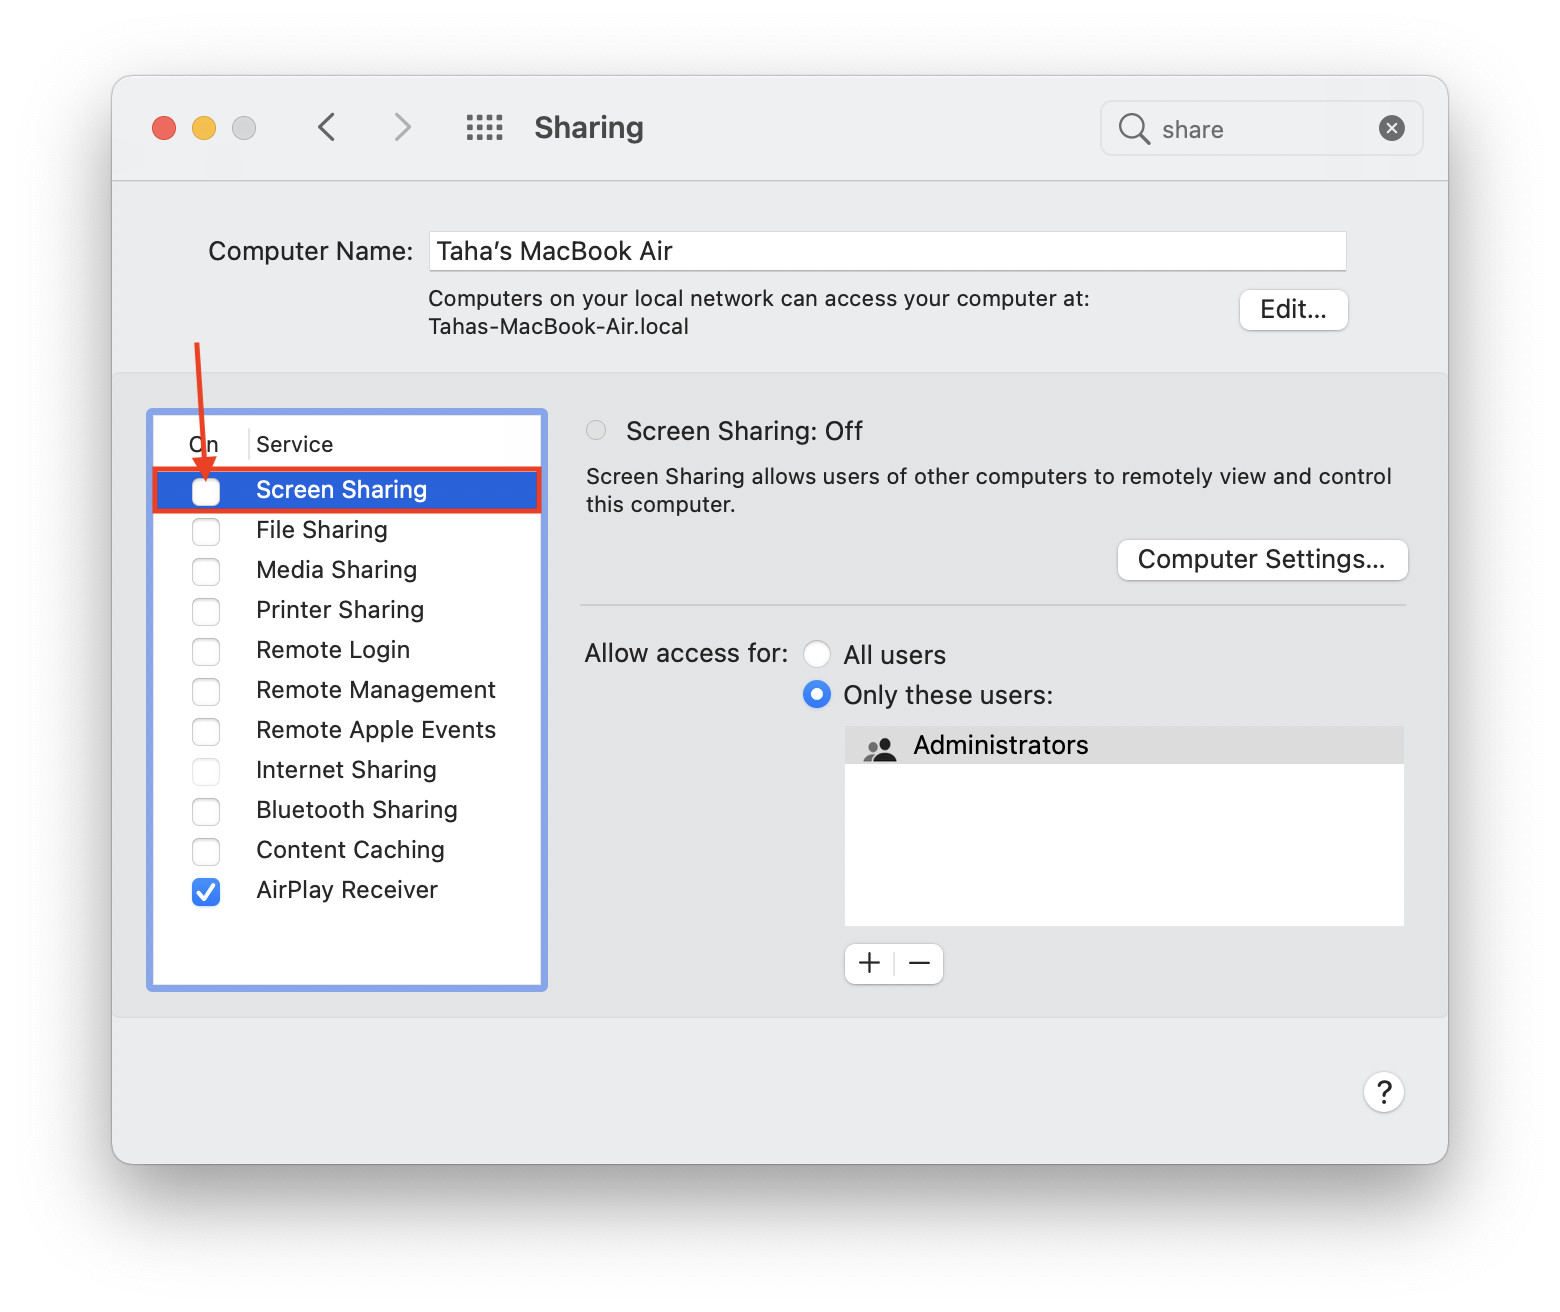
When Screen Sharing is turned on, you will be able to use another Mac to control your Mac. You can also use a tool that supports VNC to connect to your Mac using a dedicated IP address.
Share your saved Wi-Fi password
macOS comes with a handy utility called Keychain Access that stores your Wi-Fi passwords among other credentials. What’s great is that you can also share them with your friends and guests.
Head over to the Keychain Access app from the “Other” folder in the Launchpad or simply provoke Spotlight search and type in Keychain Access to open it.
In the search field of the Keychain Access app, type in the name of your Wi-Fi.
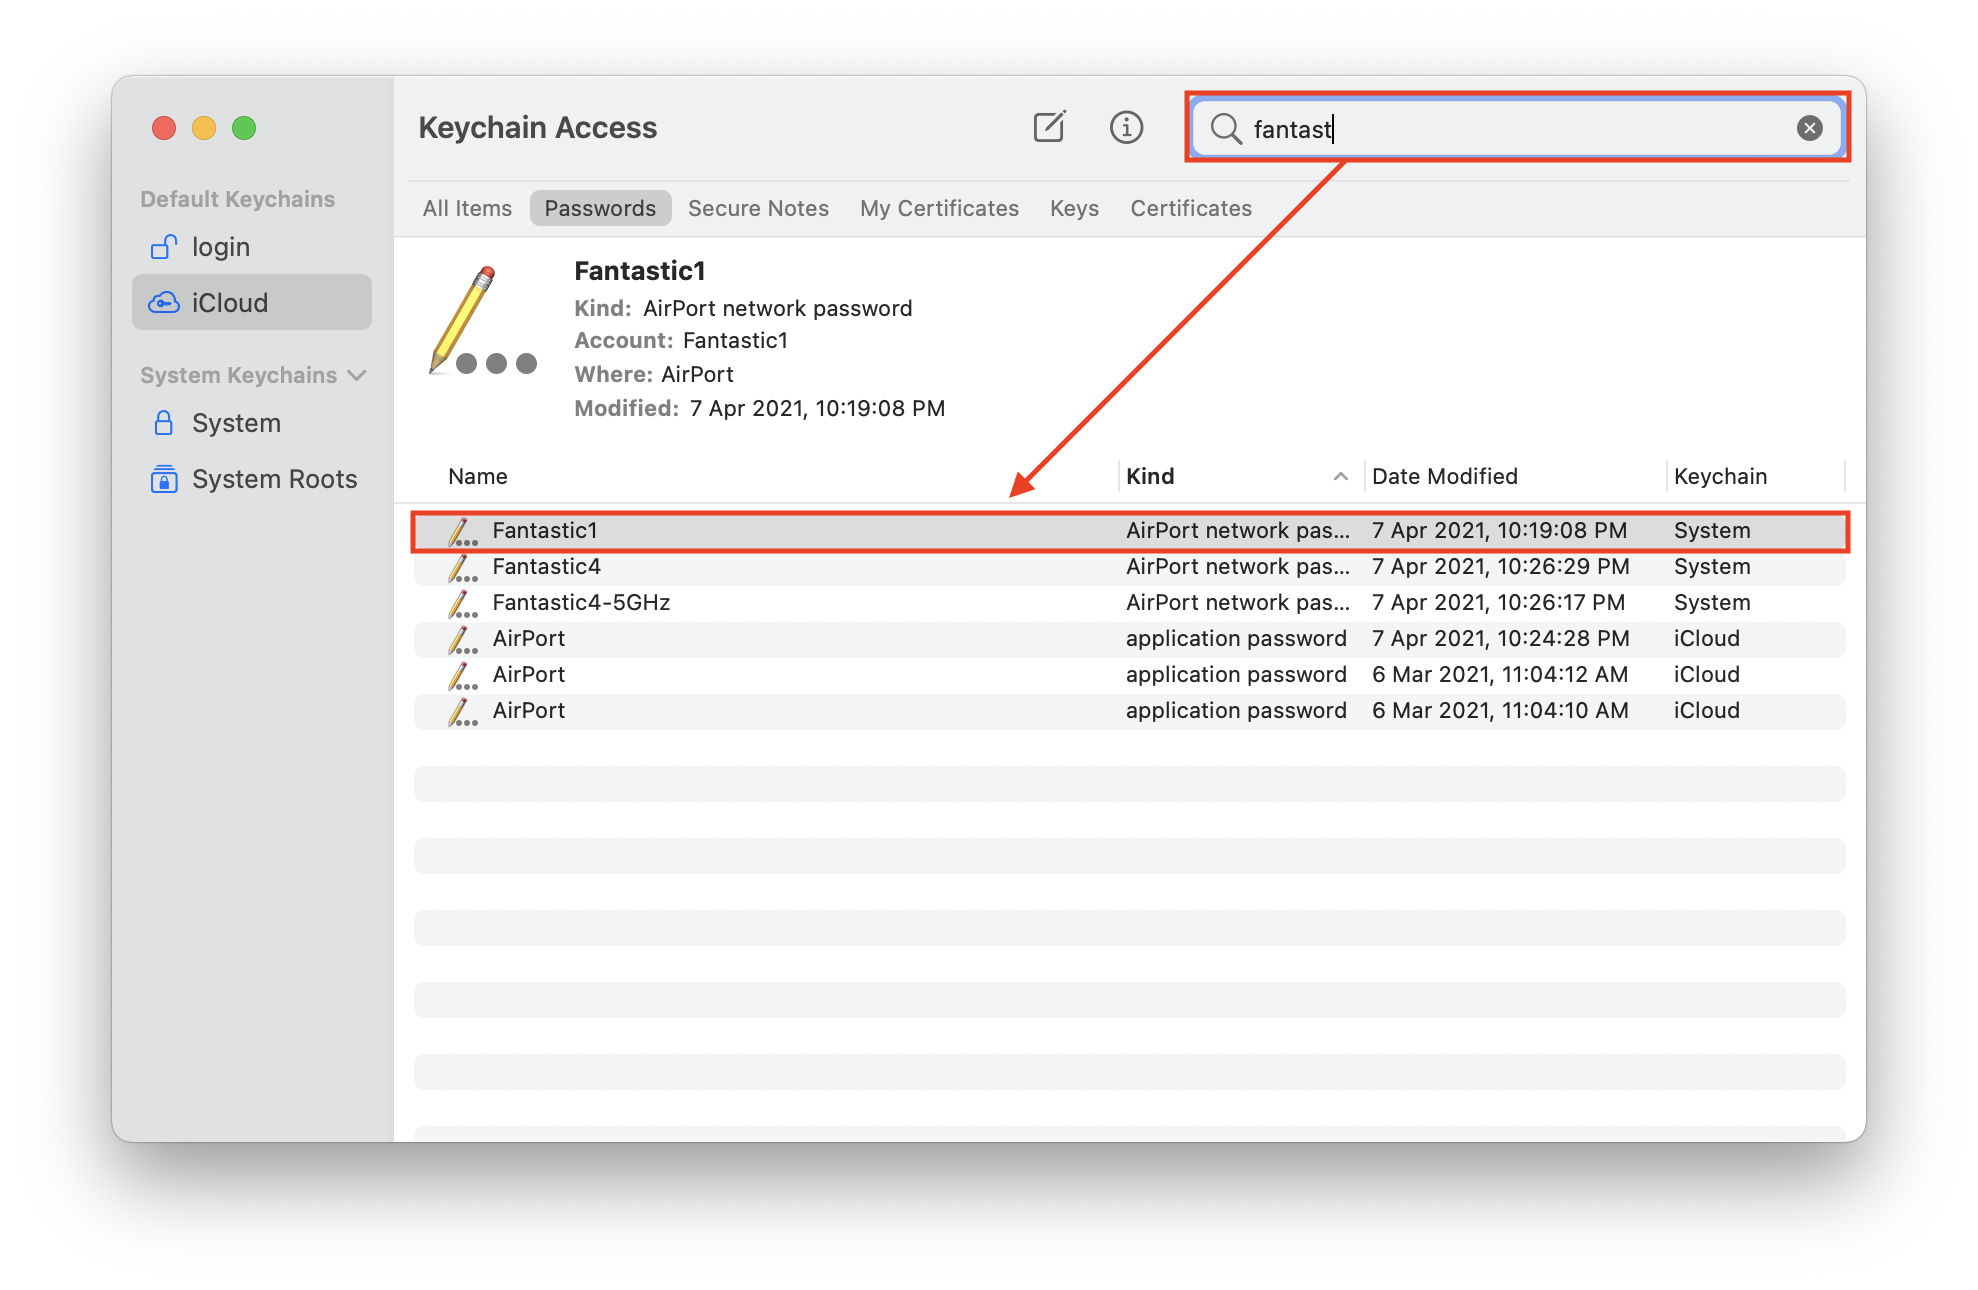
From the list that emerges, right-click on the suitable listing and then choose “Copy Password to Clipboard.”
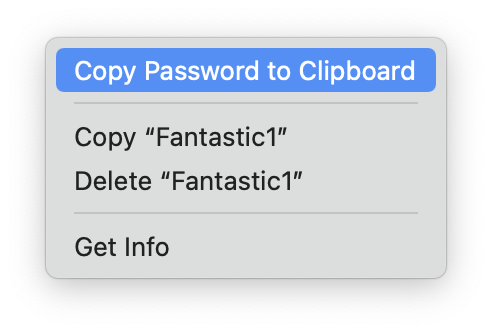
Now, you can paste the password anywhere including in chat apps to share it with your friends or guests.
Video Tips and Tricks
Watch a YouTube video in Picture-in-Picture
While watching a YouTube video, simply right-click on the video two times. The first time, YouTube will display its own menu but you should see macOS’ native menu when you click in the same place the second time.
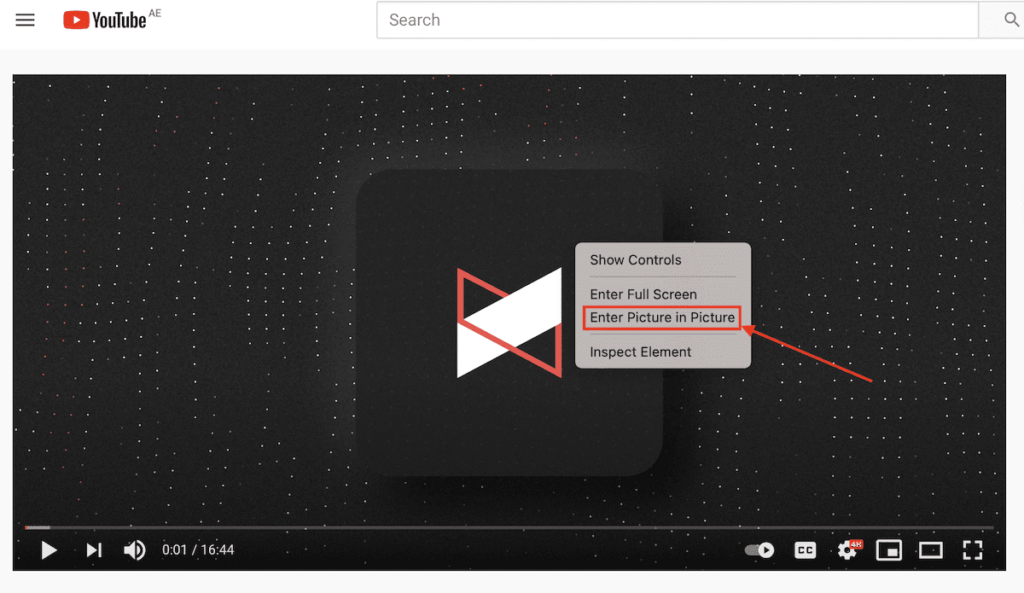
There, select “Enter Picture-in-Picture.”

Enable Picture-in-Picture on unsupported websites
Picture-in-Picture is a decent feature. It lets you simultaneously watch a video and work on other things. The problem is, PiP only works on some websites, such as YouTube. For instance, if you watch a video on Vimeo, you will realize that there is no option to enter the video in PiP.
That said, Safari has a neat little trick…
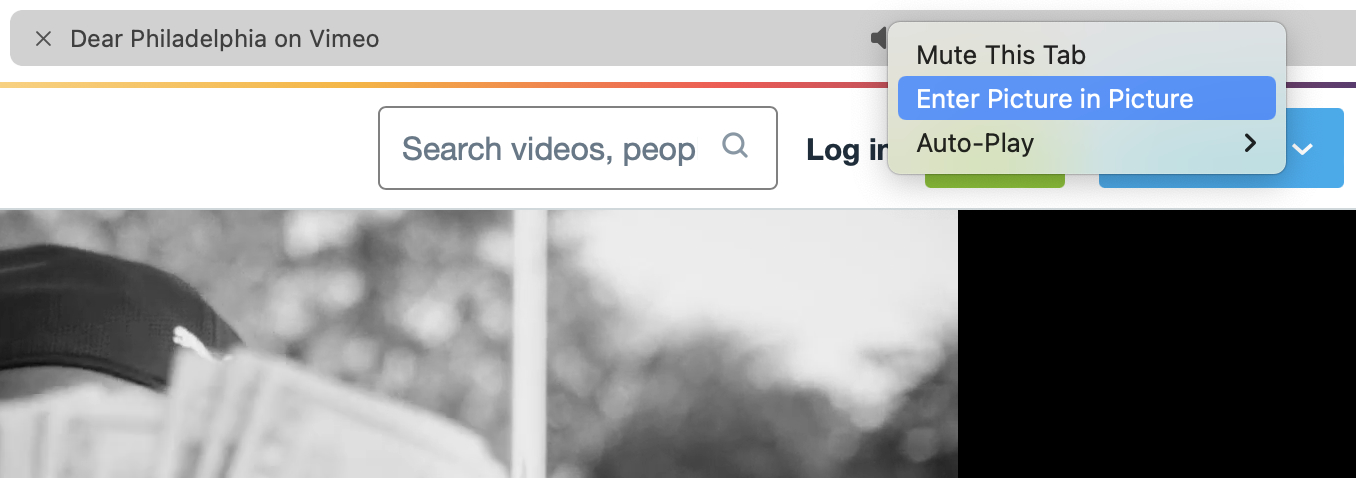
When playing a video from any website in Safari, a speakerphone icon appears beside the corresponding tab. If you right-click the icon, you’ll notice there is an option to “Enter Picture-in-Picture.” Choosing this option will open the video in PiP anyway.
Finder and QuickLook Tips
Preview files in Finder without opening them
This is by far the most ubiquitous Mac tip. Despite that, it seems a lot of users are oblivious to it. The basic principle of this tip is to preview files without opening them in order to save time.
There are times where you might open the wrong image when you wanted to open another. You may also sometimes want to simply not waste time opening and closing an image and instead would want a quick peek into what’s inside.
Turns out, macOS lets you do just that.
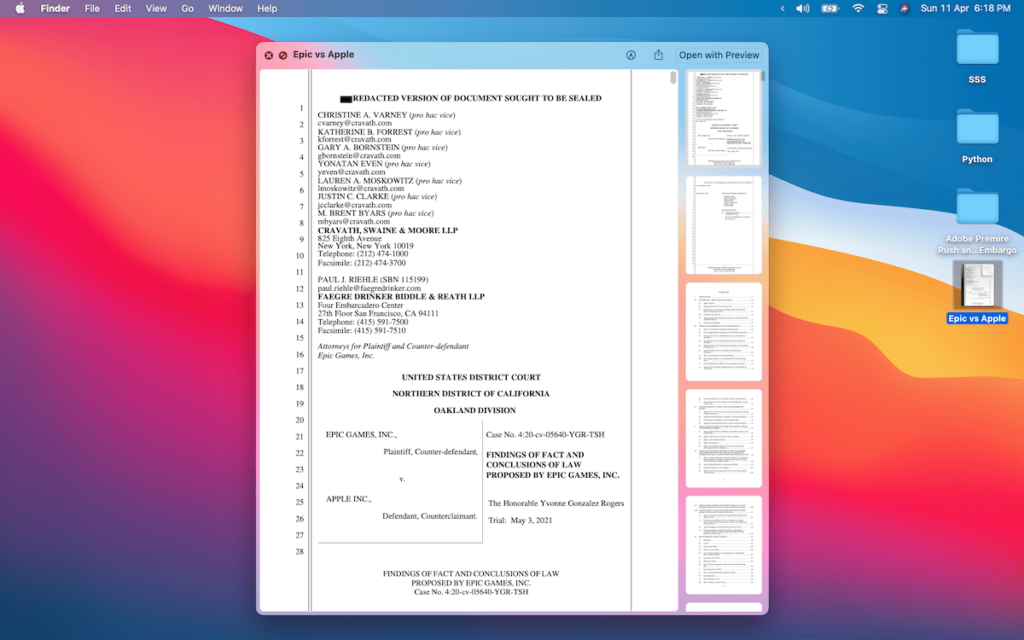
Simply select the item within Finder that you want to view and press and hold the spacebar while the item is selected. Let’s assume you want to preview an image. Holding on the spacebar will pop the image in its full resolution on the screen and the image will pop back into the icon upon releasing the spacebar.
It’s worth noting that the preview function not only works with photos, but with other file types as well including PDFs, which is really handy.
Automatically duplicate a file and open it by double-clicking on it
Sometimes, when you’re working on a file and aren’t entirely sure of the end result, it’s safe to create a duplicate of the file in order to prevent damaging the original. This is especially true of photos.
Fortunately, macOS lets you eliminate the hassle of copy and pasting a file within Finder to duplicate it and automatically duplicates it when you double-click the file. However, in order for a file to automatically create a duplicate of itself while double-clicking it, all you need to do is right-click on the file within Finder, click on Get Info, and finally, check the “Stationery Pad” box.
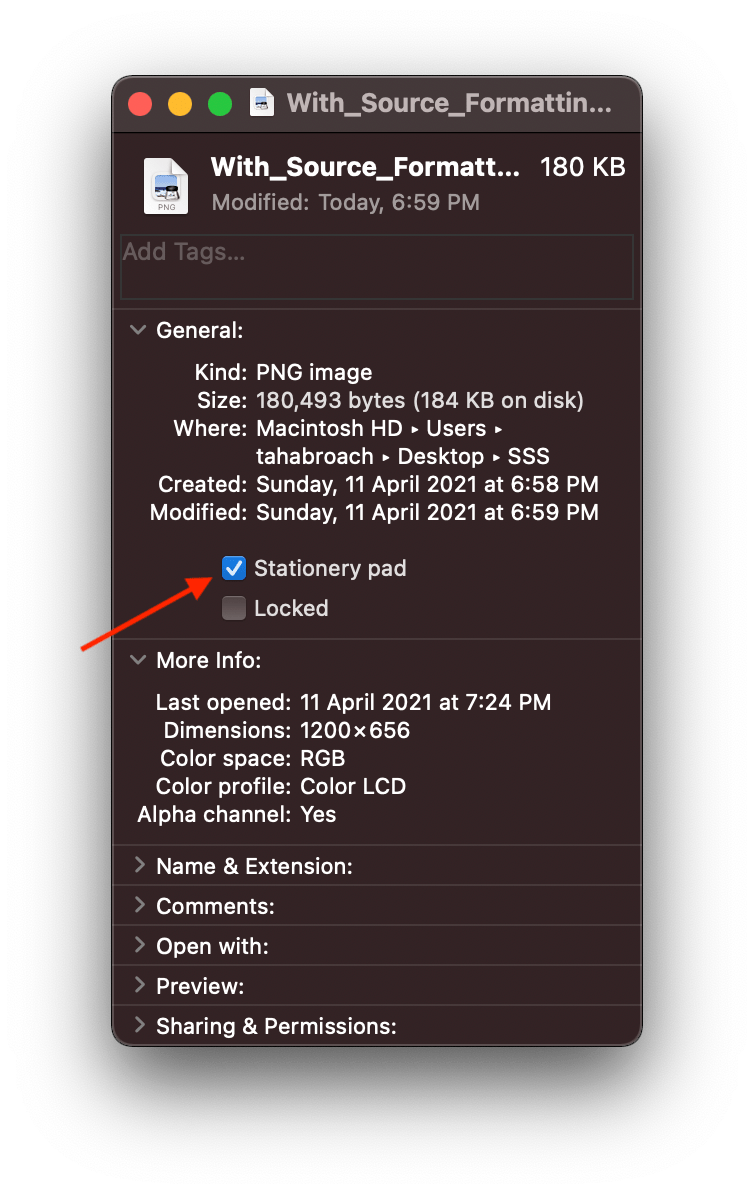
Now, the next time you double-click the file, Finder will automatically create a duplicate of the file and open that instead of the original.
Open a full-screen QuickLook preview
You can preview files with QuickLook, but if you want to get a better look at them, did you know that you can open previews in full-screen mode.

Here’s how it works: select a file, photo, or video to preview. Normally, you’d use the Spacebar to access that file’s preview. Although, in this case, instead of pressing Spacebar, press Option + Command + Y, and the file will open in a full-screen preview mode.
It’s worth noting that the full-screen preview mode is also accompanied by a small hovering toolbar that lets you contract the preview, close it, or share it.
Open a file while it’s in preview
While Preview mode lets you take a quick glance at a file, photo, or video, it’s often counterintuitive if you have to close the preview and then open the file should you decide to do so.
Instead, you can simply press Command + O to open the file right from its preview. Note that the file will open in the default application for its format.
Preview items in the Downloads folder from the Dock
If you click on the Downloads folder in the Dock, you will notice that you cannot use Preview mode on the files normally. That is because you cannot select them first. If you try to do so, it will directly open the file instead of selecting it.
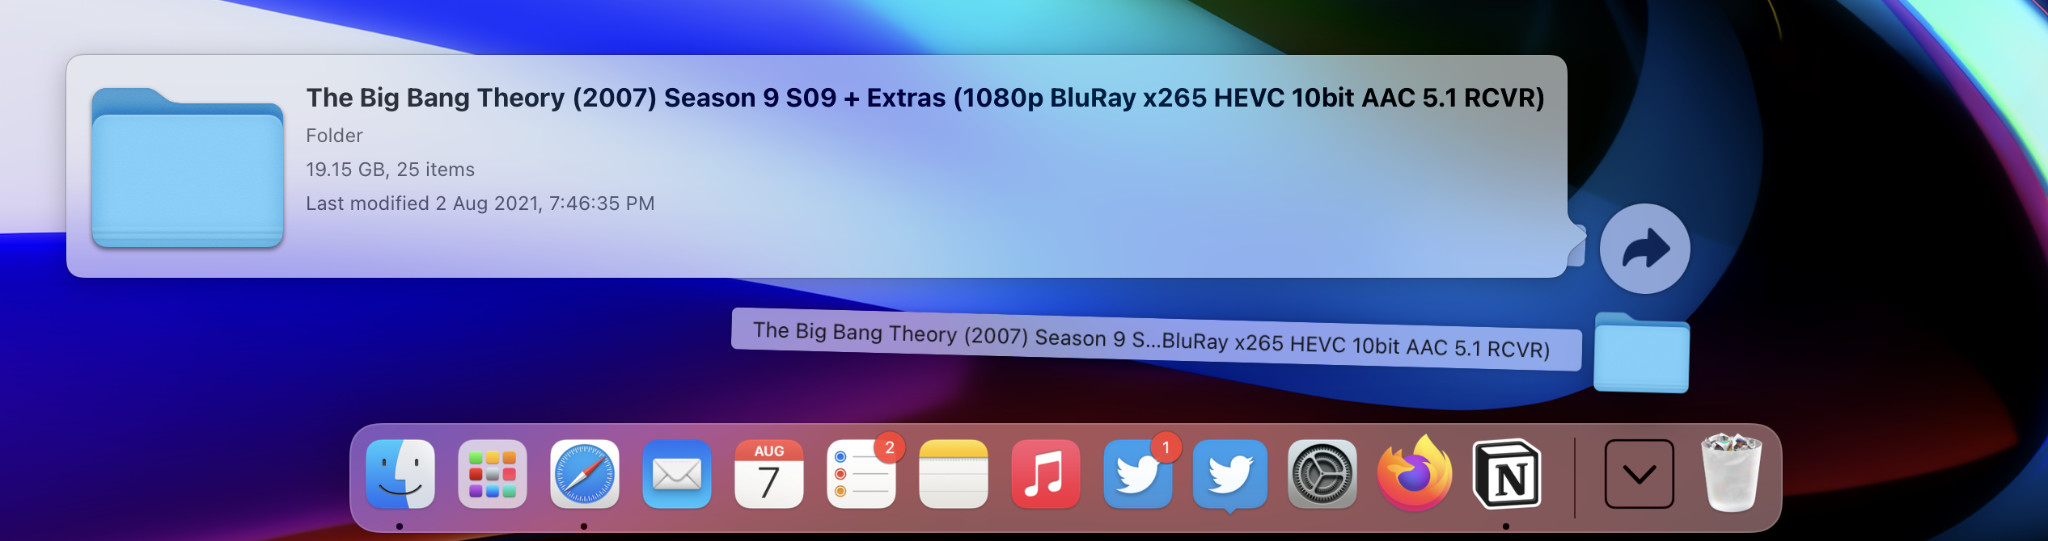
The solution: hover your mouse pointer over a file in the Downloads folder in the dock and then press Spacebar.
This way, Preview should work as expected.
Rename multiple files together in Finder
Finder lets you rename multiple files together. And the process of doing that is quite simple.
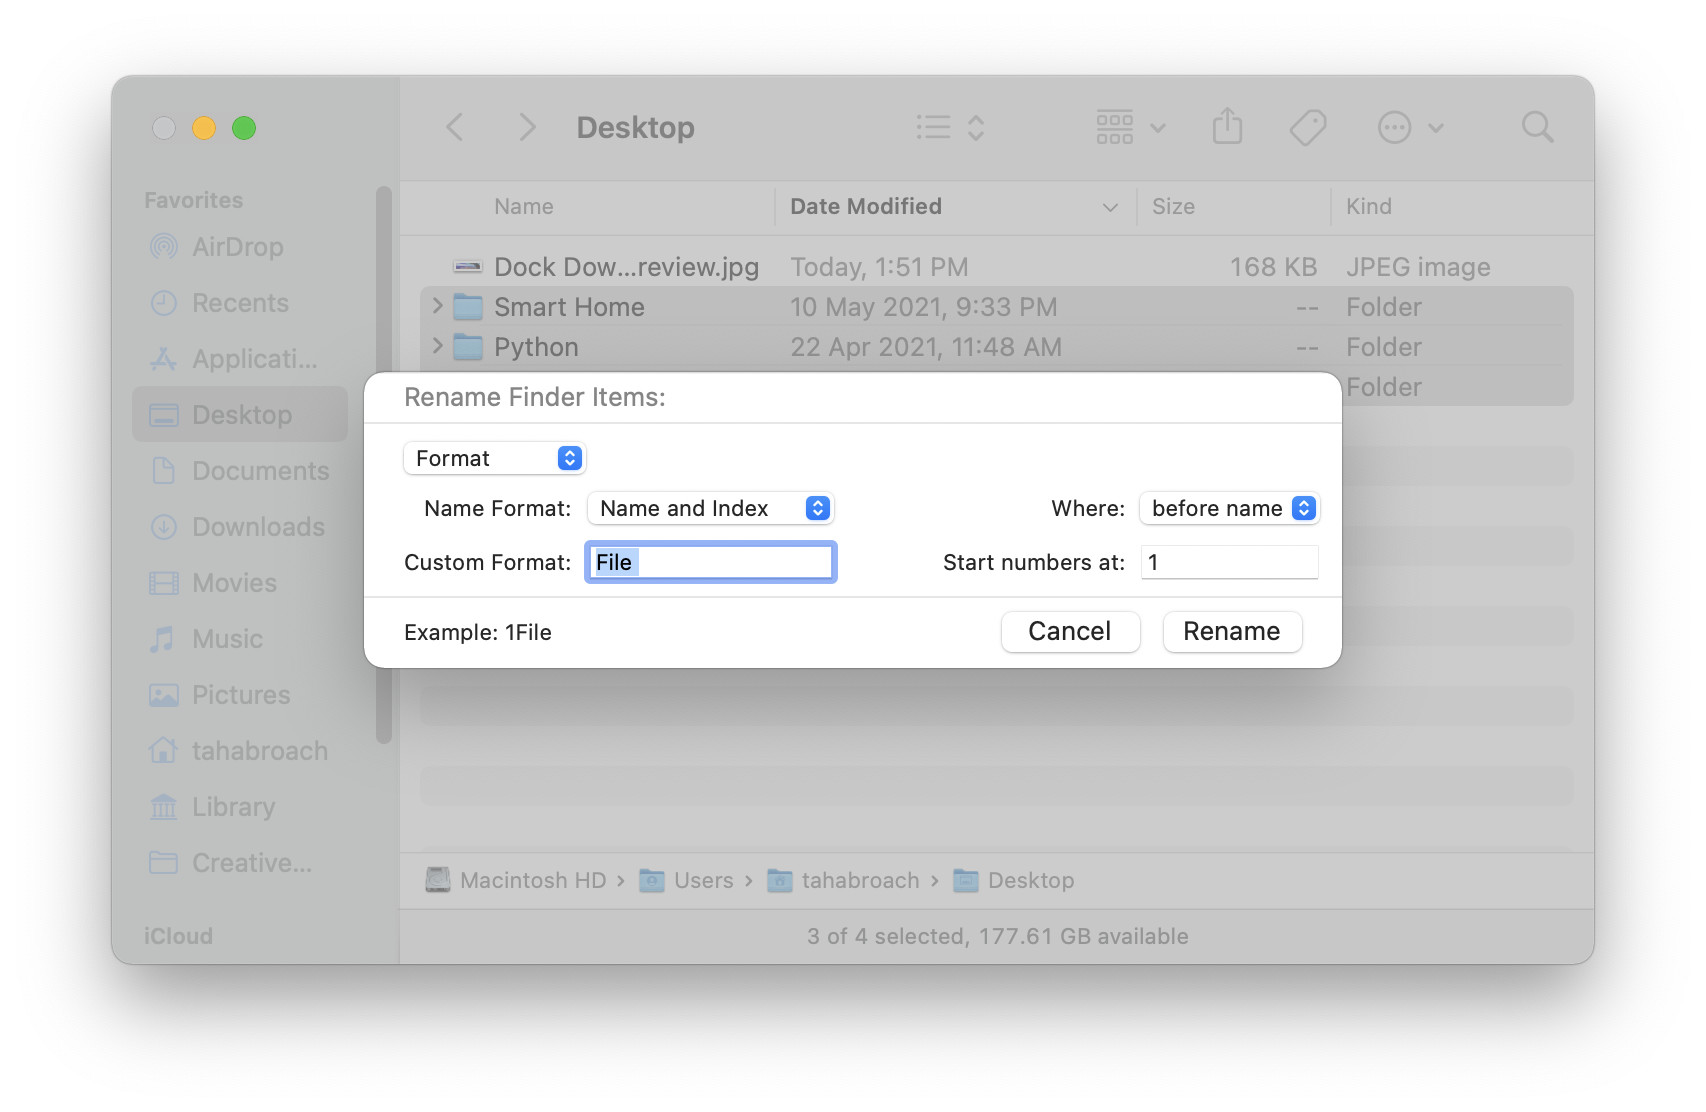
All you need to do is select a bunch of files instead of one, right-click on the selection, and click Rename.
The renaming interface lets you set the naming format, whether you’d want a custom name or something appended to the name. It’s quite proficient and extremely useful when you’re working on a project where most files are of the same nature.
Customize Finder toolbar
Finder is more powerful than it seems at the surface. This is because most of its functions are hidden behind its toolbar.
You can edit Finder’s toolbar to add more actions to it. The way to do that is by right-clicking on an empty space in the toolbar and selecting “Customize Toolbar…”
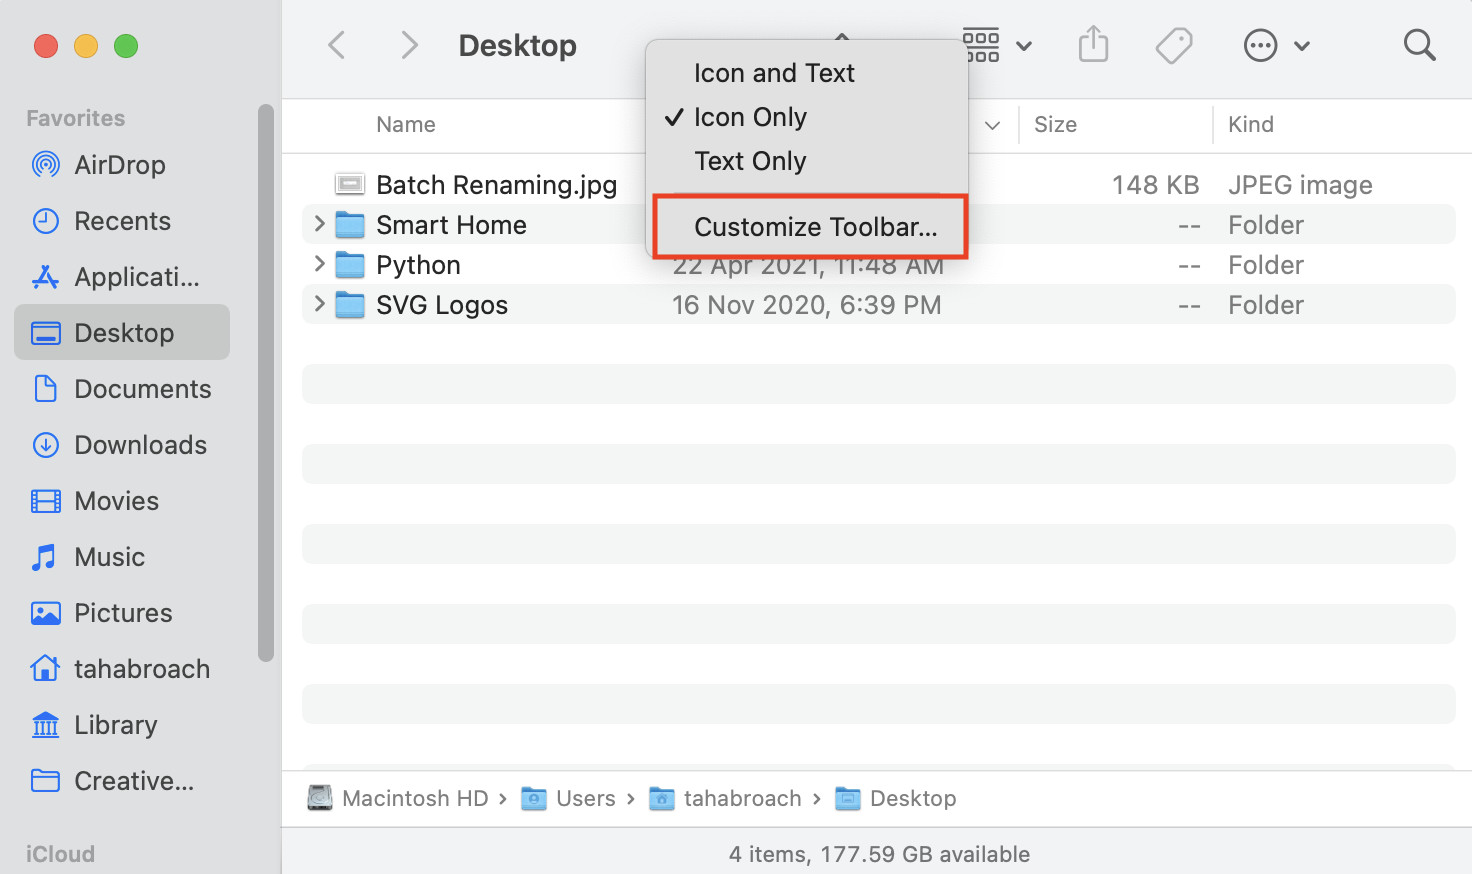
There, you can drag and drop actions into the toolbar as you desire.
Show external devices connected to your Mac on Desktop
By default, when you connect an external device like an external drive, iPod, CD, or DVD; it only displays them in Finder’s sidebar. However, you can have them show up on Desktop for easy access.
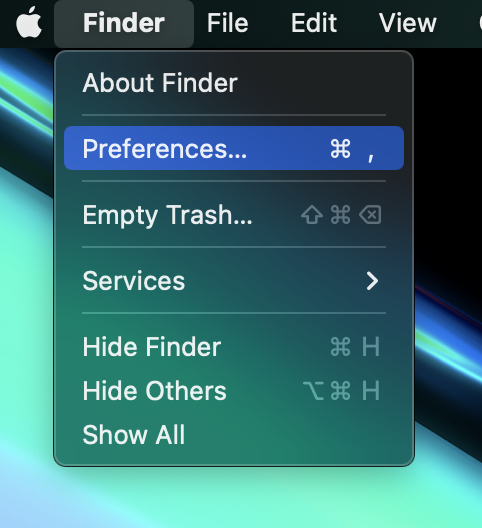
To do that, head over to the Finder app and click on the Finder label in the Menu Bar. Then, choose Preferences.
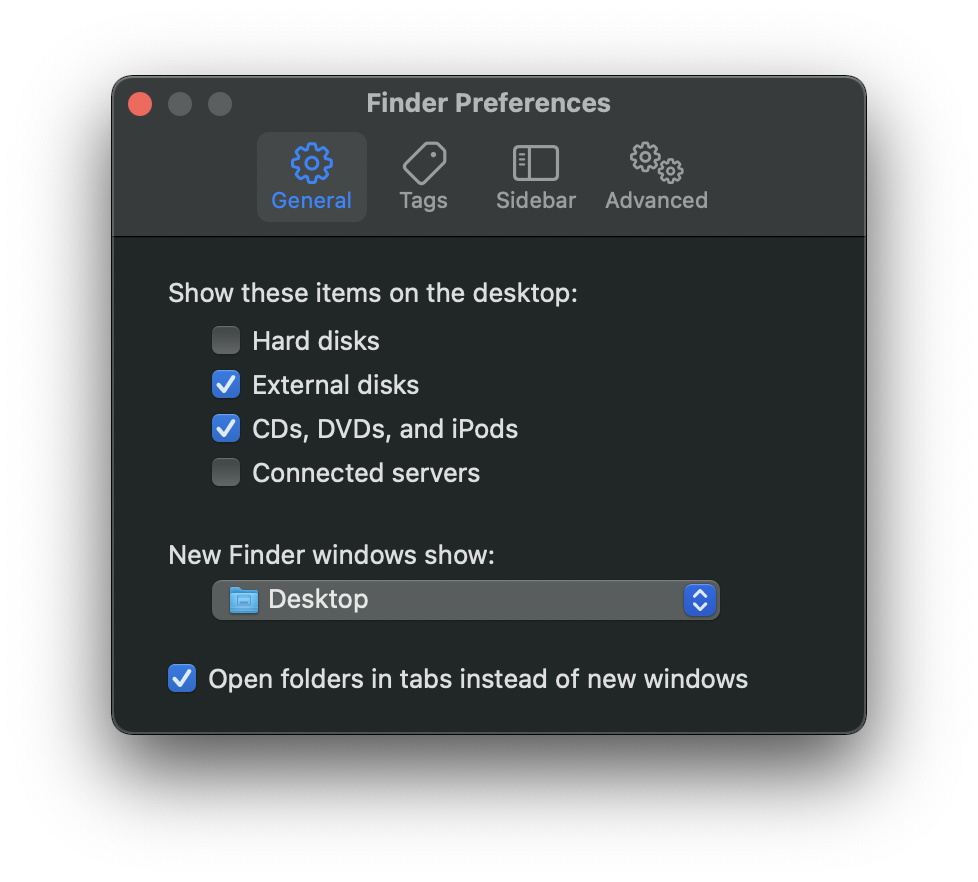
In the General tab, tick the external devices you’d like to show up on Desktop.
Set Finder to open in a specific location by default
You can set Finder to open a specific location as the default option. Doing this, each time you access finder, the location you select as default will automatically load.
For instance, if you save most of your files on Desktop and want it to be the default location Finder opens, you can do so by heading over to the General tab in Finder Preferences and selecting the location from the dropdown menu below the label that says “New Finder Windows Show.”
Delete items in the Trash Bin automatically
Deleted files on macOS go straight into the Trash Bin where they stay until you delete them permanently. However, storing them requires storage and there’s often only so much available.
What you can do is set the Trash Bin to automatically remove items from it after 30 days. This way, even if you forget about the files after deleting them, they won’t occupy the precious storage in your Mac for long.
To do this, head over to Finder Preferences. There, go to the Advanced tab and tick the checkbox that says “Remove items from the trash after 30 days.”
Always keep folders on top
The Desktop can get cluttered easily with a mix of folders and files. While you cannot always delete those files, you can organize them. And the best way to do that is to keep the folders at the top and the files down below.
Even while sorting files in Finder, usually, files and folders are mixed up, making everything look cluttered and disorganized. Interestingly, you can have the folders always appear at the top here as well.
In order to do this, head over to Finder Preferences. Then, switch to the Advanced tab. Finally, tick both checkboxes under the label that states “Keep folders on top.”
See hidden files in Finder
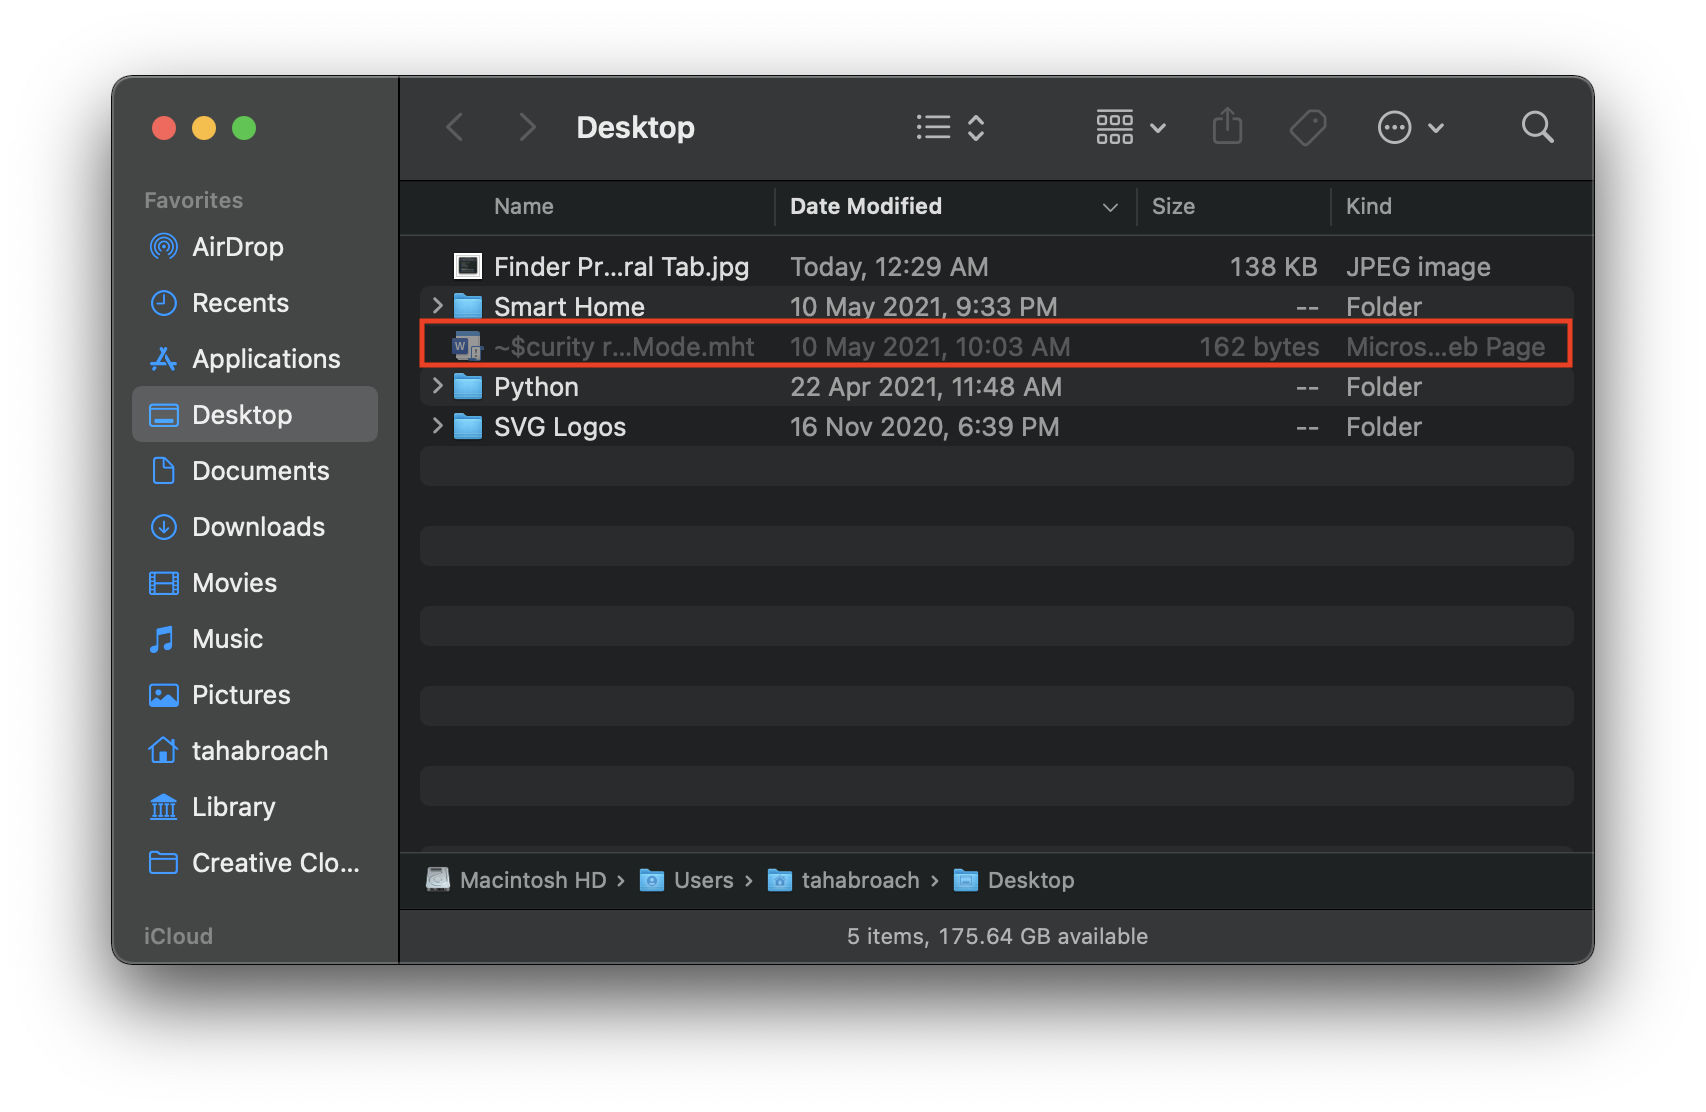
macOS smartly keeps some files hidden. However, should you need to access these files, you can do so by pressing Shift + Command + “.” (without the quotes).
Quick Finder keyboard shortcuts to navigate to different folders
- Shift + Command + R: AirDrop
- Shift + Command + A: Applications
- Shift + Command + D: Desktop
- Shift + Command + I: iCloud Drive
- Shift + Command + O: Documents
Show visual path in Finder
Finder doesn’t show you a file path of the folder you’re in by default. This is especially disconcerting when you’re coming from Windows and are new to macOS.
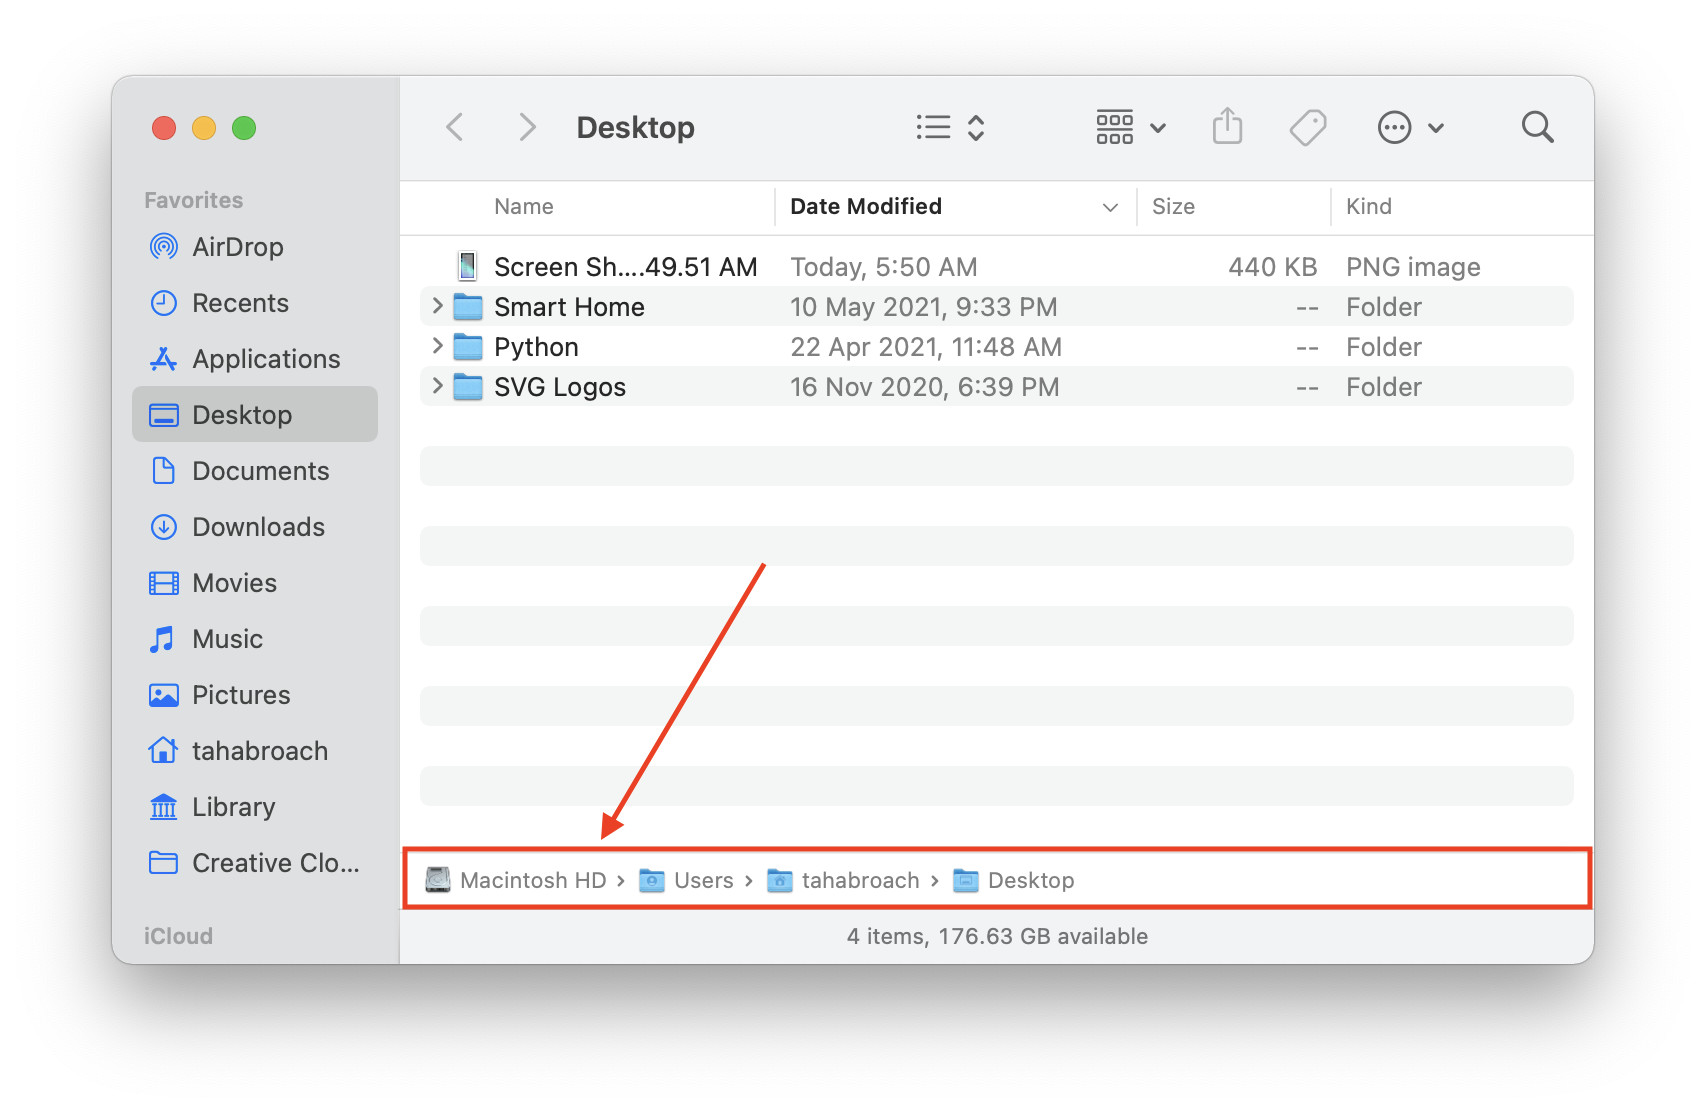
Thankfully, all you need to do is open Finder, click on the View tab in the Menu Bar, and select “Show Path Bar.”

Easily navigate the file path

While in a folder, if you right-click on the title bar, you will discover that it unravels to display the file path of that folder in the form of a list that you can click through to easily navigate different parts of the file path.
Show number of items in a folder along with its size
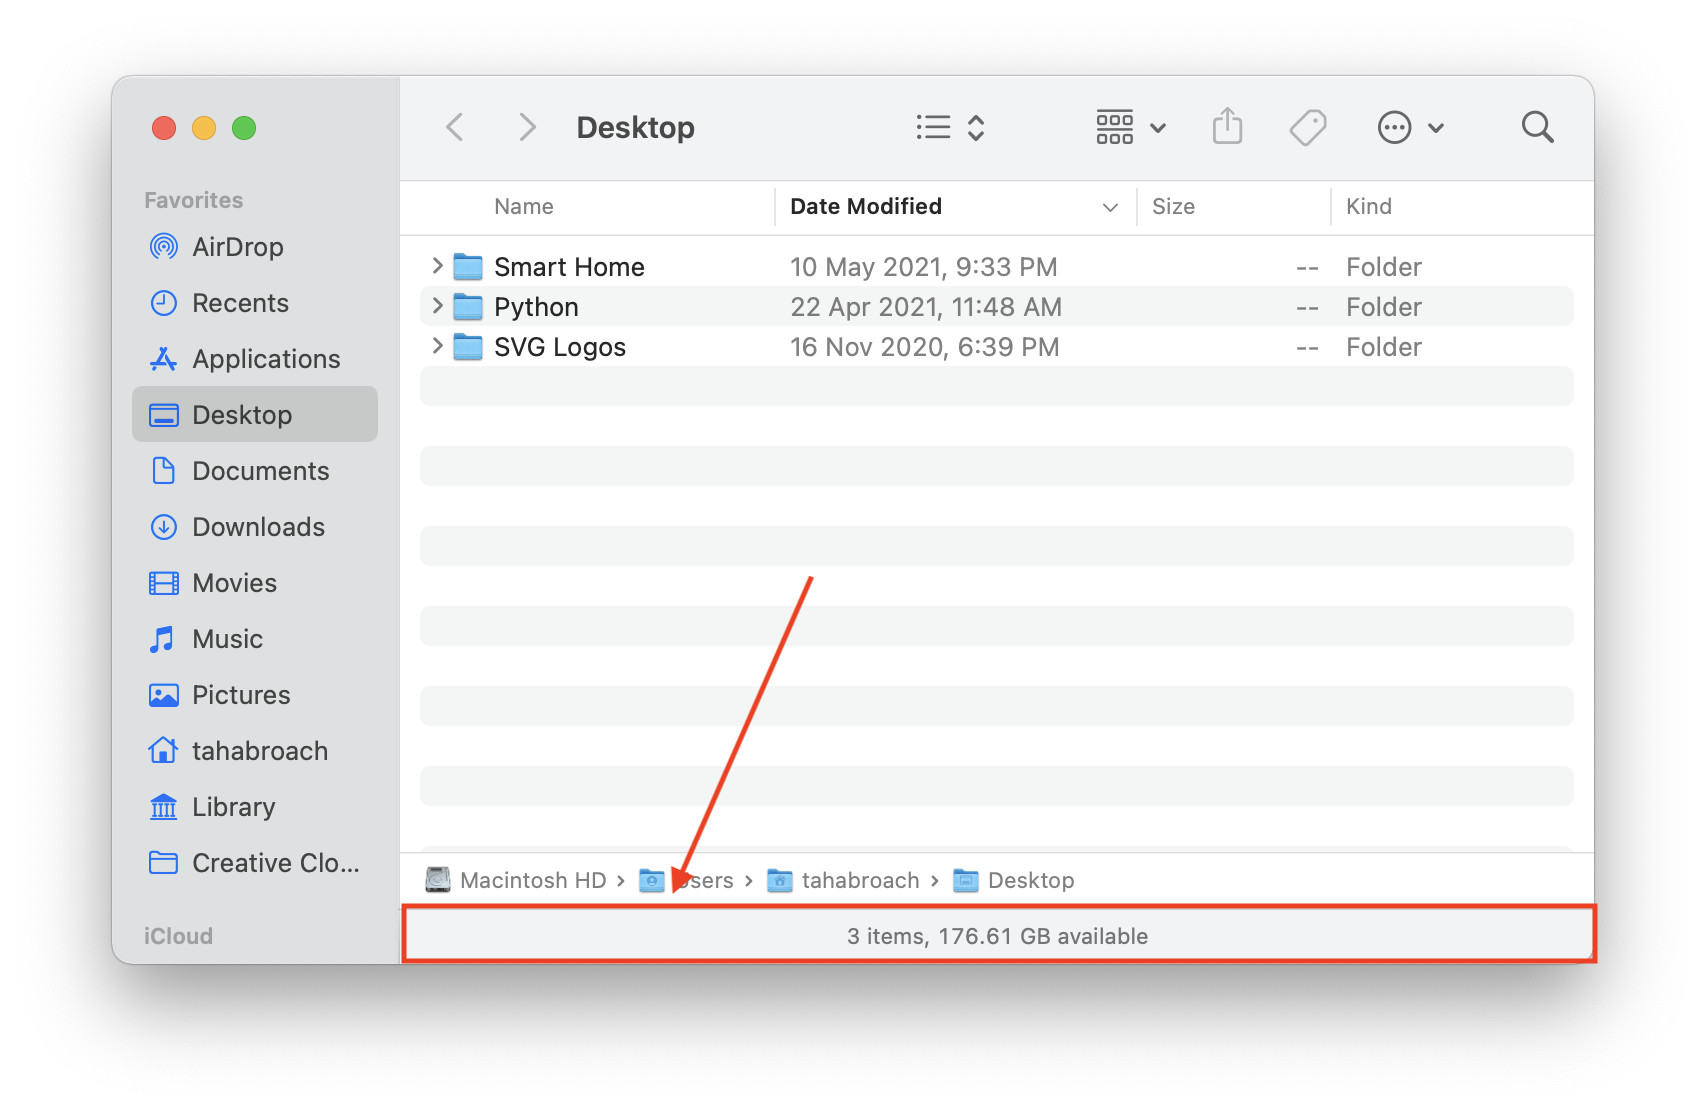
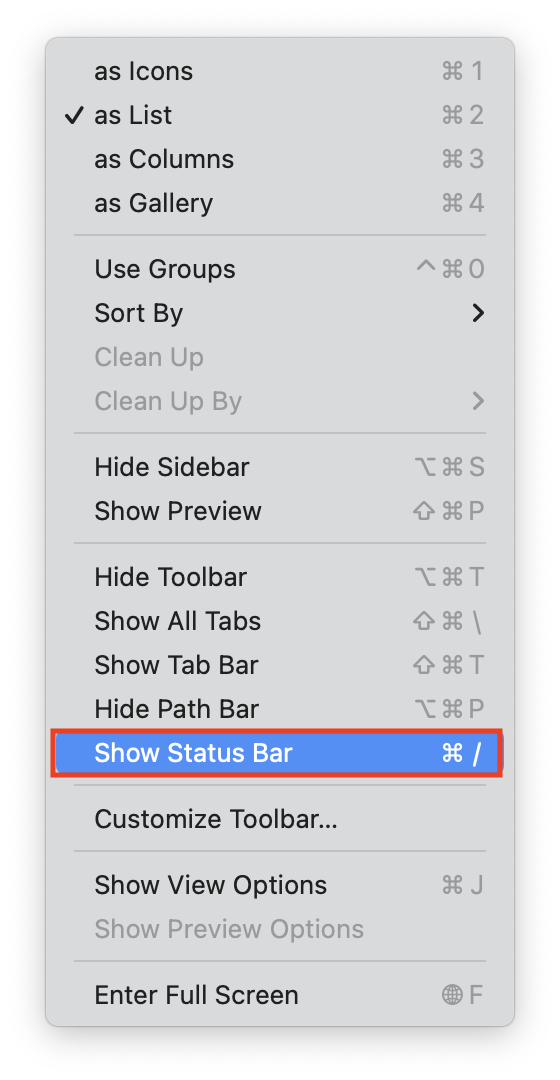
By default, Finder does not show the number of files in a folder nor does it display the amount of space occupied by the folder. However, much like enabling the file path bar, you can also enable the Status bar from the View menu in Finder.
Open Finder, click on the View tab in the Menu Bar. Then, choose “Show Status bar.”
Quickly toggle among different Finder views
Finder comes with four different views for displaying files within folders. That said, you might want to toggle different views for different folders.
The quickest way to go about it is to use these keyboard shortcuts.
- Command + 1: View as Icons
- Command + 2: View as List
- Command + 3: View as Columns
- Command + 4: View as Gallery
Enable a quick preview of files in Finder
Finder lets you quickly preview files in itself. It’s different from the previewing functionality that QuickLook brings as it’s not provoked using the Spacebar.
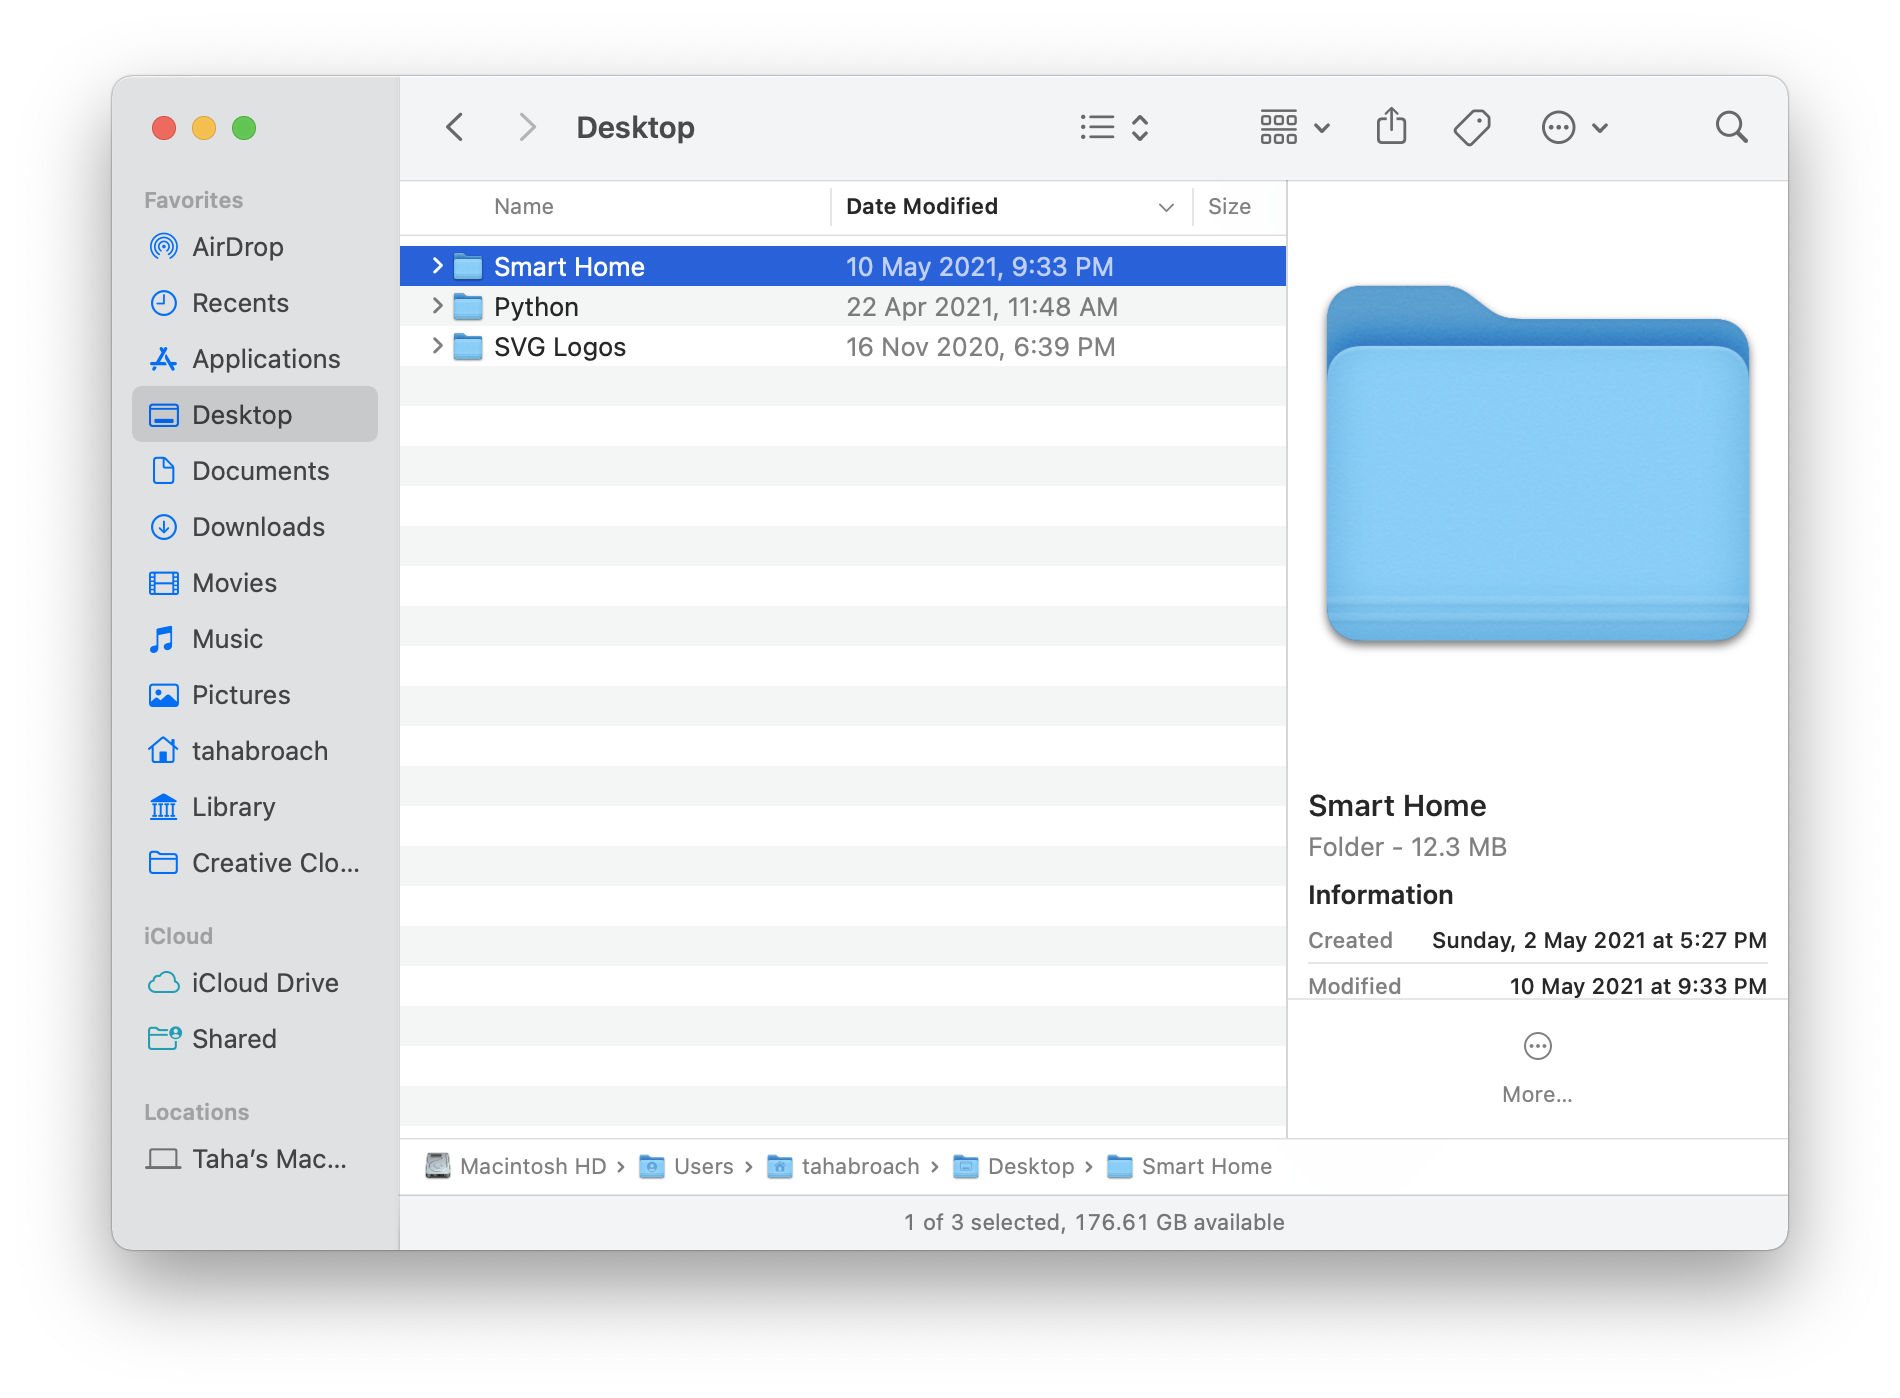
When you’re in Finder, simply press Shift + Command + P to activate file previews in Finder. These previews appear in a sidebar to the right of the window.
Resize columns equally in Finder
Columns in Finder let you absorb more information at once while navigating through folders. It’s quicker this way and some people prefer it over the List view. You can also resize columns in Finder in case a file’s name is too long.

Regularly resizing columns Resizing columns equally
However, did you know that you can also resize all columns equally altogether? Here’s how to do it!
Simply hold the Option key and drag the line between columns to resize all columns equally.
Increase or decrease the size of icons in Finder
Icons in Finder appear too small? Or too big? It’s simple. You can increase or decrease their size by pressing Command + “+” and Command + “-“ respectively. (Without the quotes)
Open a dedicated search window in Finder
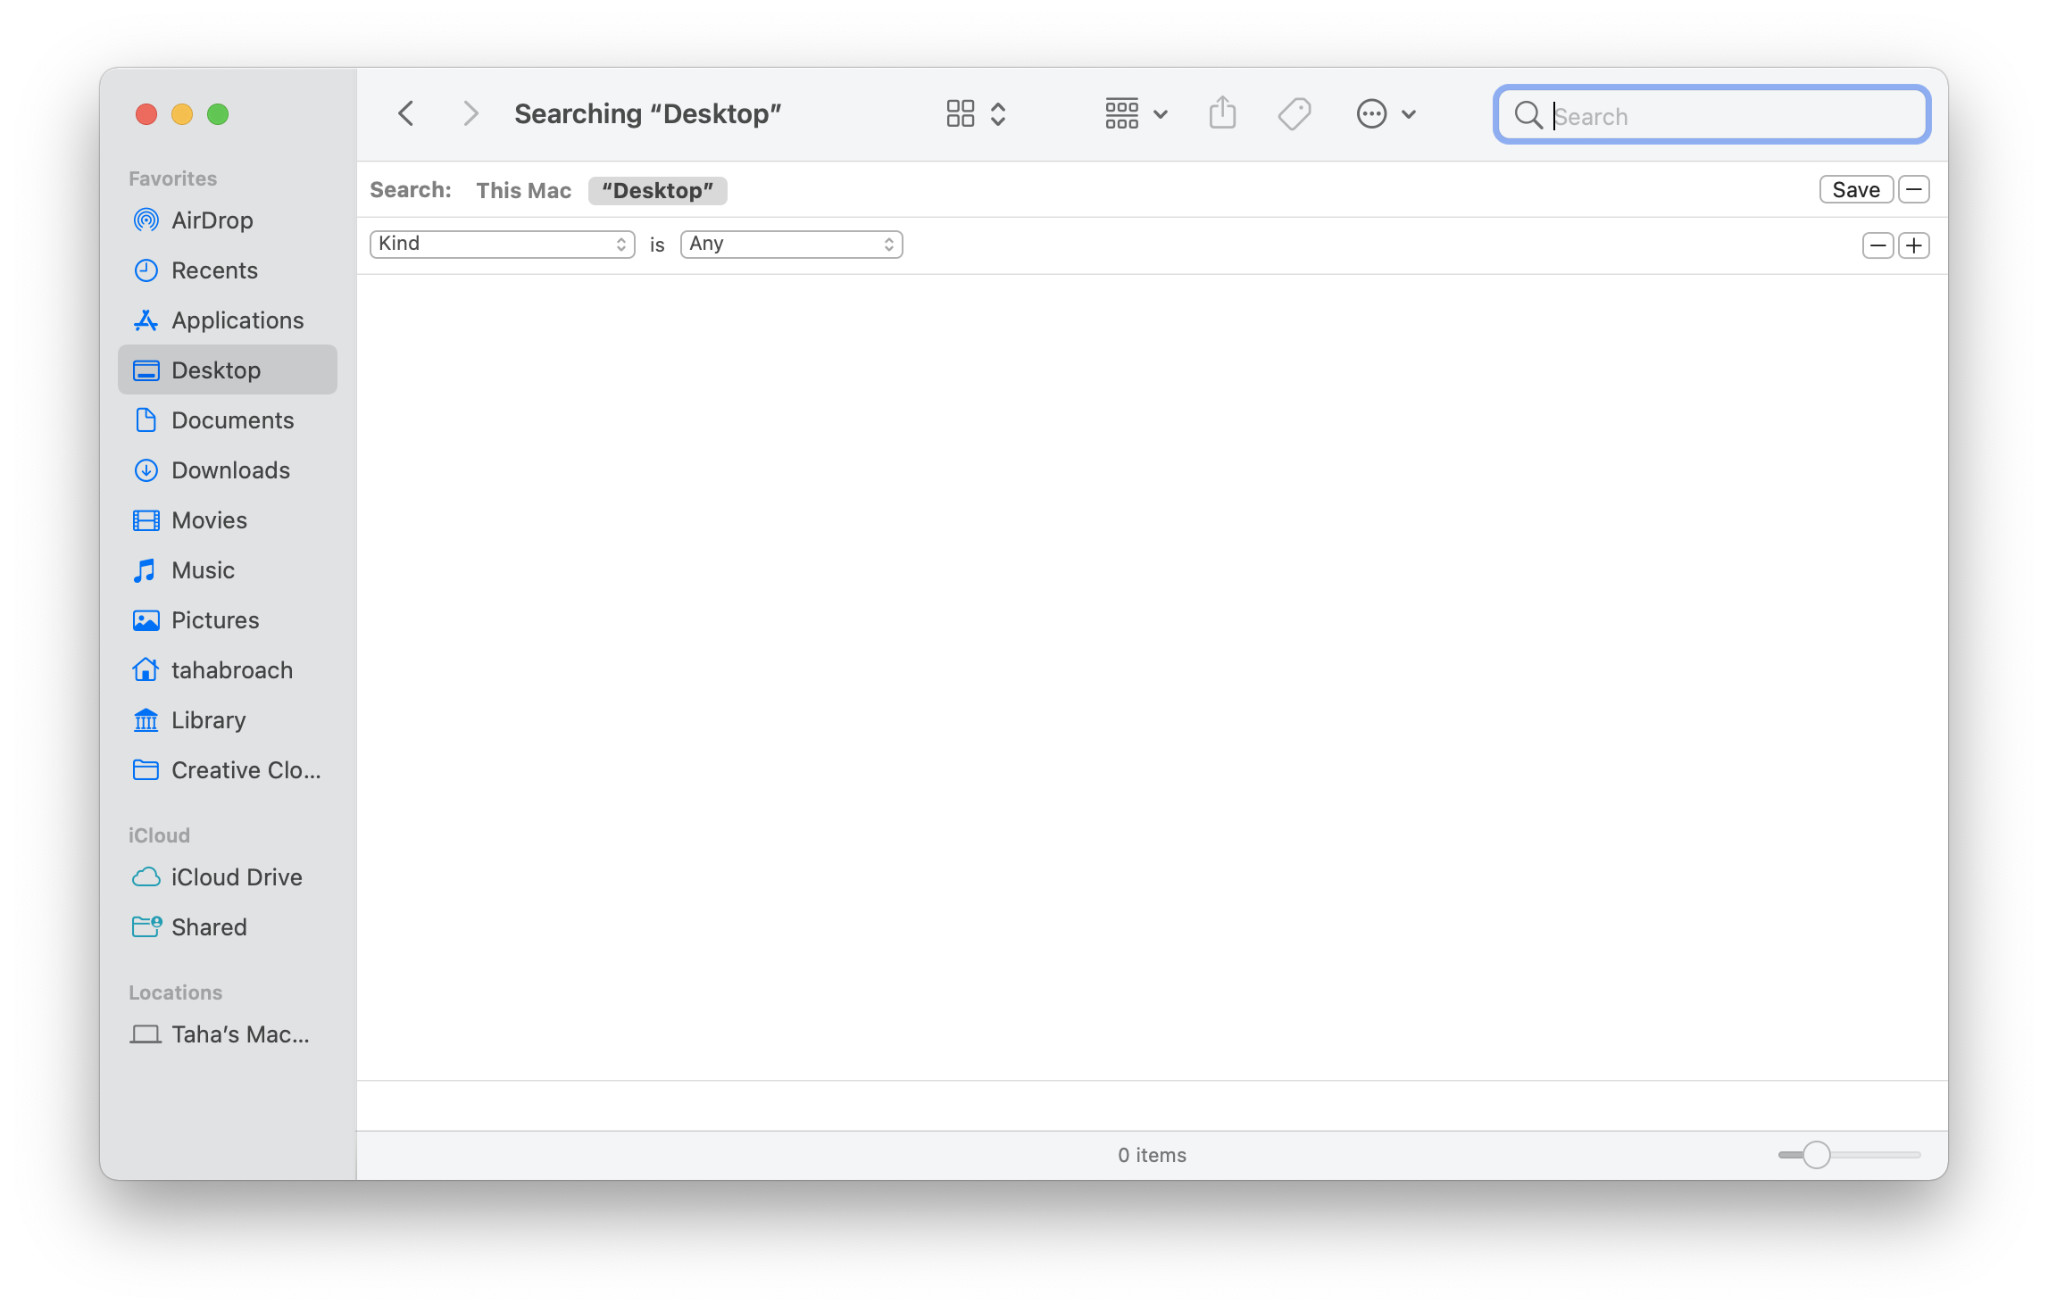
Searching for a file but the regular search isn’t cutting it? Press Command + F while in Finder to enable a special search field that also lets you filter files by their status and type.
Search files by a specific search term
Sometimes, you need to find a file containing a specific term in either the title or the content. Nevertheless, using this search trick in Finder, you can easily find it.
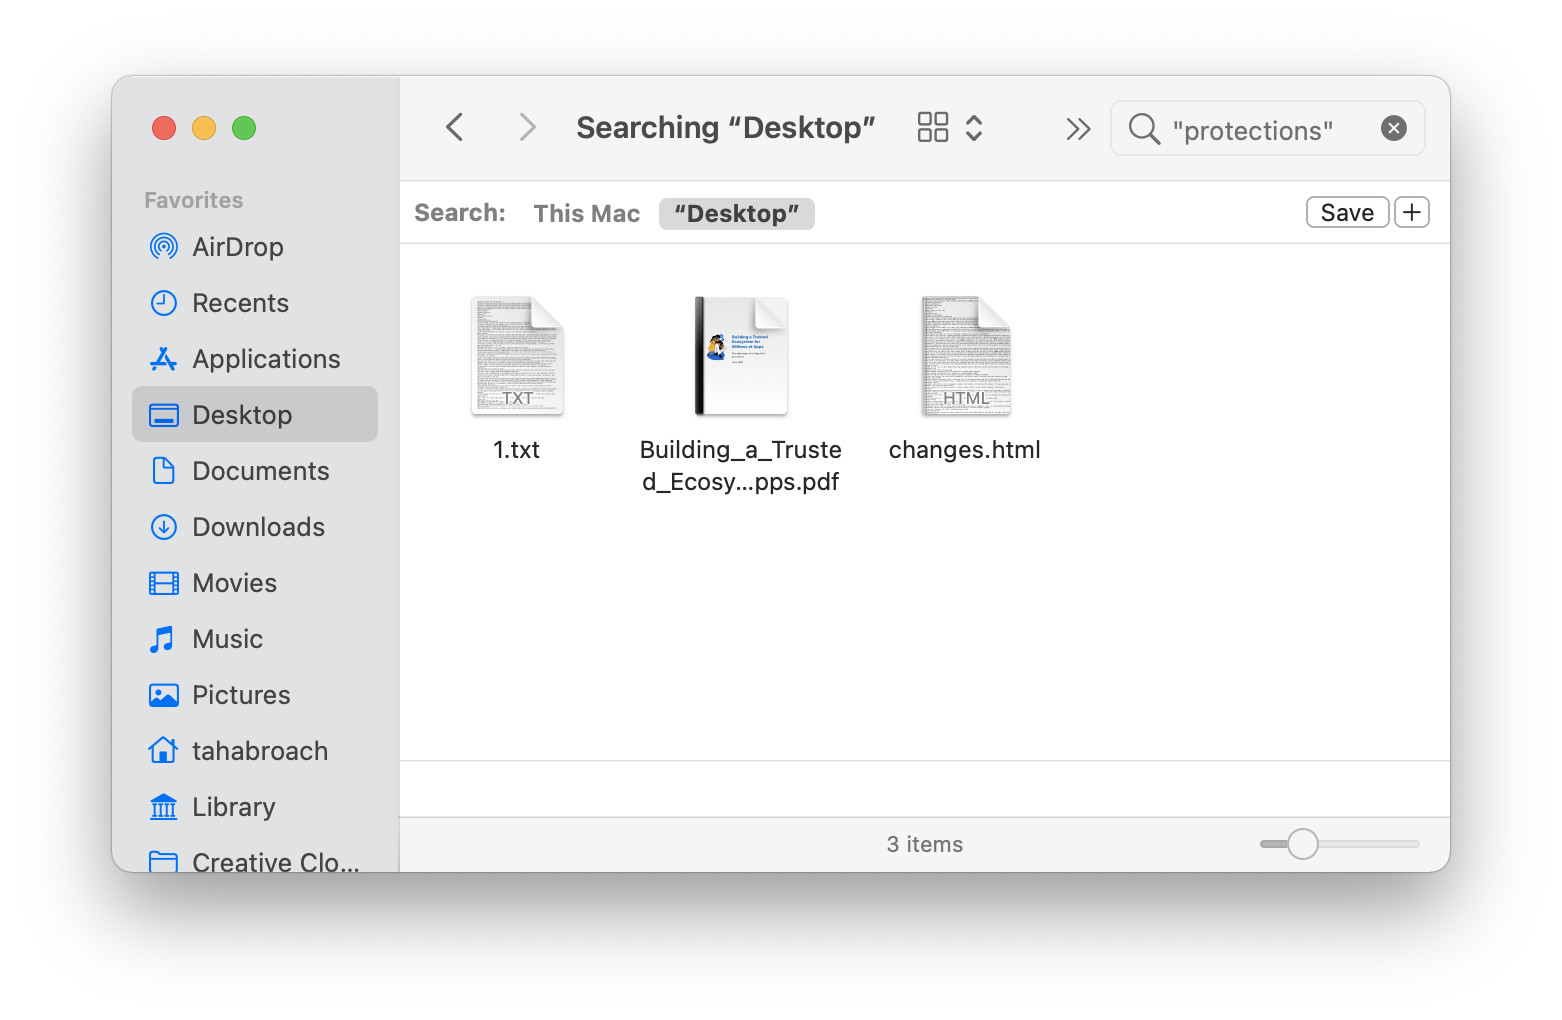
Add quotes around the search term to look for an exact match instance of the search term in the title of different files or even in their content!
Cut and paste a file in one go
Unlike Windows, the action for cutting and pasting a file is not as straightforward. This usually leads to people copying and pasting the file to its destination and then going back to delete the file from its initial location.
That said, all you need to do is instead of pressing Command + V to paste the file after copying it, simply press Option + Command + V to automatically move it from its original location.
Quickly go up a directory in Finder
This is just one of the quicker ways to navigate through Finder: press Command + to move up a directory. This is a substitution for having to click the backspace key, which doesn’t work for going up a directory in Finder.
Open a file inside an app
If you’re in an app like, say, Affinity Photo where you need to open a file to work on it, the simplest way to do that is to press Command + O.
Enter a folder in Finder
We recently covered how to go up a directory using a handy keyboard shortcut. However, the keyboard shortcut for entering a folder is Command + .
Declutter your Desktop
Keeping your Desktop organized is difficult what with files and folders scattered around. However, little did you know macOS includes a neat solution.
Right-click on an empty space and choose “Use Stacks.”
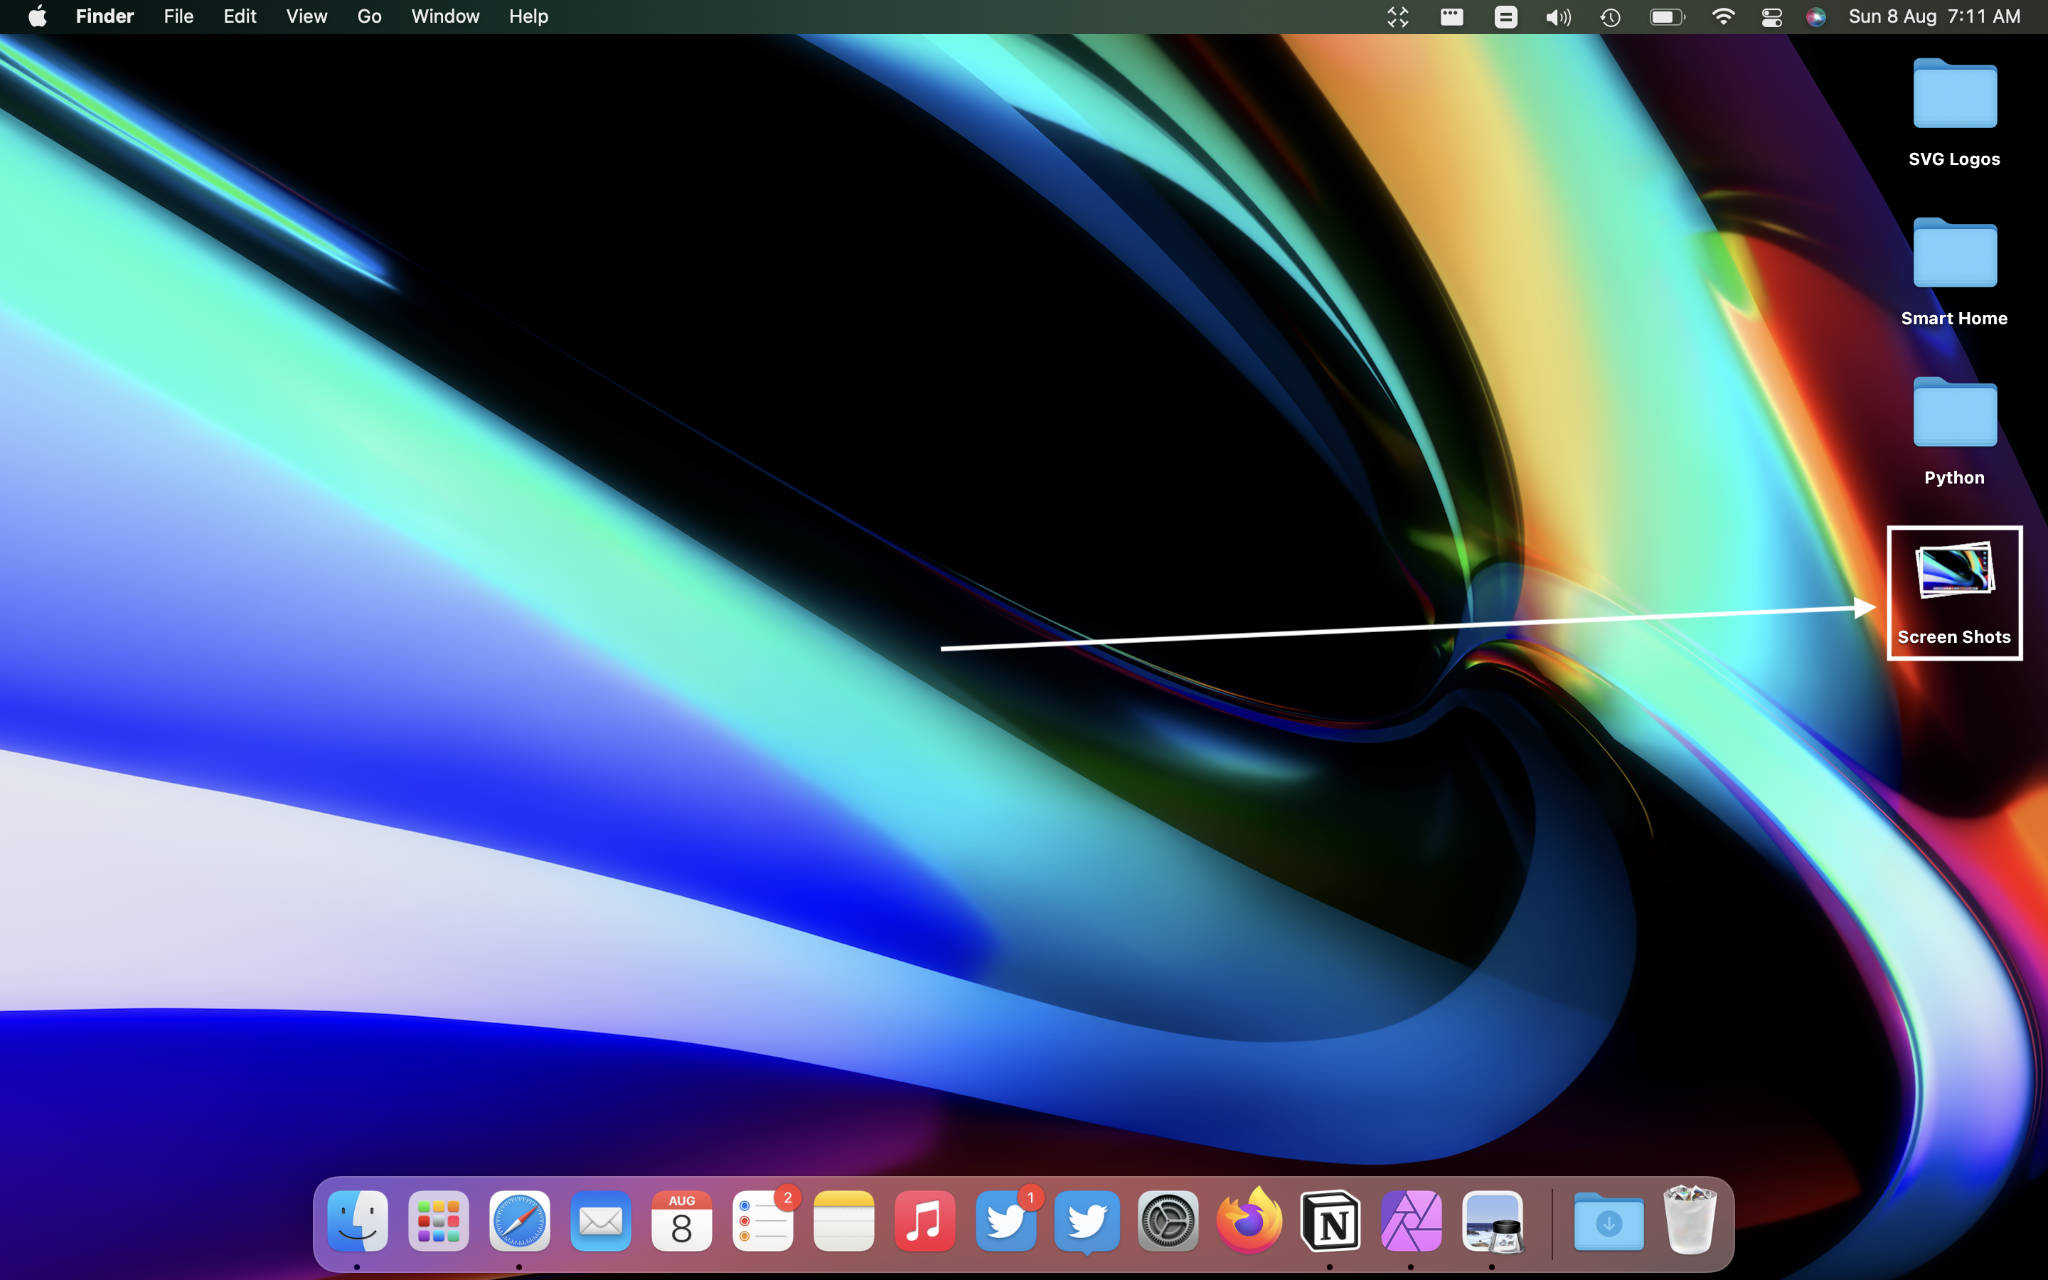
This will stack all similar files together, ultimately leading to a spacious Desktop. When you click on a stack, it expands to reveal the files within.
Bypass Trash Can while deleting a file
Normally, when you delete a file, it goes to the Trash Bin and stays there until you delete it manually or set it to delete automatically after 30 days. However, if you don’t want a file to stay in the Trash Bin, you can bypass it by selecting the file and pressing Option + Command + Delete.
Text and Clipboard Tips
Paste text without formatting
Sometimes, when you copy formatted text from somewhere and try to paste it in, say, a word document, it appears in the original formatting which doesn’t match the style of the format you’re working with currently.

While you can right-click and choose to paste without the formatting, it’s not quick. That said, if you want to save time pasting text without formatting, macOS has a handy keyboard shortcut.
If you press Shift + Option + Command + V, the text will appear without the source formatting.
Handy, isn’t it!
Summon autocomplete suggestions on Mac
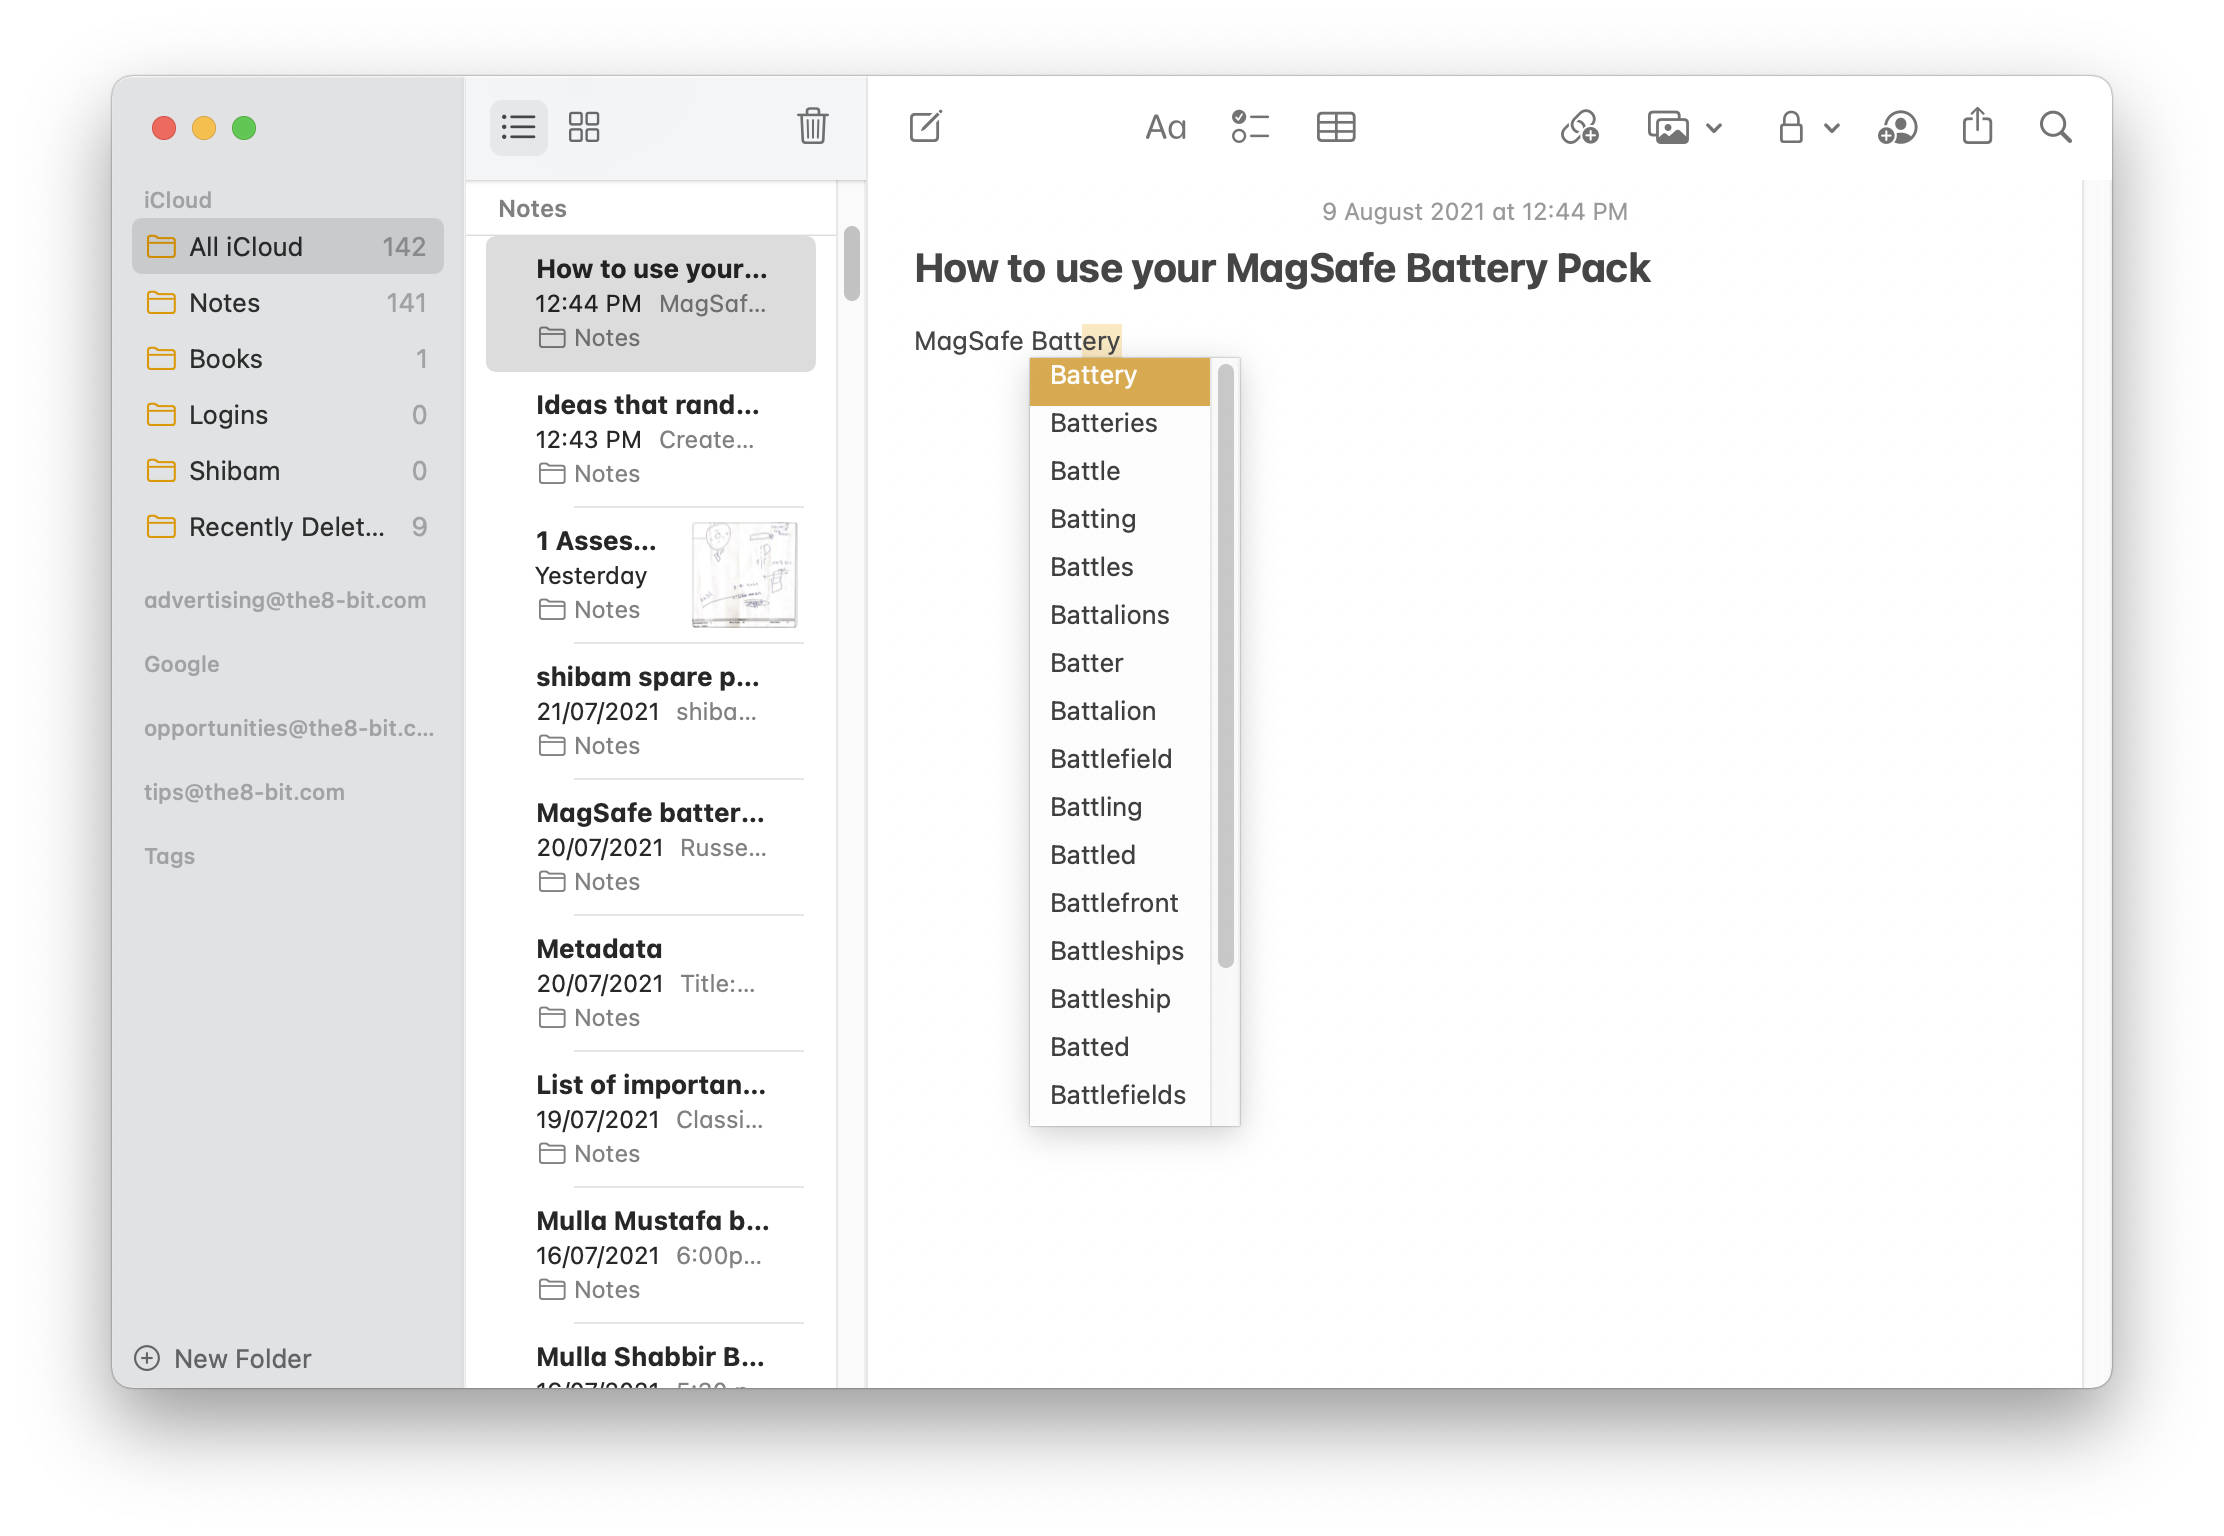
While typing in certain apps such as TextEdit and Notes, halfway through a word, press F5 to summon autocomplete suggestions for that word.
It’s worth noting that autocomplete suggestions are shown by default in Macs with Touch Bar.
Quickly access Lookup
Lookup is a terrific feature that offers contextual information about a selection of words you make. The well-known way of accessing Lookup is by selecting a word or a string of text, right-clicking on the selection, and choosing Lookup from the options.
However, what if I said there was a quicker way of accessing Lookup? Select a word and then simply press Control + Command + D. Voilà!
Access a key’s contextual menu
Hold down a key on the keyboard on your Mac to reveal a contextual menu for different variations of the letter.
Delete text in the opposite direction
Ever since the dawn of computers, the most ubiquitous form of correcting textual mistakes is by pressing the delete key. It deletes the last letter you typed into your computer. Little did you know you can also delete in the opposite direction.
On your Mac, press Function + Delete to forward delete text.
Mind blown, isn’t it?
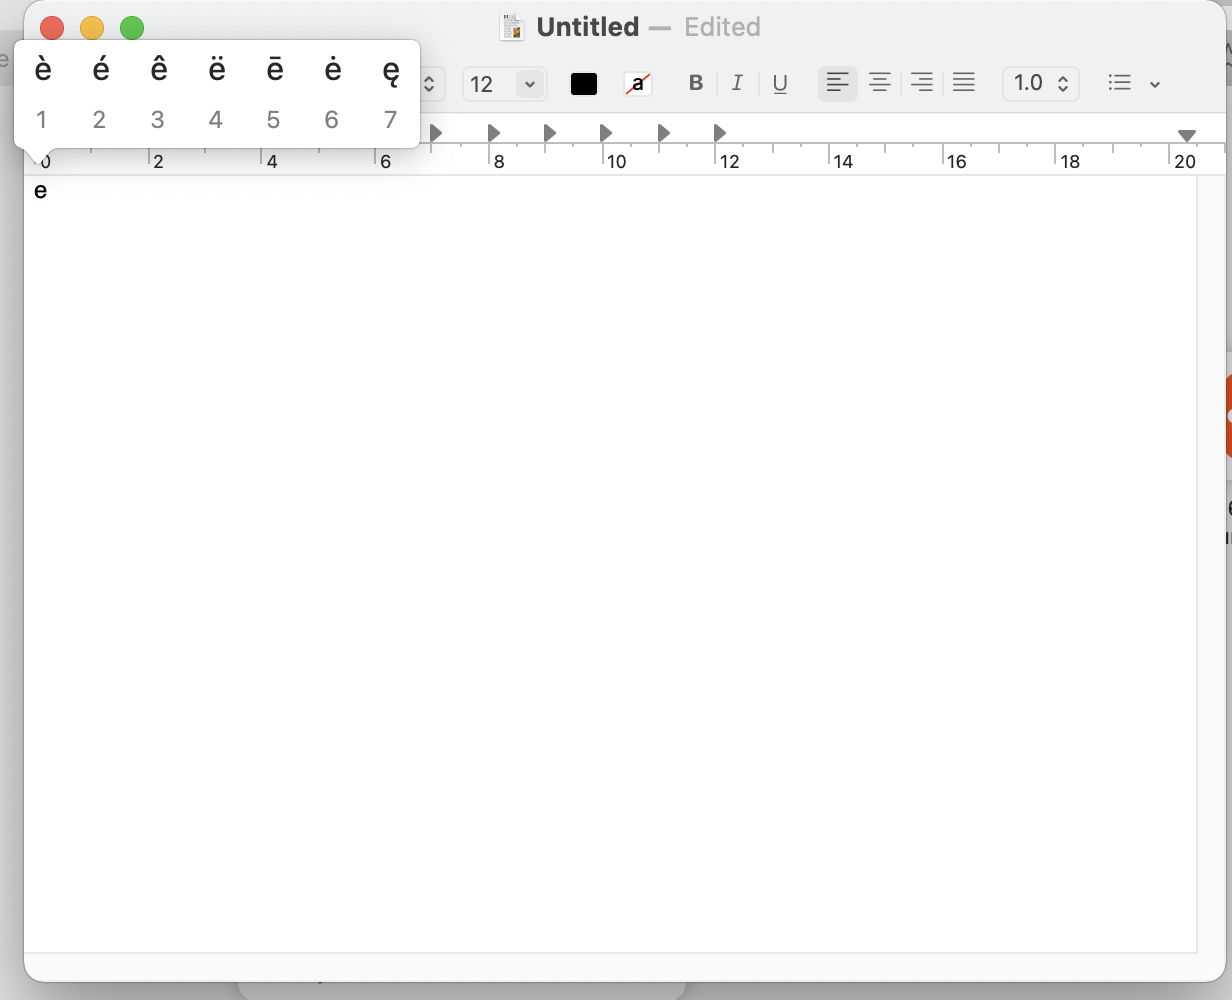
Add diacritics to text
Diacritics are the little symbols that appear above certain words, as in Café. In order to add diacritics to your words, simply type the word stopping short of the letter where you want to add the diacritic symbol.
Then, press Option + . Finally, press the same letter again.
Menu Bar Tips and Tricks
Alternate, quicker way to enable Do Not Disturb
If you want to enable Do Not Disturb quicker than ever and yet more conveniently, simply click the time and date while holding down on the Control key.
Drag and remove Menu bar icons
You can drag to rearrange Menu bar items by holding down on the Command key while trying to do so. To remove an icon from the Menu bar, simply hold down on the Command key and drag the icon outside the Menu bar and release it.
Printing Tips and Tricks
Print pages with increased convenience
If you regularly use a printer, this tip is for you.
Head over to the Printers and Scanners tab in System Preferences and drag your printer’s icon onto the Desktop.
Now, you can simply drag and drop documents on the icon to automatically begin printing them.
Print ‘From and To’ address envelopes
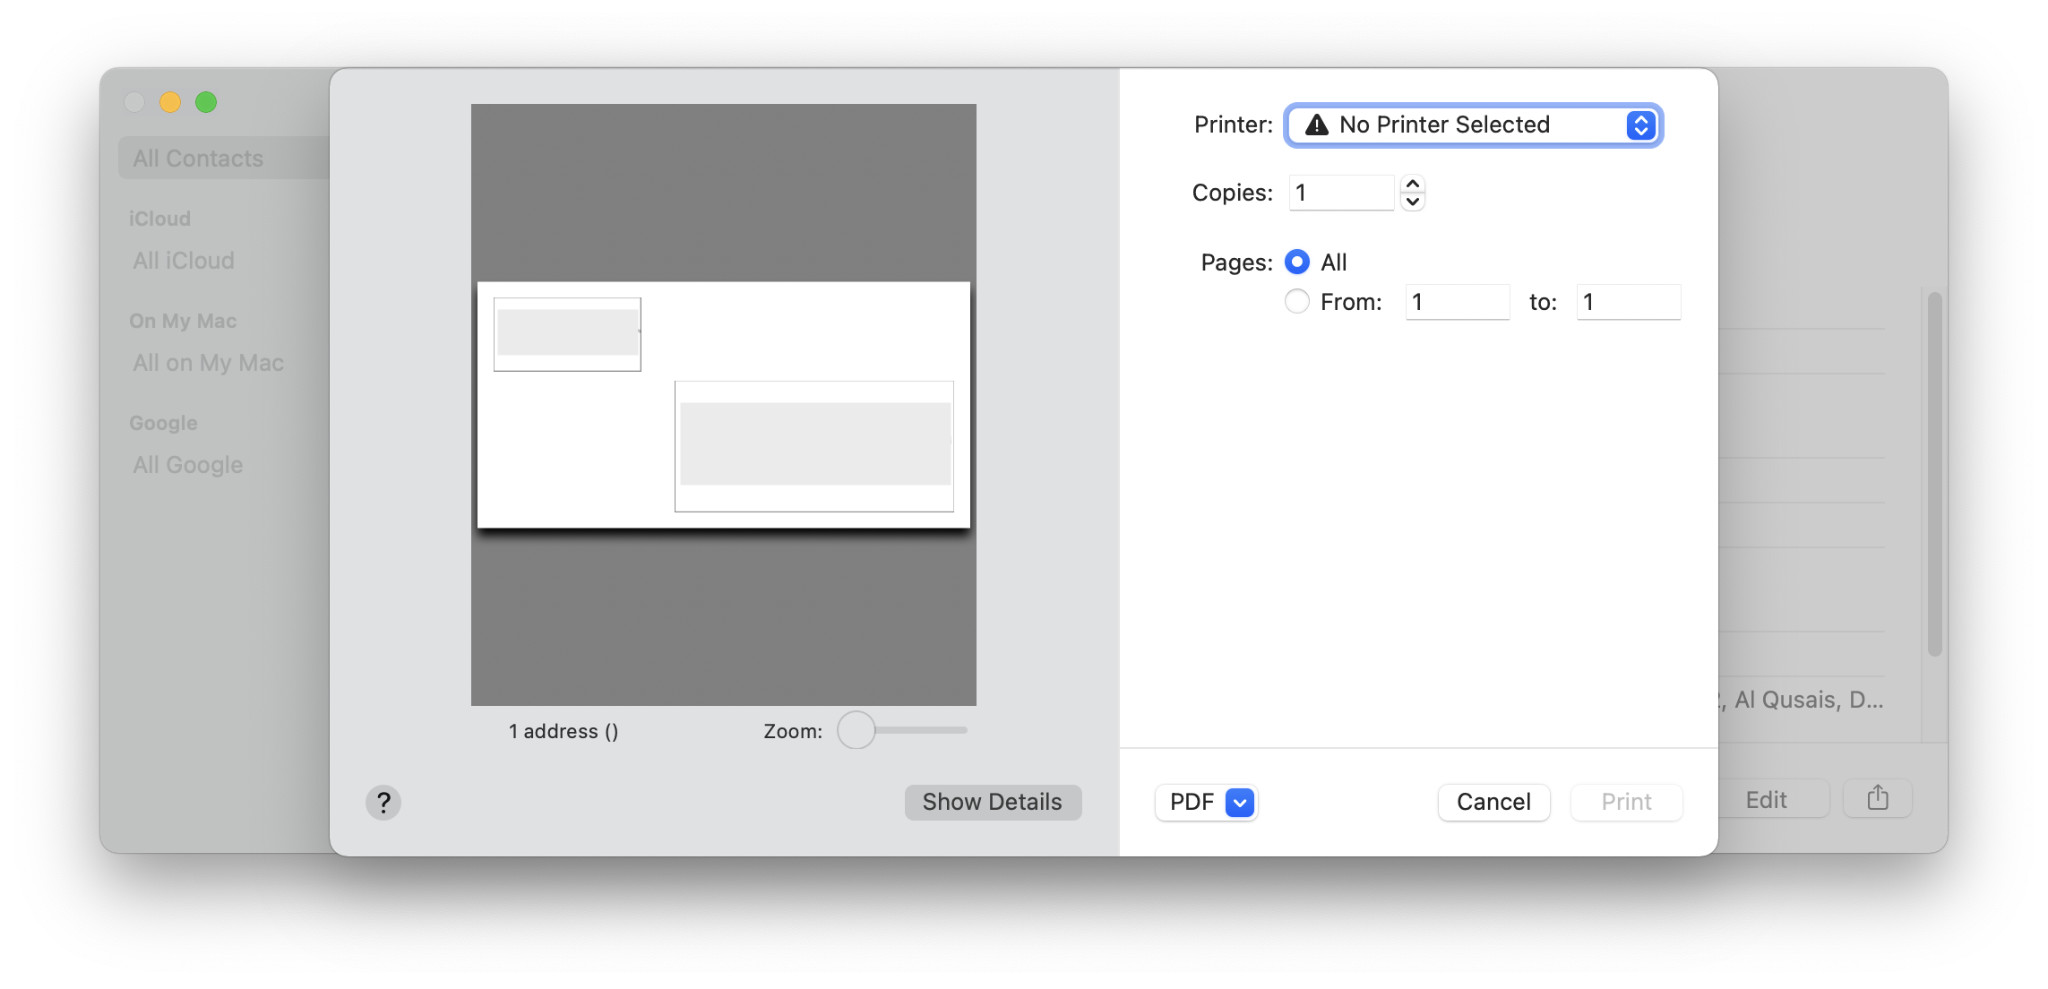
The contacts app lets you print “From and To” address envelopes. All you need to do is search for a contact, click on its name, and then press Command + P to access the Print dialog. Note that the recipient contact should have adequate address information already saved in the Contacts app.
macOS Terminal Tips and Tricks
macOS comes with a Terminal pre-installed. It’s a useful application often used for developmental purposes. However, if you know what to do with it, the Terminal helps you tweak your Mac to a considerable level. Let’s take a look at a few Terminal tips and tricks.
Save screenshots in different file formats
By default, screenshots in macOS are saved in PNG format which is popular for preserving the quality of images but at the expense of size. This means that screenshots captured on macOS often exceed above 2 megabytes; and if you’re using a 4K display, even more.
Such image sizes are naturally not suitable for use on the web as they considerably increase load times. While you can convert images using various tools after capturing the screenshot, did you know that using Terminal, you can permanently change the file format screenshots are stored in?
This would save a lot of the hassle associated with converting images.
Here’s how to do it: Open the Terminal, either from the Launchpad or using Spotlight search.
Then, copy and paste the following code in the Terminal:
defaults write com.apple.screencapture type JPGNote: You can change the file format in the code mentioned above to anything. In this case, it’s “JPG.” But you can replace it with GIF, TIFF, or anything you want.
Once you’ve pasted the aforementioned code in the Terminal, hit Enter.
Now, try capturing a screenshot and you’ll notice the file format has changed to the one you set, and depending on the format, it should also have a smaller size.
Change App Store automatic update check frequency
The App Store automatically checks for updates every week. However, if you want to increase the frequency it checks for updates, you can do so by entering a simple Terminal command:
defaults write com.apple.SoftwareUpdate ScheduleFrequency -int 1In the above string of text, the number “1” at the end is the number of days the App Store should wait before checking for updates, which is every day. You can change this number to any number of days you want.
Once you’ve pasted the command in the Terminal, press Enter.
Disable contextual menu
When you press and hold a letter key on the keyboard, it prompts a contextual menu with additional letter options instead of continuing to repeat the letters. You can fix that with this Terminal command:
defaults write -g ApplePressAndHoldEnabled -bool falseOnce you’ve pasted the command into the Terminal, press Enter.
Furthermore, if you need to enable contextual menus again, simply copy this command, and instead of the word “false,” type “true.”
Stop your Mac from sleeping
Your Mac has a display timeout setting after which it dozes off. However, if you want it to stay on while you’re downloading a large file or something else, use the following Terminal command:
caffeinatePress Enter after pasting the command into the Terminal.
Note that after entering this command, your Mac will stay on indefinitely. To end the no-sleep phase, simply press Control + C or type in “killall caffeinate” in the Terminal and press Enter.
There are apps like Amphetamine built just for this purpose. However, if you don’t want yet another app for a subliminal task, this Terminal command is golden.
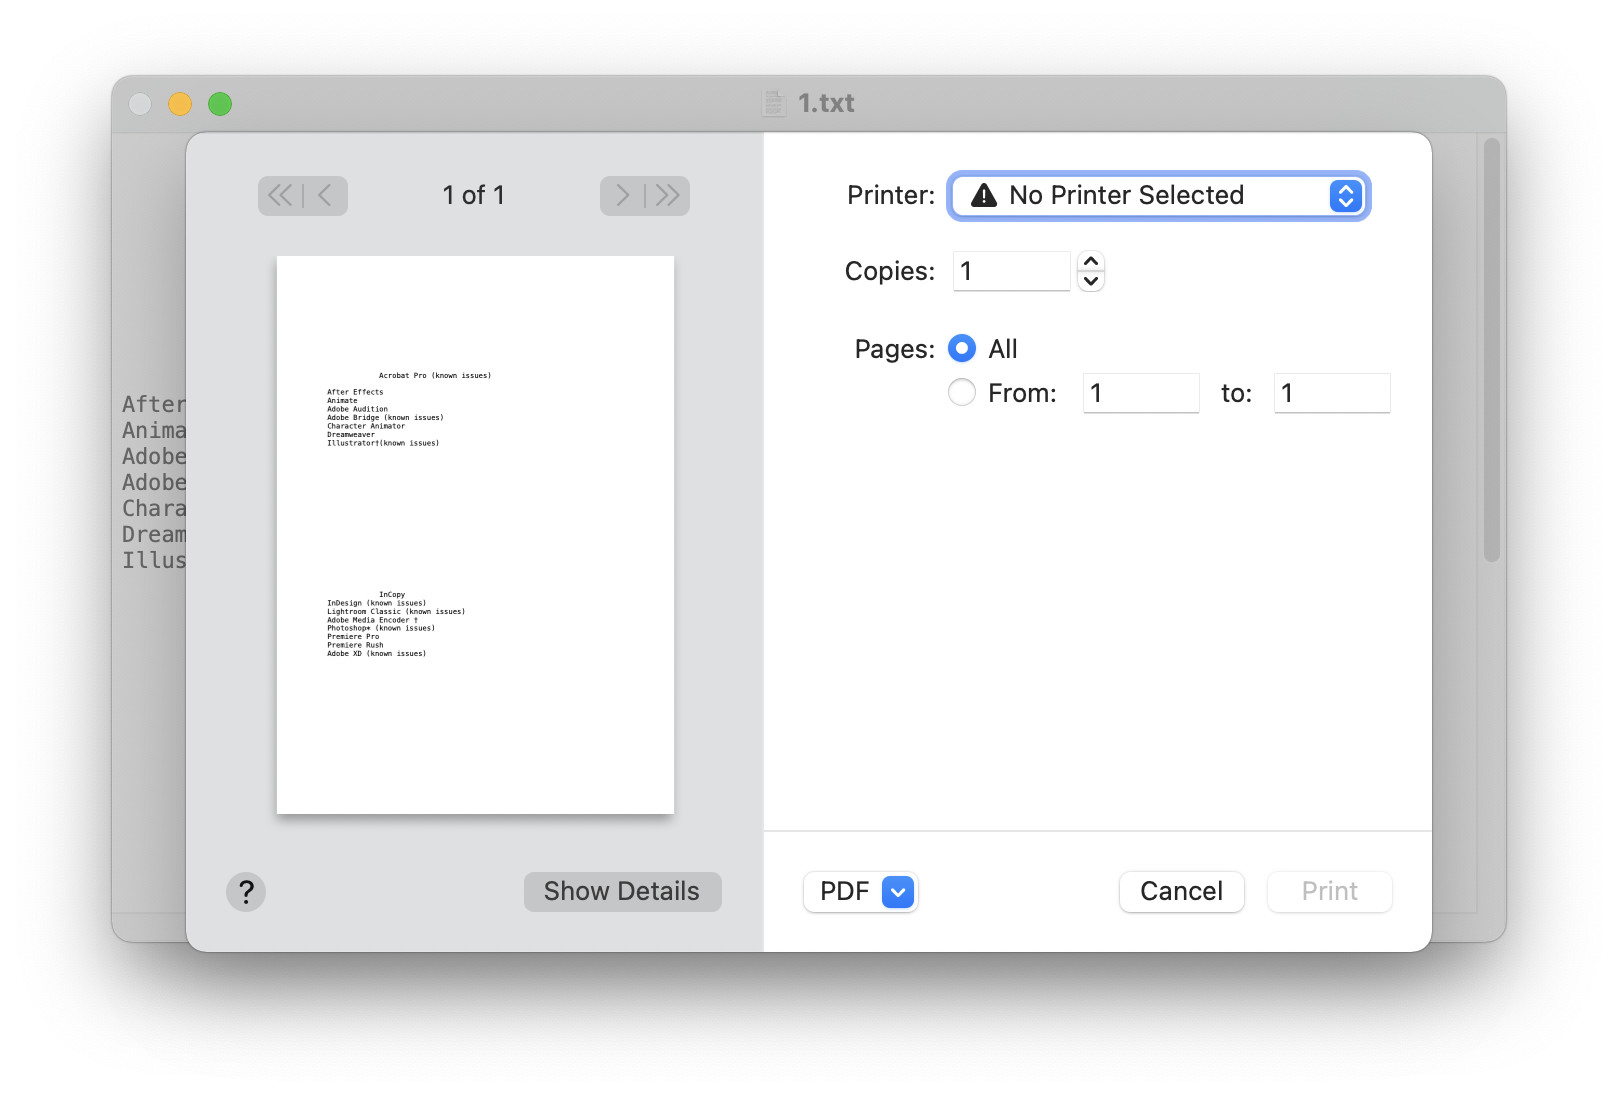
Show a detailed Print dialog box
When you try printing a document, the print dialog box is constricted by default. That is, it does not show all the printing options. In order to show it, you need to press the “Show Details” button as shown in the image below:
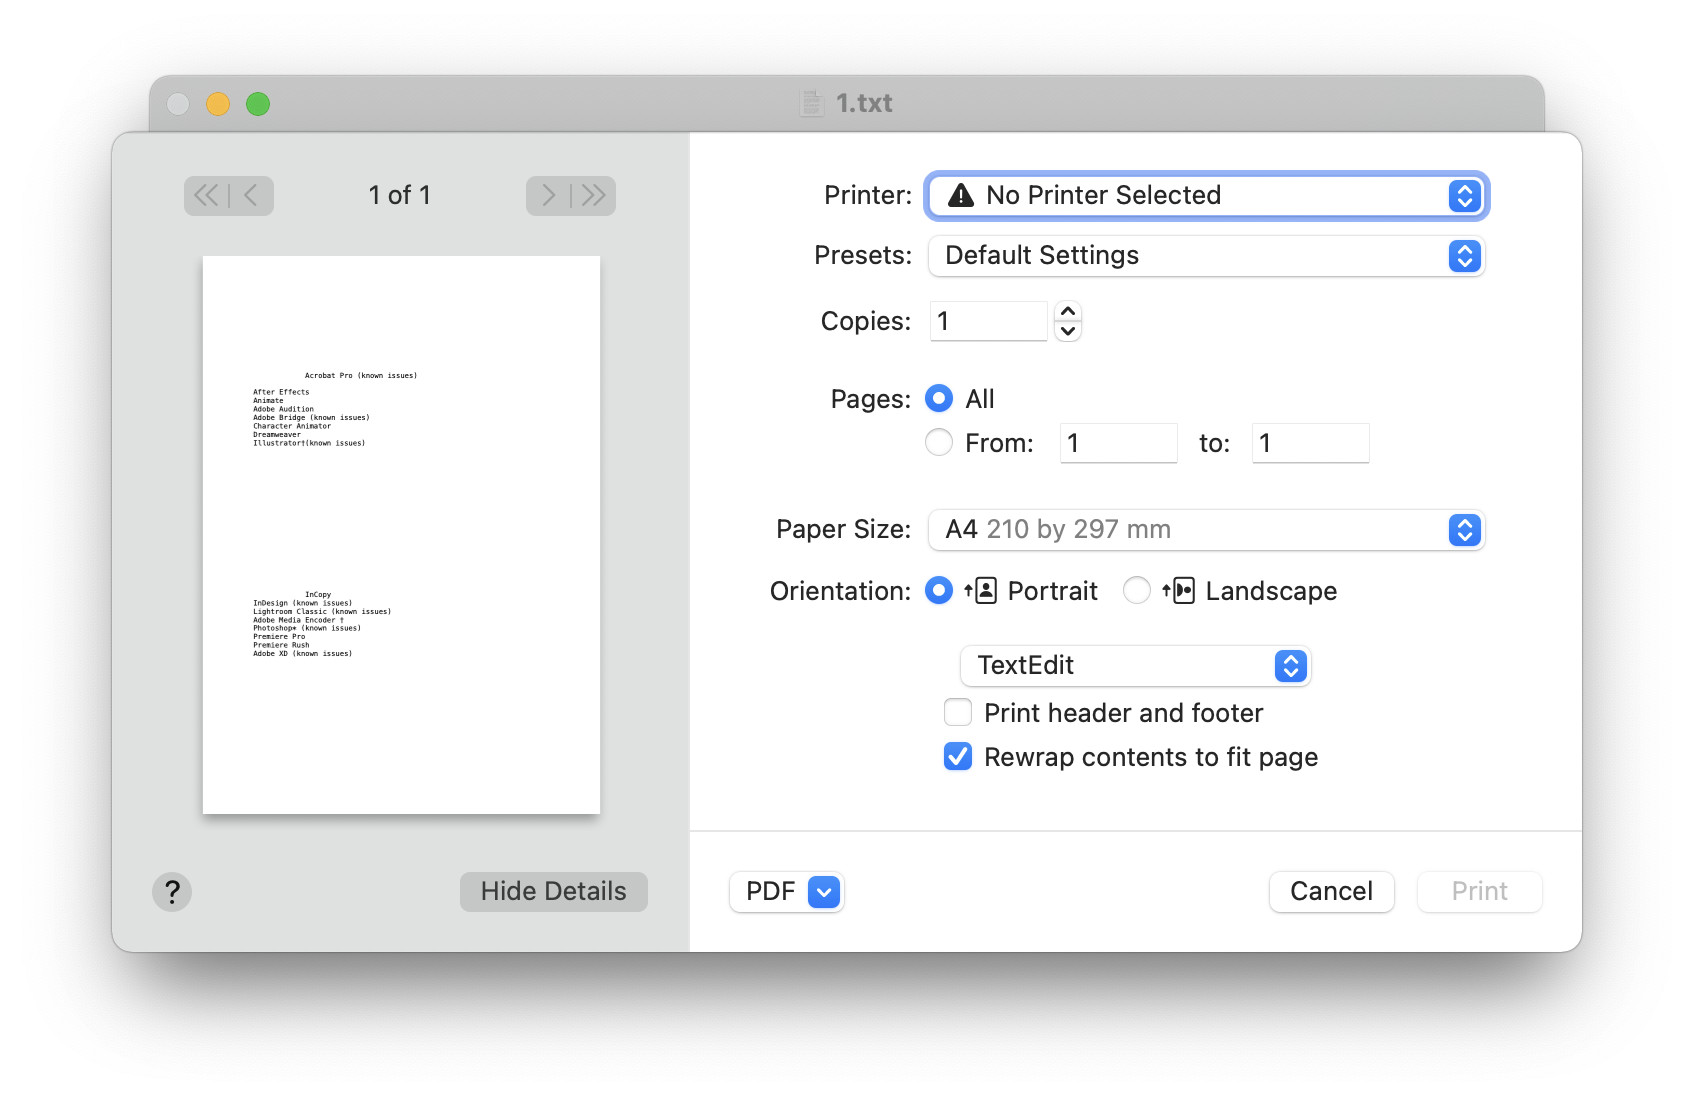
However, if you want the detailed view to appear every time by default, this is the Terminal command you can use:
defaults write -g PMPrintingExpandedStateForPrint -bool TRUEAfter pasting the command into Terminal, press Enter. This is how the detailed view looks like, for the sake of comparison:
Disable your Mac’s startup chime
The Mac’s startup chime is great, but I can’t count the number of times I’ve awakened people in the room by simply opening the lid of my Mac at night.
Thankfully, you can disable it. Just type this code into the Terminal and press Enter.
sudo nvram StartupMute=%01Add spacers in the Dock
The Dock on your Mac comes with a spacer included that separates the row of apps from the Downloads folder and the Trash Bin. Turns out, you can add as many spacers as you want to the dock. This is quite helpful if you intend to organize apps in the dock based on categories.
Use this Terminal command and press Enter.
defaults write com.apple.dock persistent-apps -array-add '{"tile-type"="spacer-tile";}' Then, paste the following code into Terminal:
killall DockThe Dock will refresh and you will be able to see the spaces. In order to remove the spaces simply drag them out of the dock and leave them into an empty space outside the dock.
Reduce Dock reappear time
If you’ve set the Dock to hide automatically, you must have at times been frustrated with the fact that it takes forever to reappear. This is especially clear when you’re in the super productivity zone!
Thankfully, this Terminal command lets you reduce the time it takes for the Dock to reappear when you hover the mouse in its direction:
defaults write com.apple.dock autohide-delay -float 0Once you’ve pasted the command, simply hit Enter.
Then, refresh the dock by using this command:
killall DockThis will reload the Dock and it should now reappear faster than ever.
Remove the Dock hiding and reappearing animation entirely
If you want absolutely no delay in the Dock reappearing, you can paste this command in the Terminal:
defaults write com.apple.dock autohide-time-modifier -float 0Hit Enter.
Then, paste this command:
killall DockDon’t forget to hit Enter again.
It’s worth noting that the Dock reappearing instantly without any animation is not aesthetically appealing, but the convenience it enables supersedes its appearance.
Always show hidden files and folders in Finder
macOS keeps certain files hidden from plain view. We’ve discussed a keyboard shortcut early in this post that reveals those hidden files in Finder. The problem with that approach is that once you reopen Finder, those files revert to their hidden status.
However, you can use Terminal to permanently unhide the files, using this command:
defaults write com.apple.finder AppleShowAllFiles -bool TRUEOnce you’ve pasted this command, press Enter.
Then, paste the following code and press Enter again:
killall FinderThis should refresh the Finder and hidden files will stay in plain view forever. If you want to re-hide the files, simply change the boolean value in the command from “TRUE” to “FALSE.”
Permanently disable drop shadows under macOS screenshots
When you capture a screenshot in macOS, sometimes, it gains a back shadow. If you’d rather prefer that screenshots don’t come with a back shadow, you can disable them using this Terminal command:
defaults write com.apple.screencapture disable-shadow -bool TRUEPaste this command and press Enter.
Then, paste this command and then press Enter.
killall SystemUIServerSet your Mac to automatically restart after a crash
Crashes on macOS are terrible. A crash may freeze your Mac prompting you to hold down the power button to perform a hard reboot. While we are not going to delve deep into the topic of macOS crashes and tips to prevent these, what if I say you can automate this process?
Simply paste the following command in Terminal and press Enter:
sudo systemsetup -setrestartfreeze onNow, the next time your Mac crashes, it will automatically reboot.
Only show active apps in the Dock
Some people only prefer to use the macOS Dock as a multitasking interface. Clicking through the app icons on the Dock is much easier and faster than other multitasking methods, especially if the Dock is not set to hide.
However, there’s one way to improve the multitasking process involving the dock: let’s get pasting this command into Terminal. (Don’t forget to press the Enter key.)
defaults write com.apple.dock static-only -bool TRUEThen, paste the following code into the Terminal and press Enter:
killall DockThis will hide all the inactive apps and only display the active apps on the Dock.
Dull app icons with hidden app windows in Dock
The macOS Dock is a beautiful virtual shelf that hosts your most important apps. It shows a tiny dot beneath apps that are open. However, when working with multiple apps and countless windows within, it could get difficult to comprehend which app has its window in the foreground and which app’s windows are hidden.
Thanks to this handy Terminal command, you can make apps with their windows hidden appear dimmer than other apps in the Dock. Paste the following command into Terminal and press Enter:
defaults write com.apple.Dock showhidden -bool TRUE; killall DockHide files and folders in Finder
Want to hide a file or a folder in Finder, for whatever reason? Here’s how.
Copy and paste this command into Terminal; then, press Enter.
chflags hidden [path of folder]Make sure to replace “path of folder” in the above command with the path of your file or folder in Finder without parenthesis.
View any file’s contents
Sometimes, you may come across files that cannot be opened since you do not have the supported application to open them. In such cases, you can use the following Terminal command to open these files anyway. While you won’t be able to take complete advantage of the file, you could salvage bits and pieces of information.
Don’t forget to press Enter after pasting this code.
cat [file path]Make sure to replace “file path” in the above command with the path of your file in Finder without parenthesis.
Stop apps from uploading to iCloud
If you don’t want apps on your Mac to upload their contents to iCloud, you can use this Terminal command to bar them from doing so:
Paste the command and then press Enter.
defaults write NSGlobalDomain NSDocumentSaveNewDocumentsToCloud -bool falseEnable text selection in QuickLook
QuickLook lets you quickly preview files on your Mac. However, the experience is limited to viewing. You cannot interact with files while viewing them with QuickLook without opening them in their respective apps.
Let’s say, there’s a PDF you’re previewing using QuickLook, you wouldn’t be able to copy text from the PDF while in QuickLook. But what if I said you could?
Head over to the Terminal, paste this command and hit Enter.
defaults write com.apple.finder QLEnableTextSelection -bool TRUE; killall FinderAfter you’ve executed this command, you’ll be able to select and copy text from within files while previewing them using QuickLook.
Make your Mac say anything!
Test-to-speech is a wonderful feature. You type some text and your Mac will speak it for you. However, if you want your Mac to quickly speak something to you, there’s a neat little Terminal trick:
Say "whatever you want your Mac to say"Make sure to hit Enter after pasting this command into the Terminal. Also, make sure you include the quotes this time. However, you can write anything you’d like between the quotes.
Honorable mention (not sponsored)
If you’ve loved this section of Terminal tweaks but don’t want to remember and type these commands every time, TinkerTool is the app you are looking for.
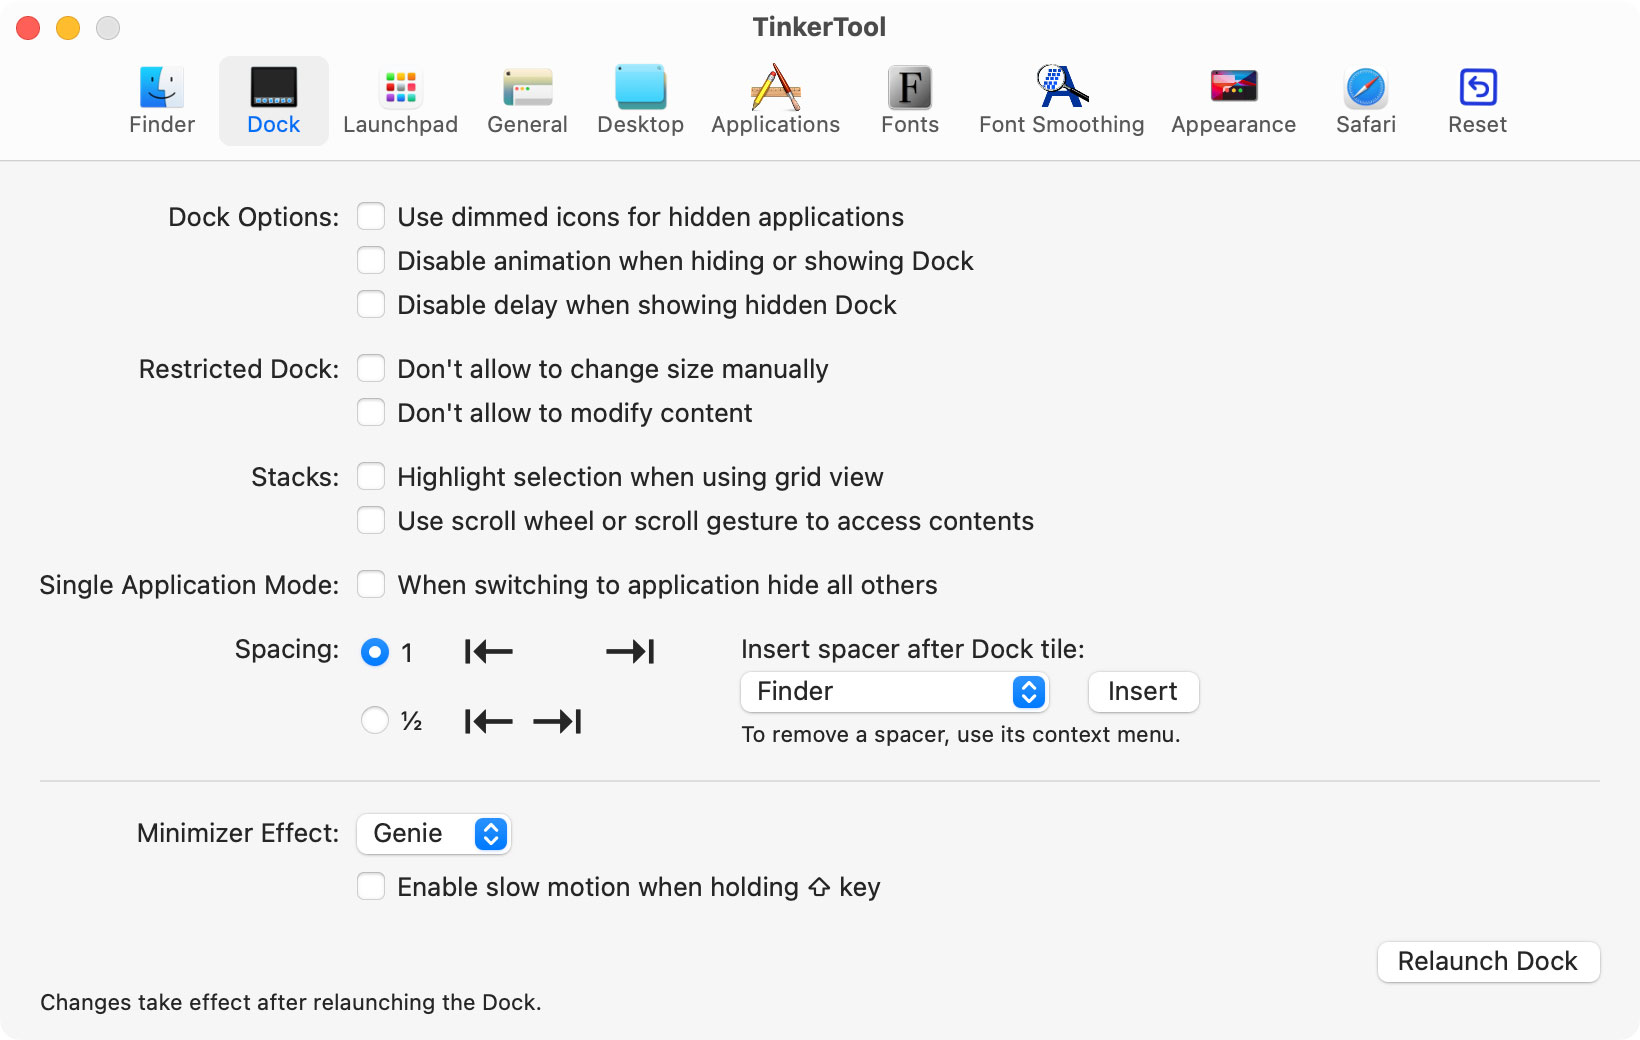
It’s a free app that lets you tweak different elements within macOS in the same way Terminal does. The only difference is that TinkerTool offers a friendly user interface with buttons that you can press to perform the same functions as some mentioned in the Terminal tips and tricks section of this post.
You can download TinkerTool from here.
Window Management Tips and Tricks
Hide everything except the window you’re currently on
It’s sometimes extremely frustrating when you need to work with multiple application windows at once and they’re all in your face on the screen.
Instead of minimizing every window that you don’t need individually, you can simply press Command + Option + H to hide all the windows except the one you’re currently working on.
It’s truly liberating.
Open a new window quickly
When you’re in an app and you want to open a new window, instead of using the mouse cursor, you can simply press Command + M.
Hide a window quickly
There’s no dedicated button for you to click when you need to hide a window in macOS. Thankfully, you can press Command + H to instantly hide a window. This is quite helpful if you want to declutter your workspace and lend your focus to a single task.
Move windows in the background without bringing them to the foreground
When a window overlaps another window and you try to move the window in the background, it automatically comes to the foreground.
In order to avoid that and keep the window in the background even while dragging it around, hold the Command key while doing so. This way, the window won’t jump to the front and you’ll be able to place it wherever you want.
Enable three-finger drag
Those with a MacBook or a Mac with a trackpad can enable a setting that lets you drag windows by swiping three fingers together on it.
Here’s how to enable three-finger window dragging:
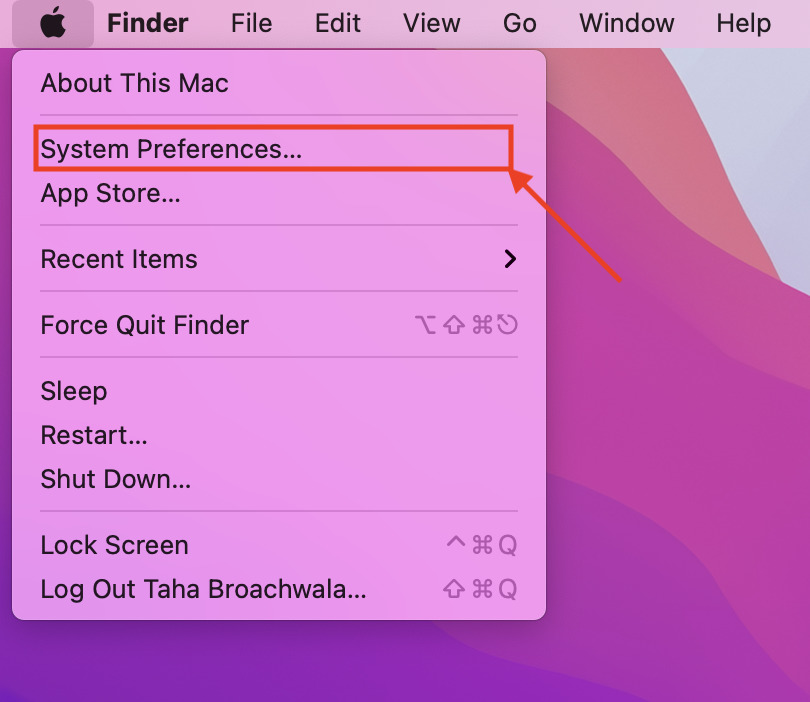
Head over to macOS Preferences by clicking on the Apple logo in the Menu bar and choosing System Preferences.
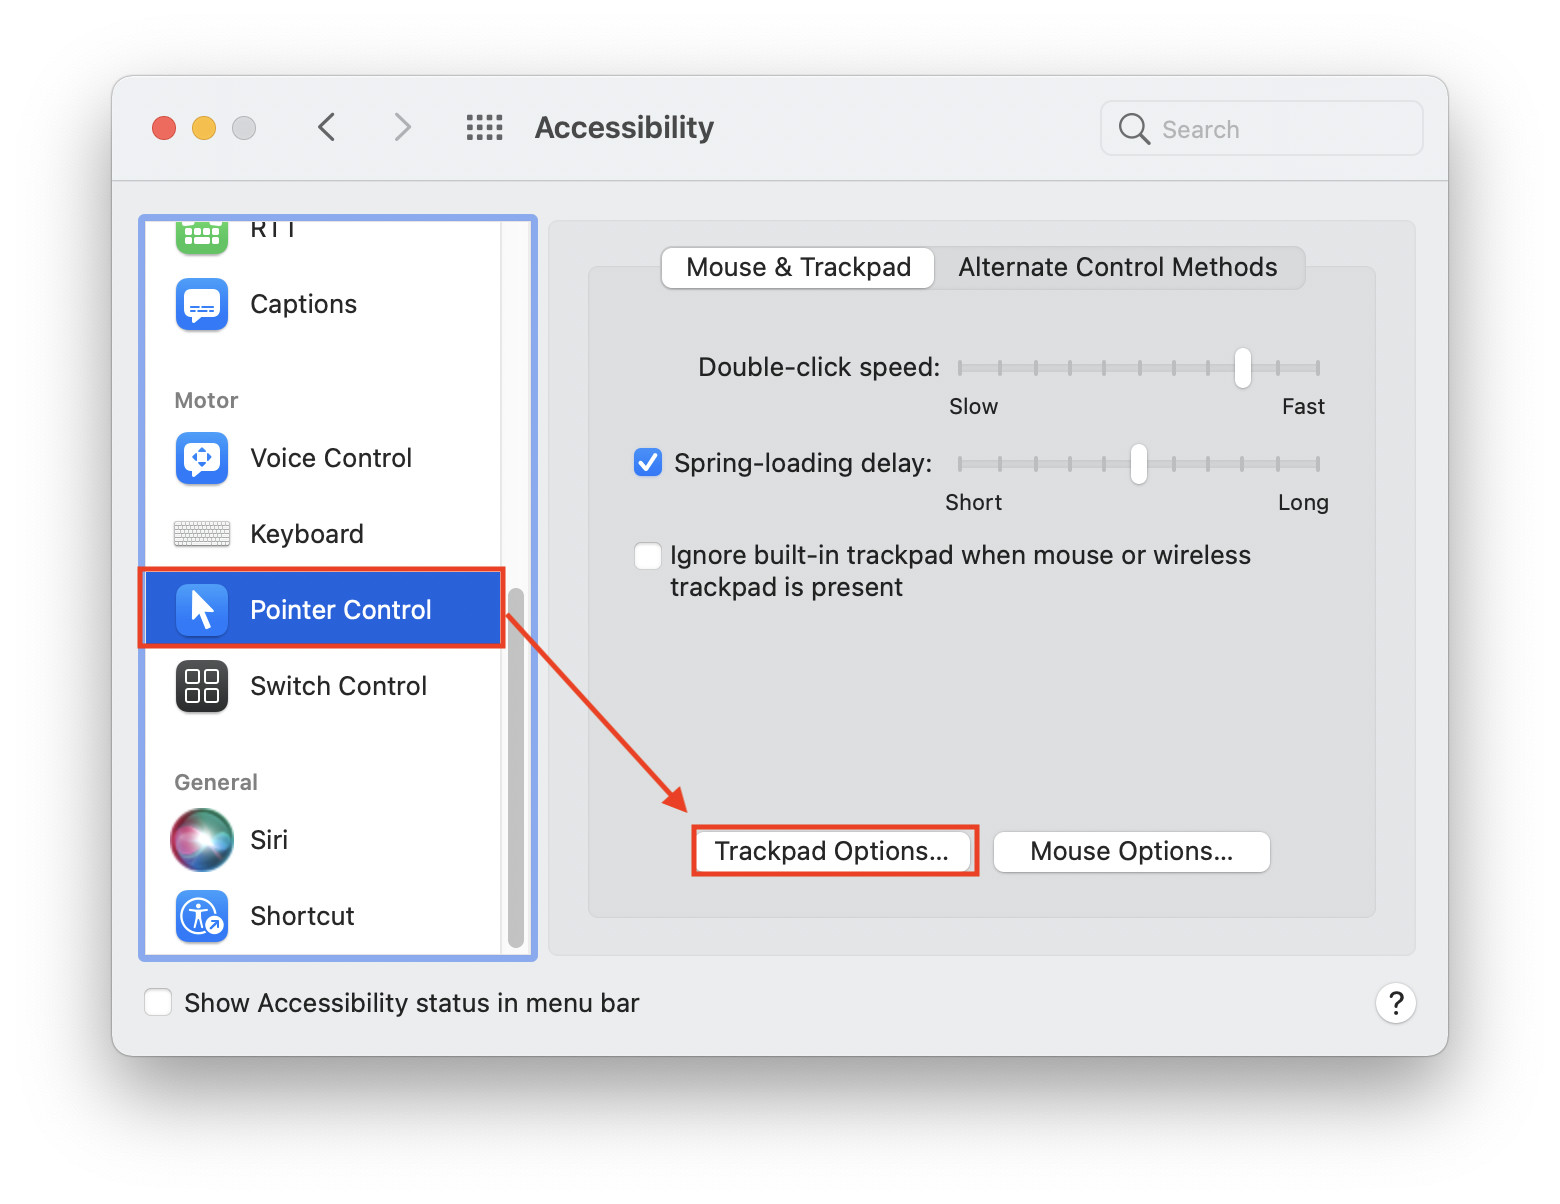
Then, head over to the Accessibility tab.

From the sidebar, select Pointer Control. Then, click on Trackpad Options.
When a popup with settings appears, tick the “Enable dragging” checkbox. Then, select “three finger drag” from the dropdown list beside it.
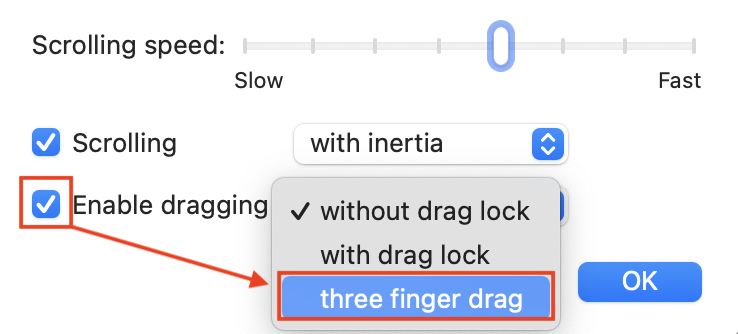
Now you can drag with three fingers to move any window. You won’t have to hold the window and drag it.
Easily switch between multiple desktops
If you are working with multiple desktops, there are several options for you to switch among them. However, the easiest option is to press the Control + keys. (without the square brackets)
Preview app Tips and Tricks
The Preview app in macOS is quite underrated. At the surface, it appears to be a simple app only capable of viewing certain file types. However, when you delve in, it reveals its true potential, replete with complex tools only found in expensive apps.
Extract an image from its background using Preview
Did you know you can extract an image from its background in Preview? Here’s how to do it!
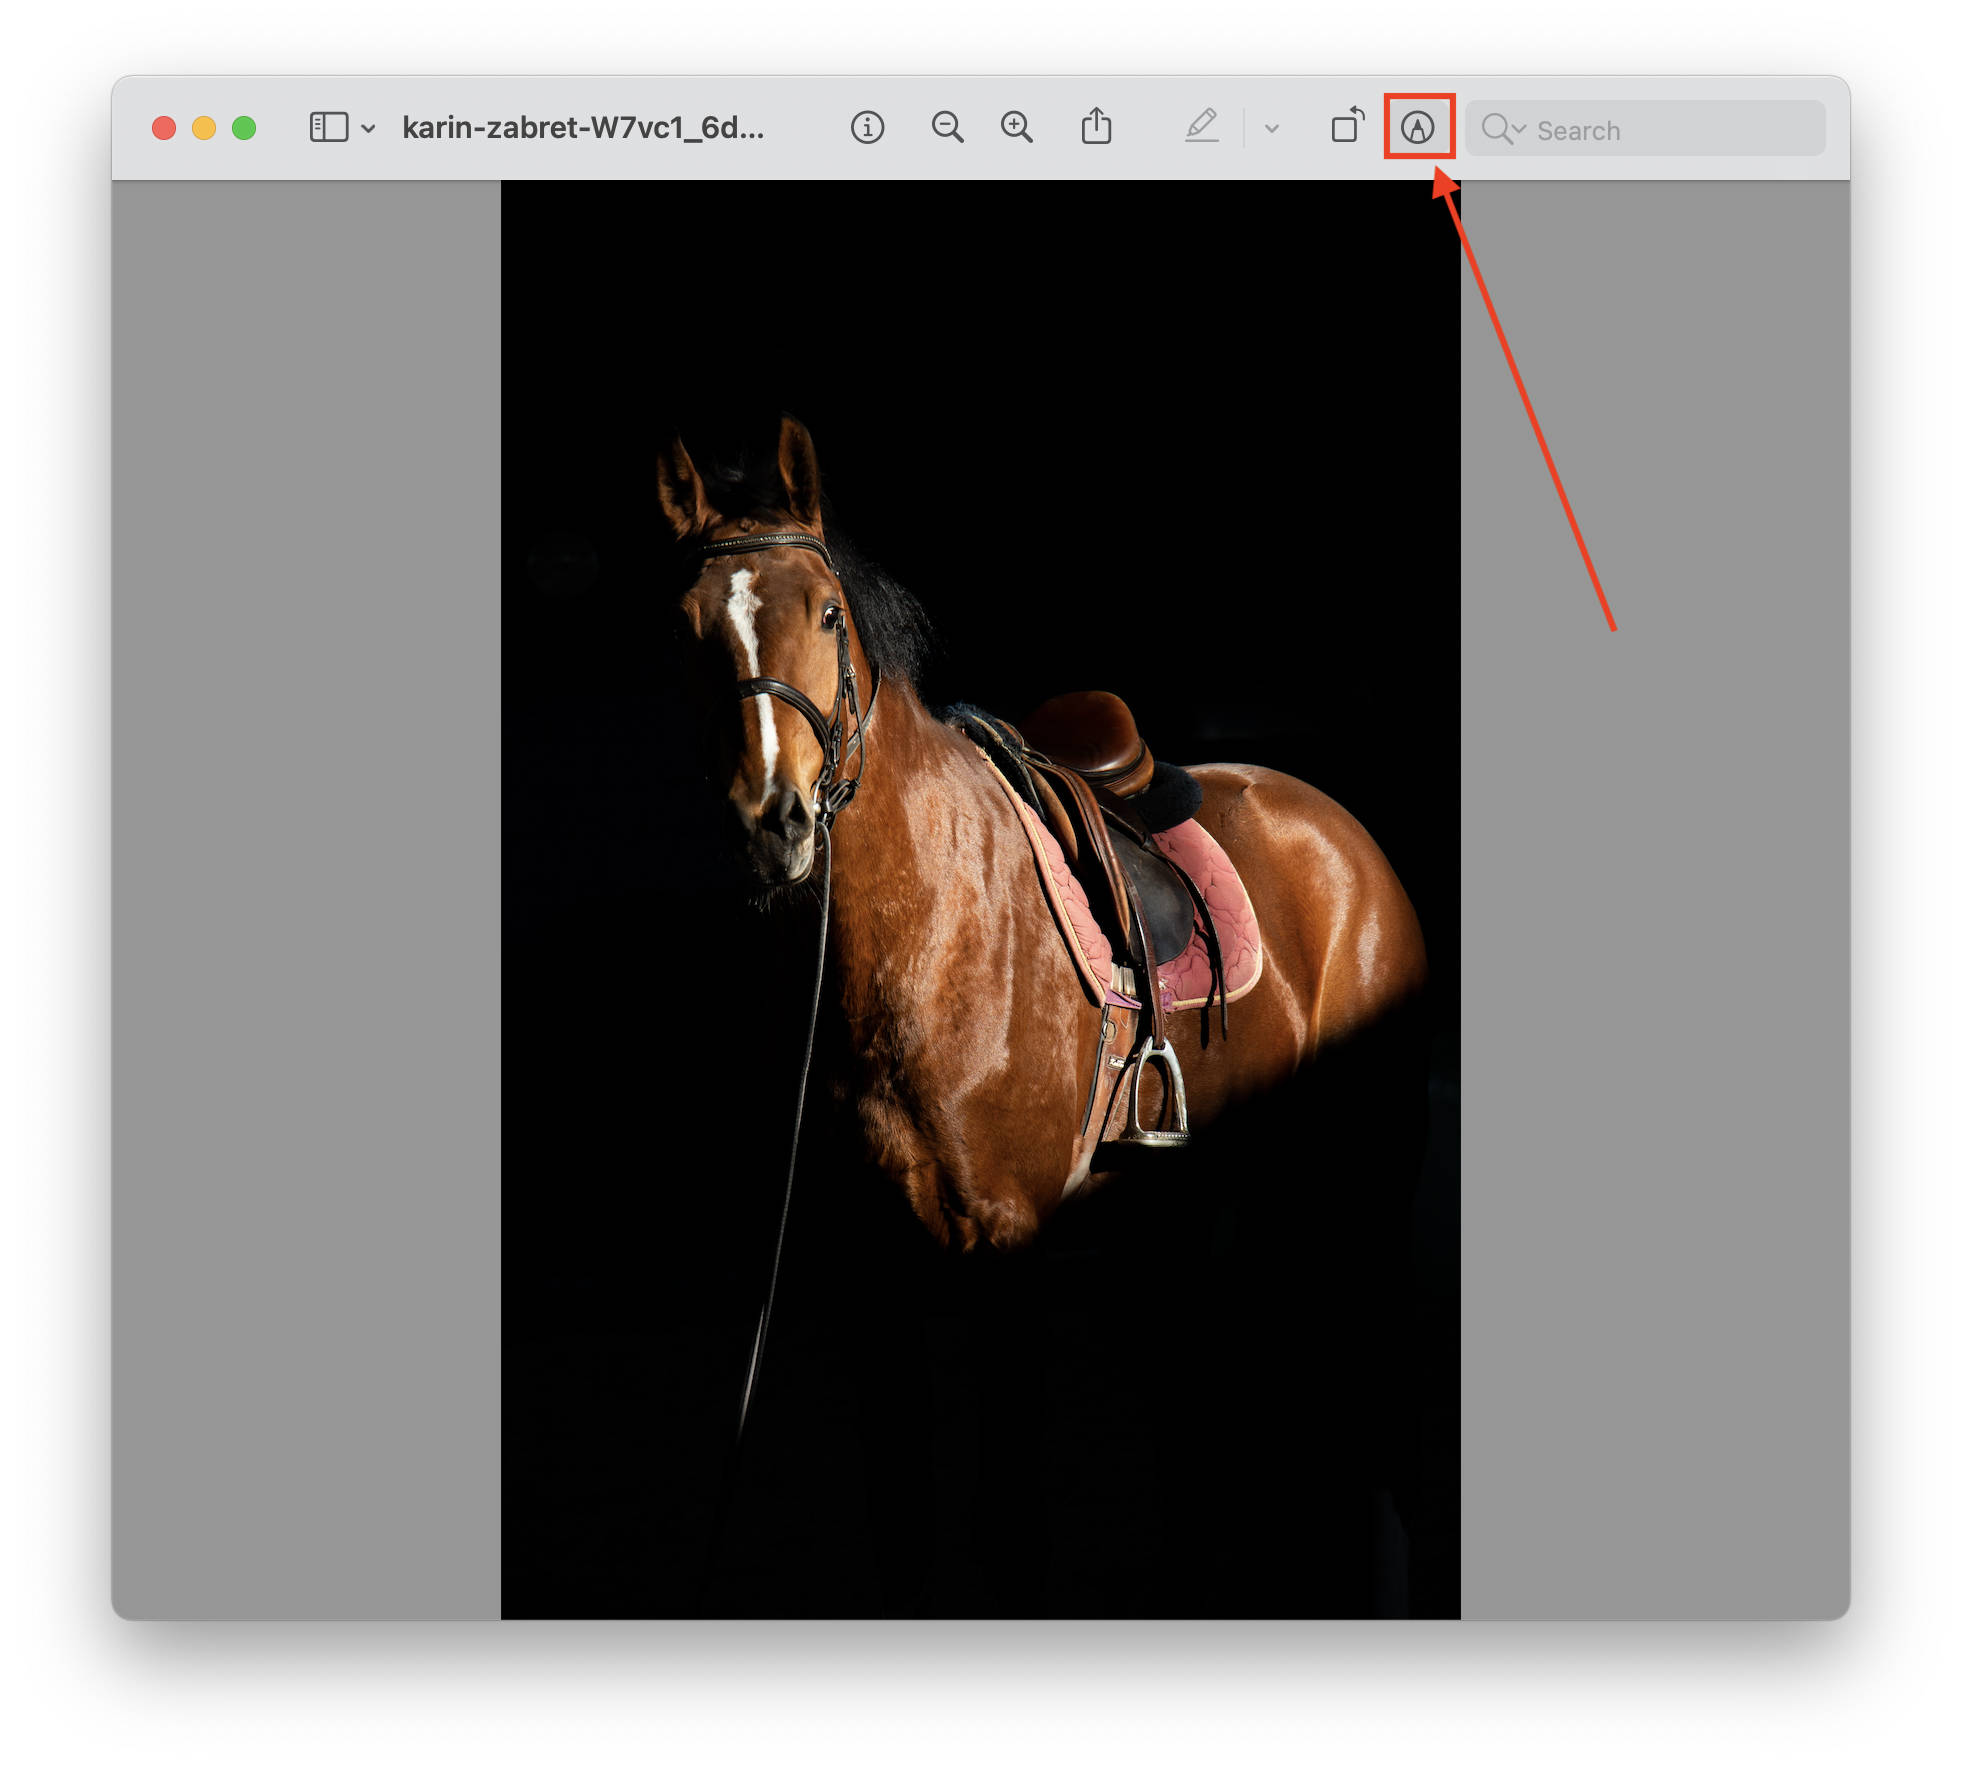
Open the image you want to work on. Make sure it has a defined object (the image you want to extract) as Preview isn’t as powerful as Photoshop or Affinity Photo in extracting images.
Click the Show Markup Toolbar button if the toolbar isn’t already visible as shown in the image below:
Then, from the Selection Tools menu, choose the Smart Lasso Tool.
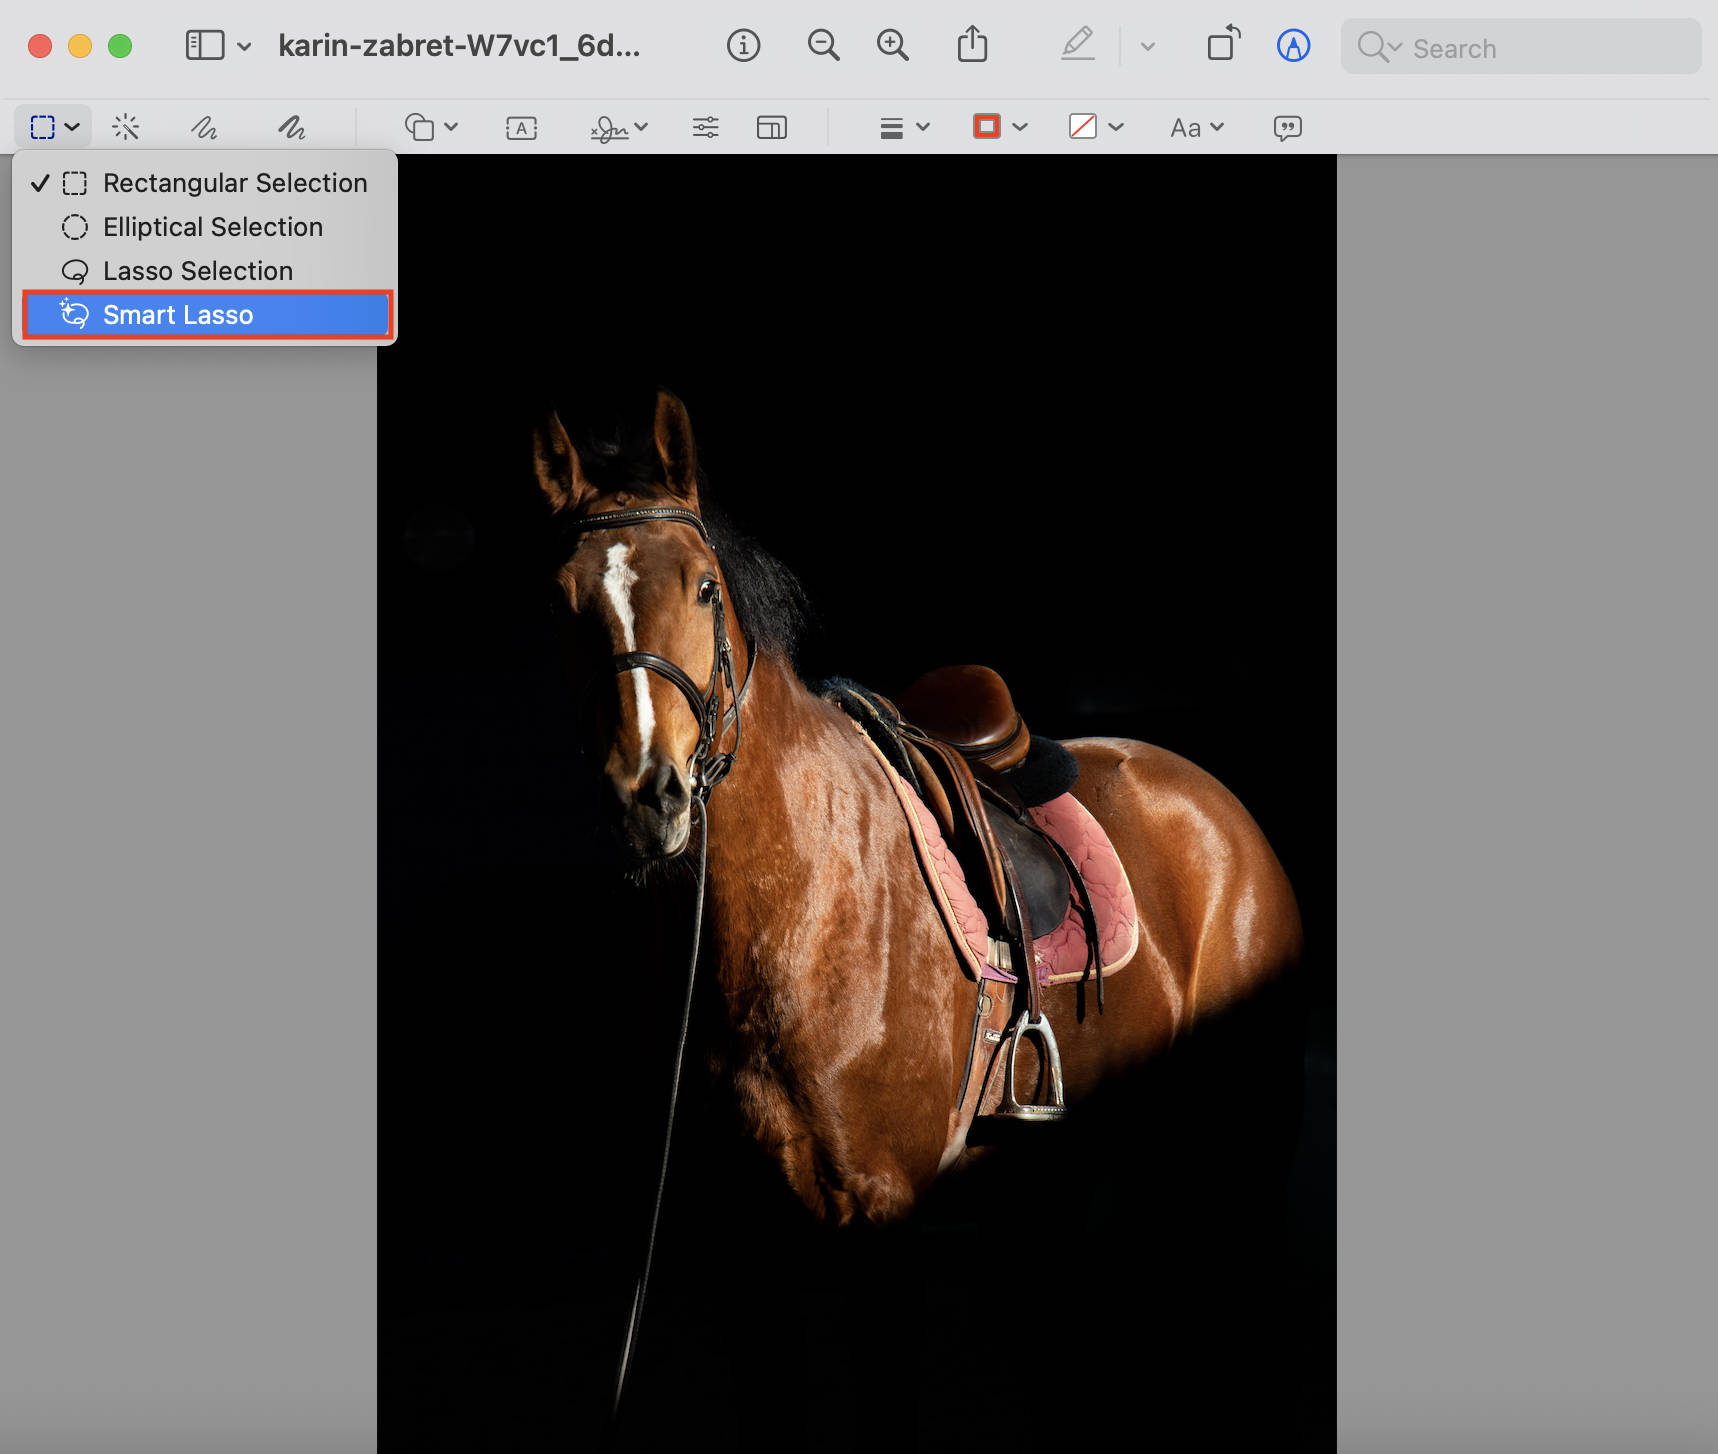
Then, trace a line across the border of the object you want to extract.

Finally, when you’ve completed tracing along the object’s borders (remember to meet the endpoint with the starting point), you can either press Command + C to copy the object or head over to Edit - Invert Selection and then press Delete to delete the background.
Miscellaneaous Tips and Tricks
Some more interesting keyboard shortcuts
| Keyboard Shortcuts | Function |
|---|---|
| Command + Q | Quit an Application |
| Shift + Command + 3 | Capture a full-screen screenshot |
| Shift + Command + 4 | Capture a selective screenshot |
| Shift + Command + 4, then, Spacebar | Capture a screenshot of a particular window. |
| Shift + Command + 4, then, Spacebar. Later, press Option while clicking the mouse | Capture a screenshot of a particular window without a drop shadow |
| Shift + Command + 4, then, while dragging the viewfinder box, hold Spacebar. | Move the screenshot viewfinder box freely to adjust it |
| Shift + Command + 4, then, while dragging the viewfinder box, hold the Option key. | Resize the screenshot viewfinder box keeping the origin at the center |
| Shift + Command + 5 | Access Screenshot and Screen Recording console |
| Shift + Option + Volume Key | Increase or decrease the volume in quarter increments, offering granular control over your volume. |
| Command + ~ | Switch between windows of an app |
| Command + . | Hit the cancel button on dialog boxes |
| Option + Command + Esc | Force Quit an unresponsive app |
| Option + (without square brackers) | Opens preferences associated with the function printed on Function Keys |
Avoid accidentally triggering hot corners
Accidentally triggering a hot corner while hovering your mouse pointer in a corner of your Mac’s screen is anger-inducing.
Thankfully, there’s a trick to avoid that, too.
First, head over to System Preferences - Mission Control - Hot Corner.
There, select a corner and while choosing an action from the dropdown list, press and hold the Command key.
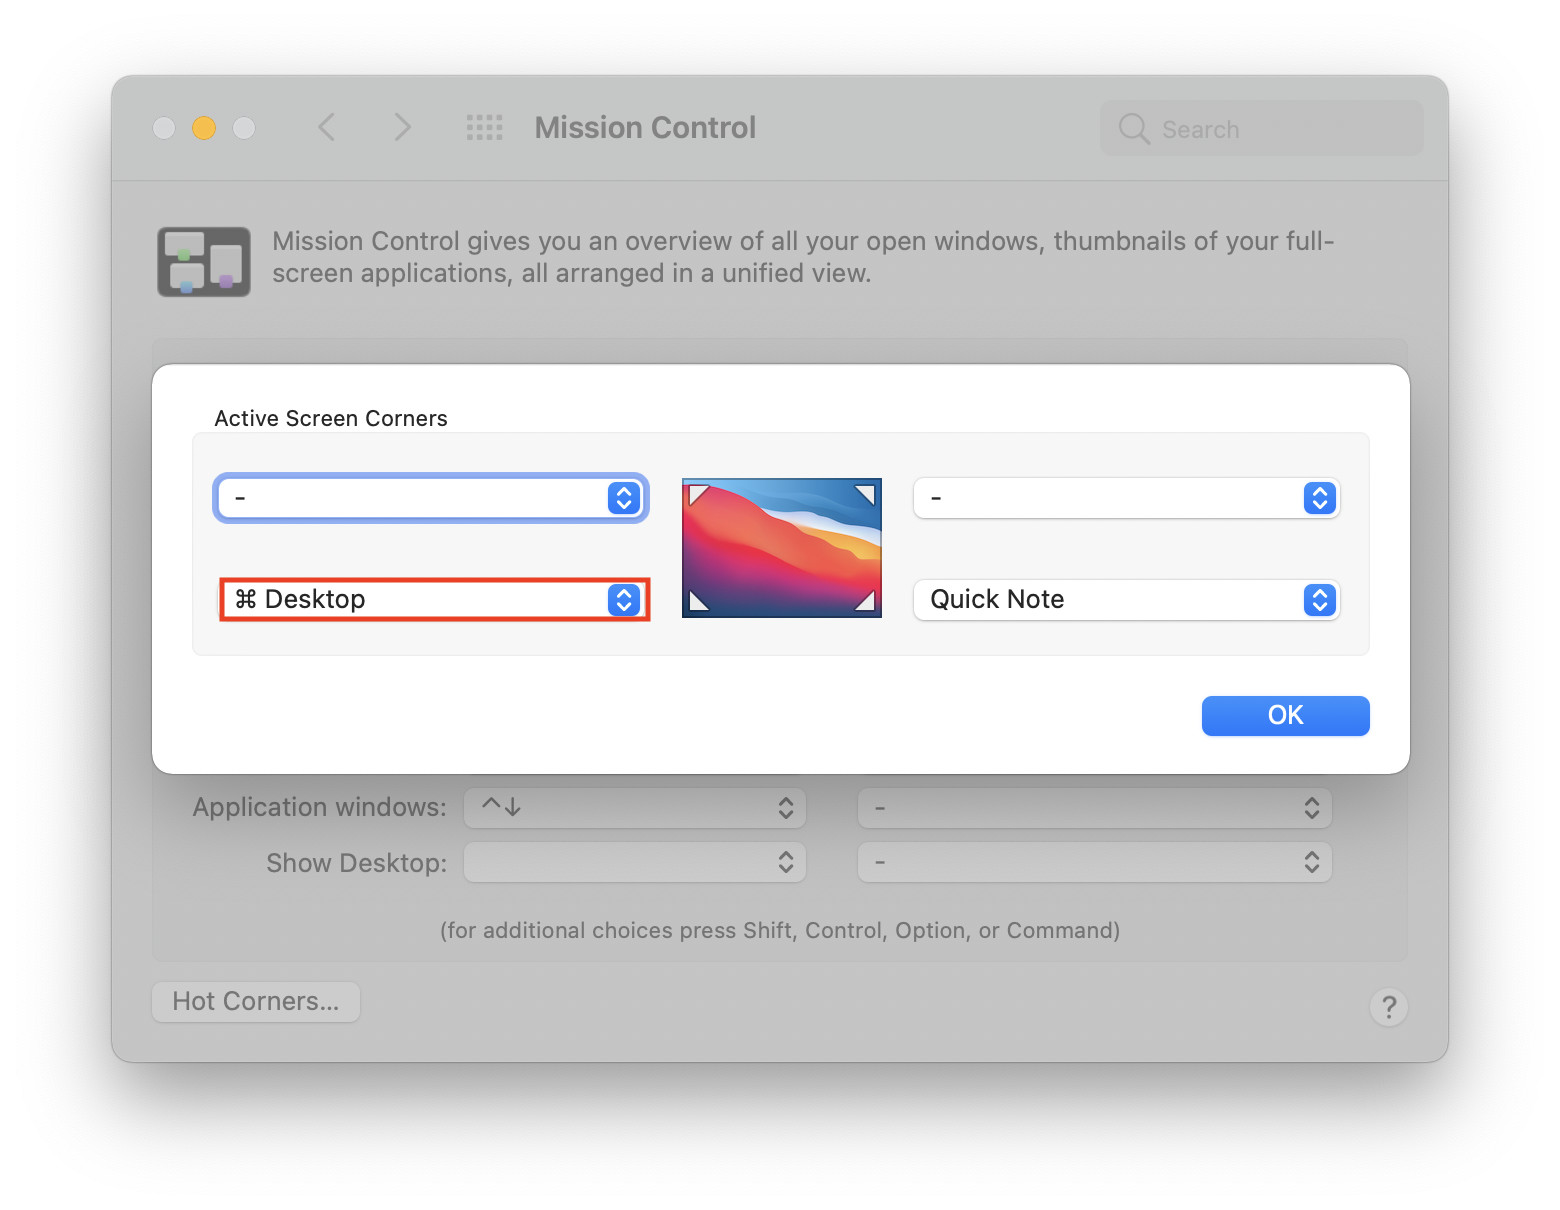
Once you’ve chosen the action, that hot corner will only activate if you press the Command key alongside hovering your mouse pointer in that corner. This easily solves the problem of Quick Note’s unsolicited pop-ups from a corner in macOS Monterey, for instance.
Note that you can use any key combination for this purpose. However, since the Command key is the easiest option, I decided to choose that for the demonstration.
Quit all apps at once!
There are times where you might want to quit all apps at once. Unfortunately, there’s no button that allows you to do that (unless you use Alfred).
That said, not all hope is lost, as you can easily create an Automator shortcut that quits all active apps with a single click.
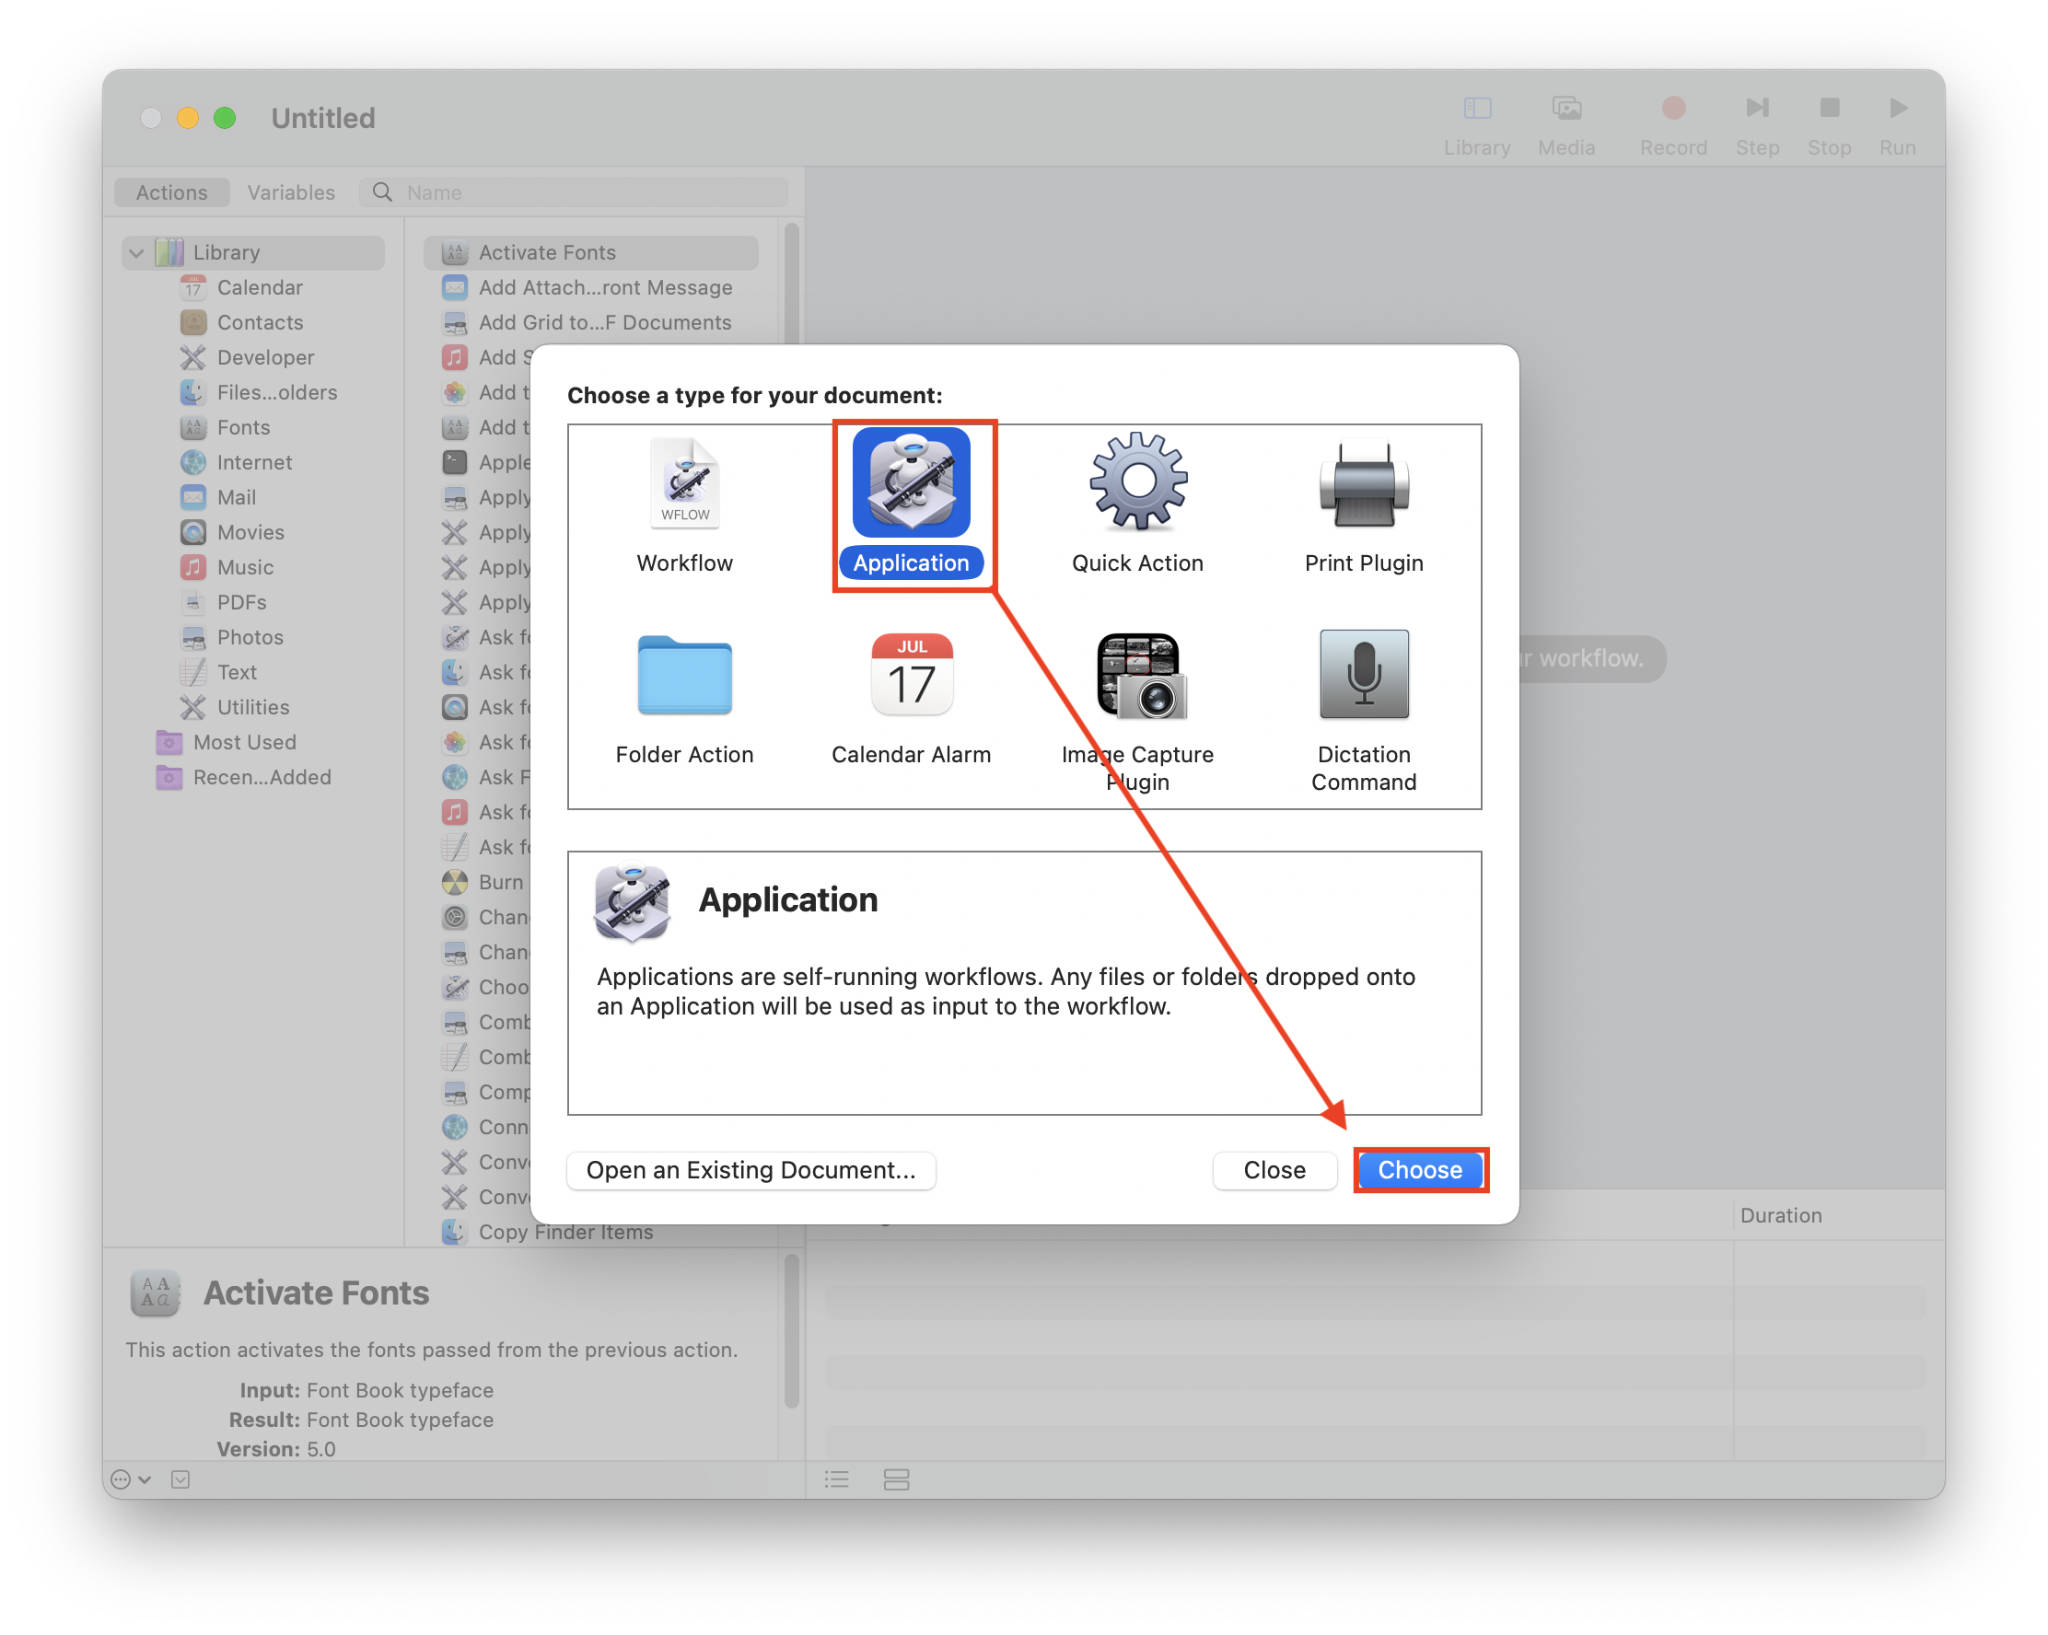
- Head over to the Automator app.
- Select “Application” as the choice for the project type and click Choose.
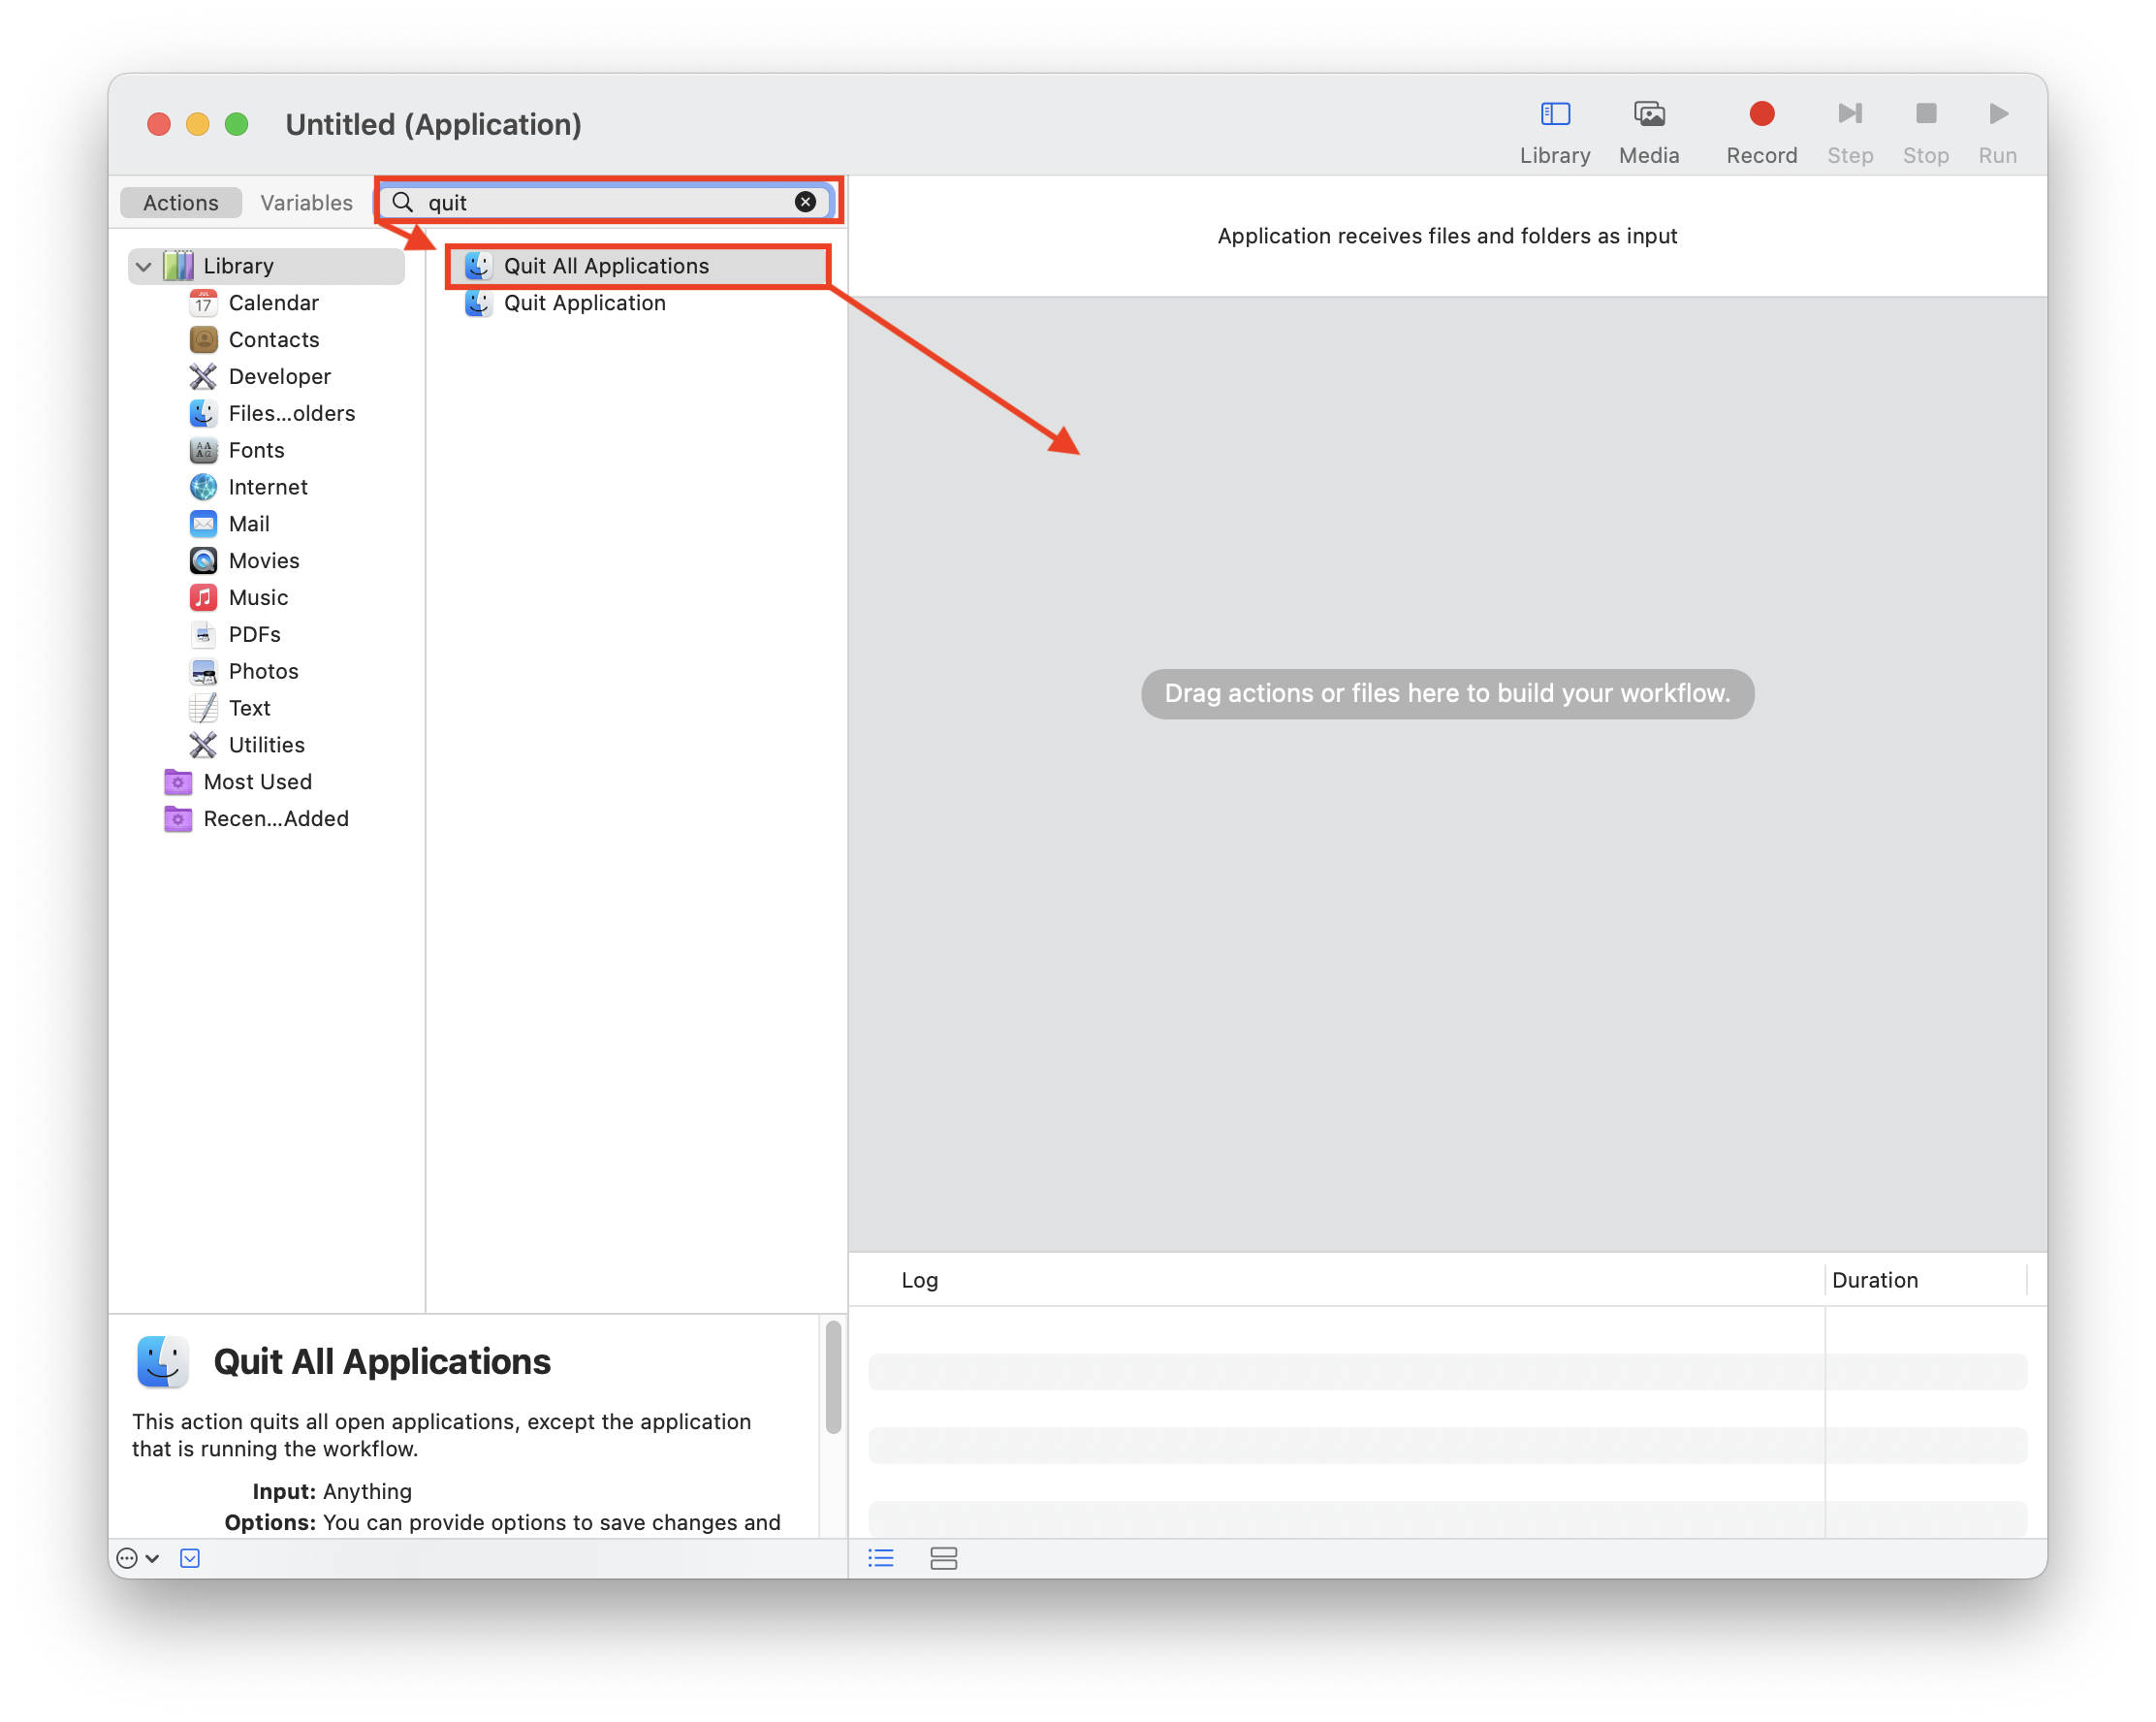
- Then, search for the Quit All Applications action and drag it into the empty space to the right.
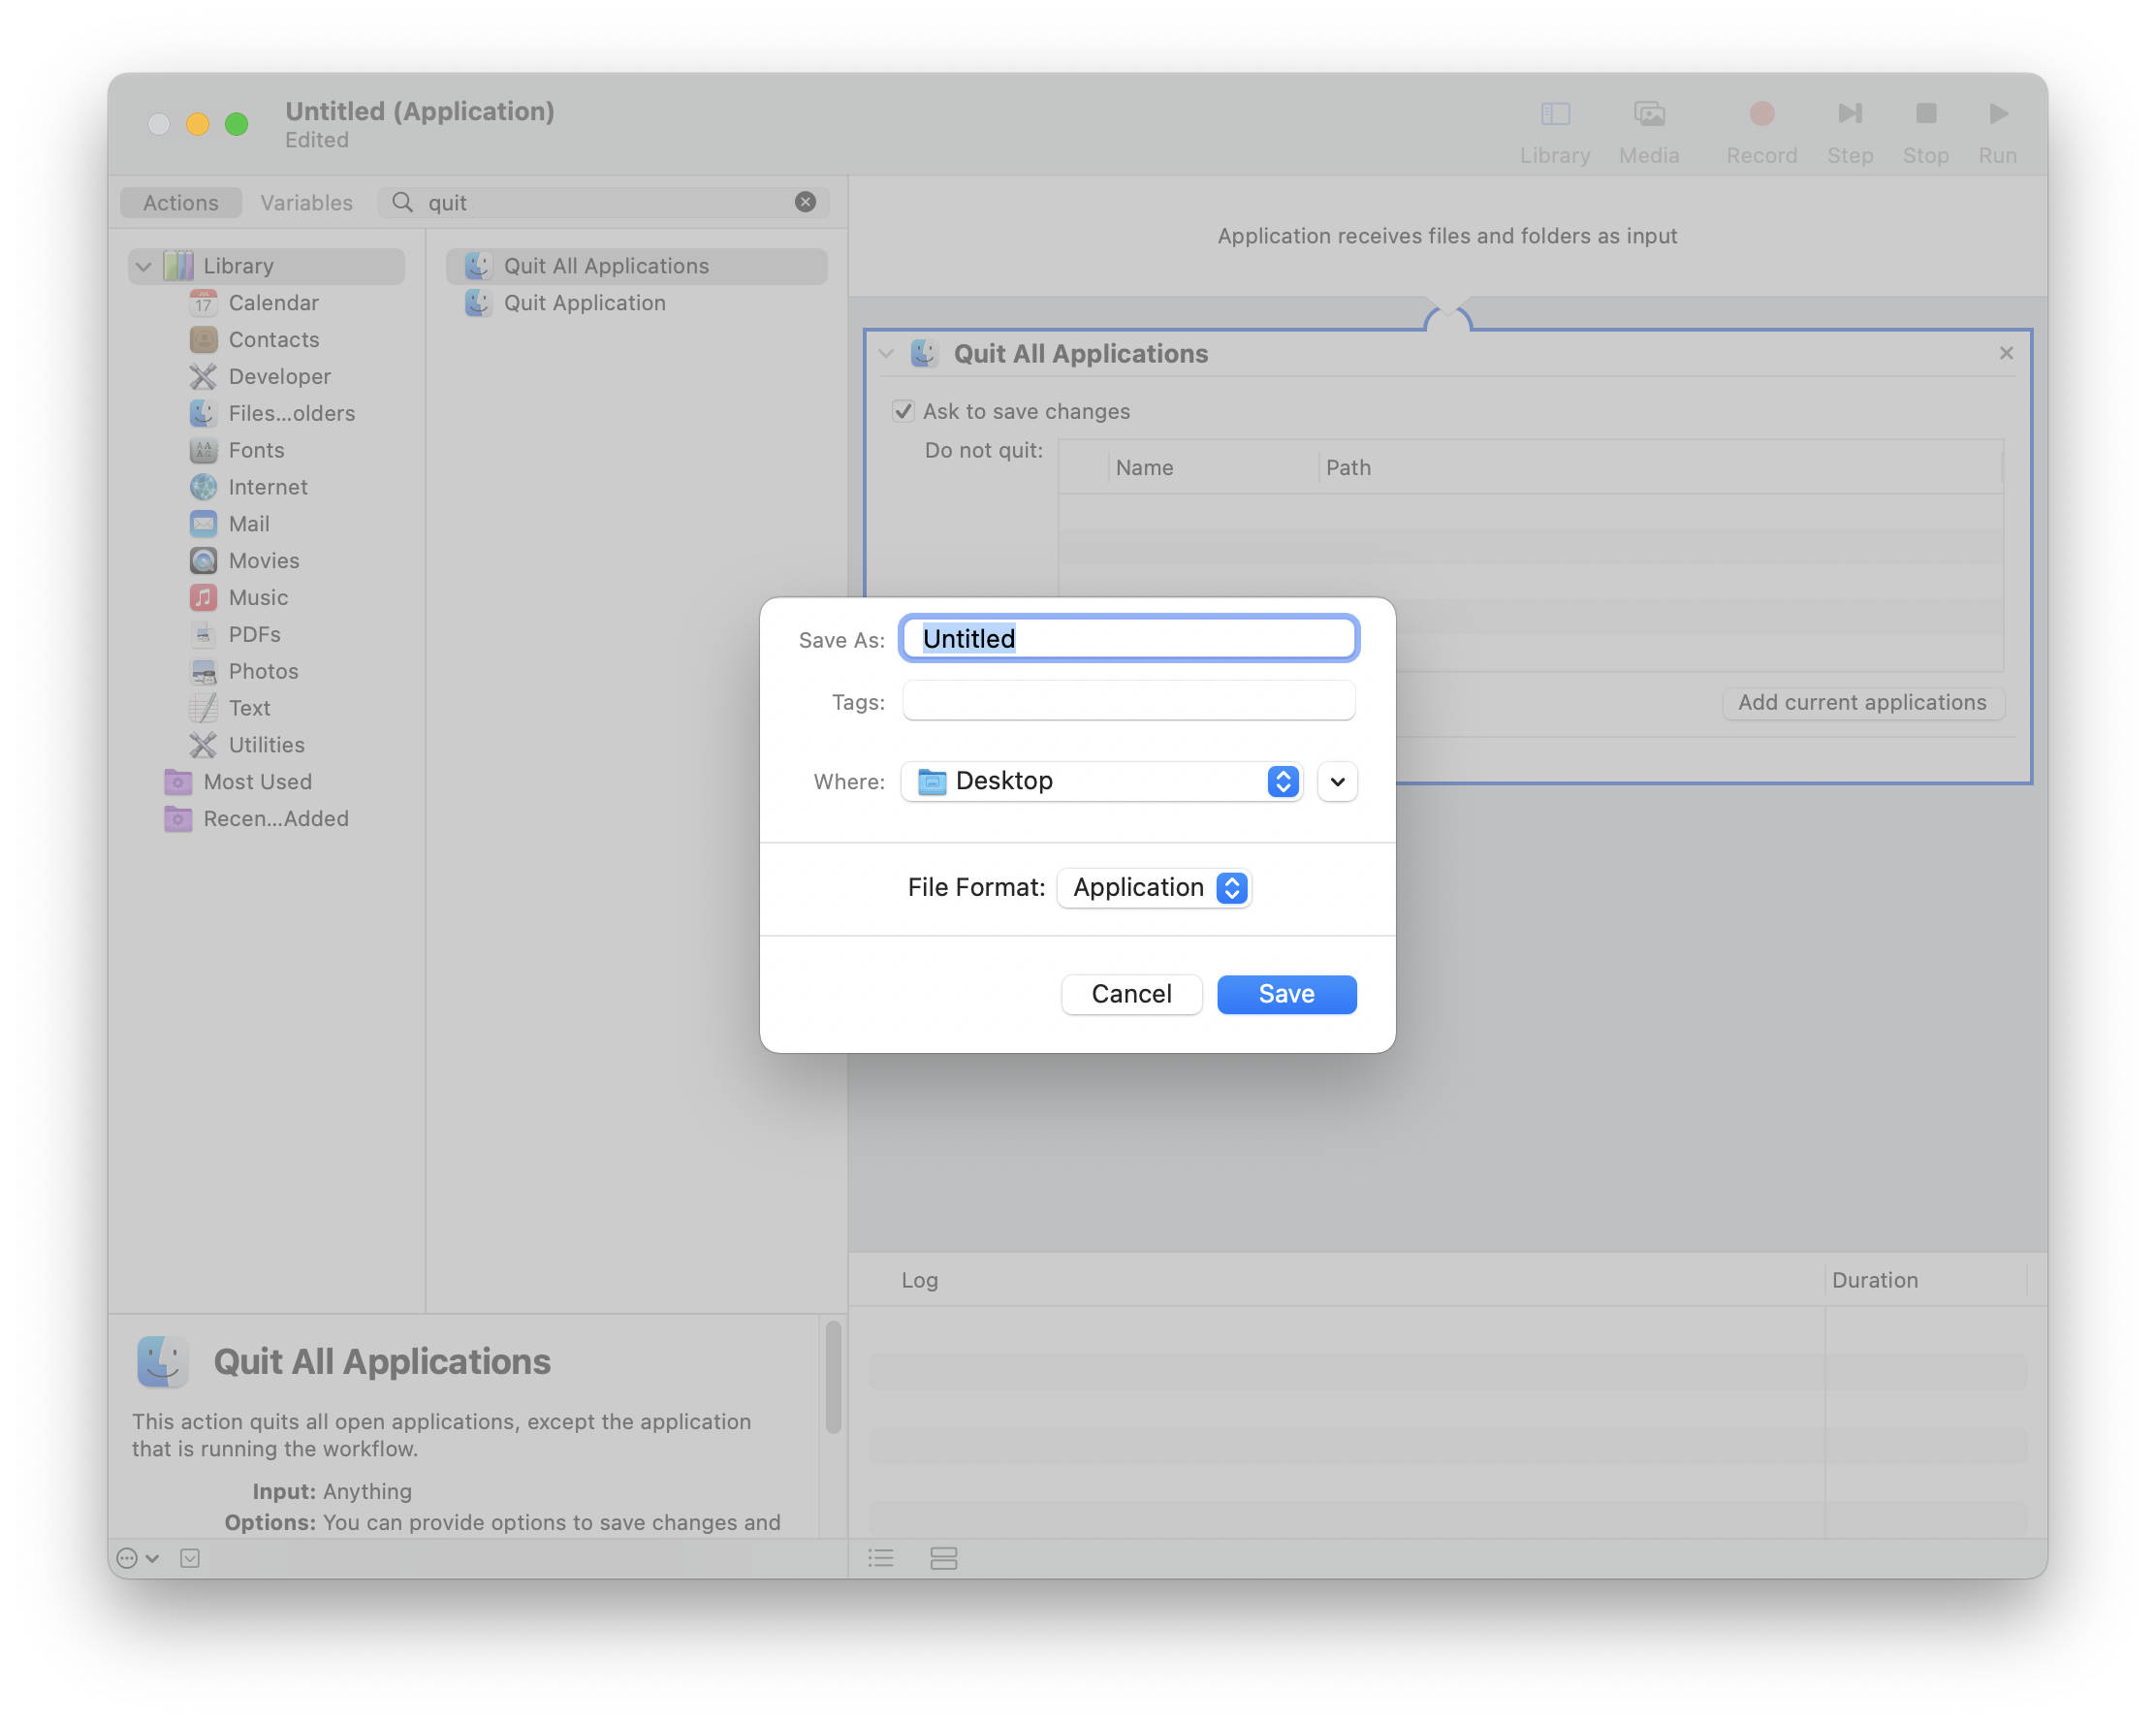
- Finally, click on the File tab in the Menu Bar and choose Save. When a Save dialog box appears, choose the location where you want to save the app and click Save.
Now, the great thing about this application you’ve just created is that it’s easily accessible via Spotlight search. Simply bring up Spotlight search and type in the name of the app. For instance, I’ve named it “Quit all Apps.” So, when I finally press Enter, the app instantly runs and quits all apps.
Alternately, you can also double-click on the app wherever you’ve saved it to run it. However, I think accessing it using Spotlight is the better option.
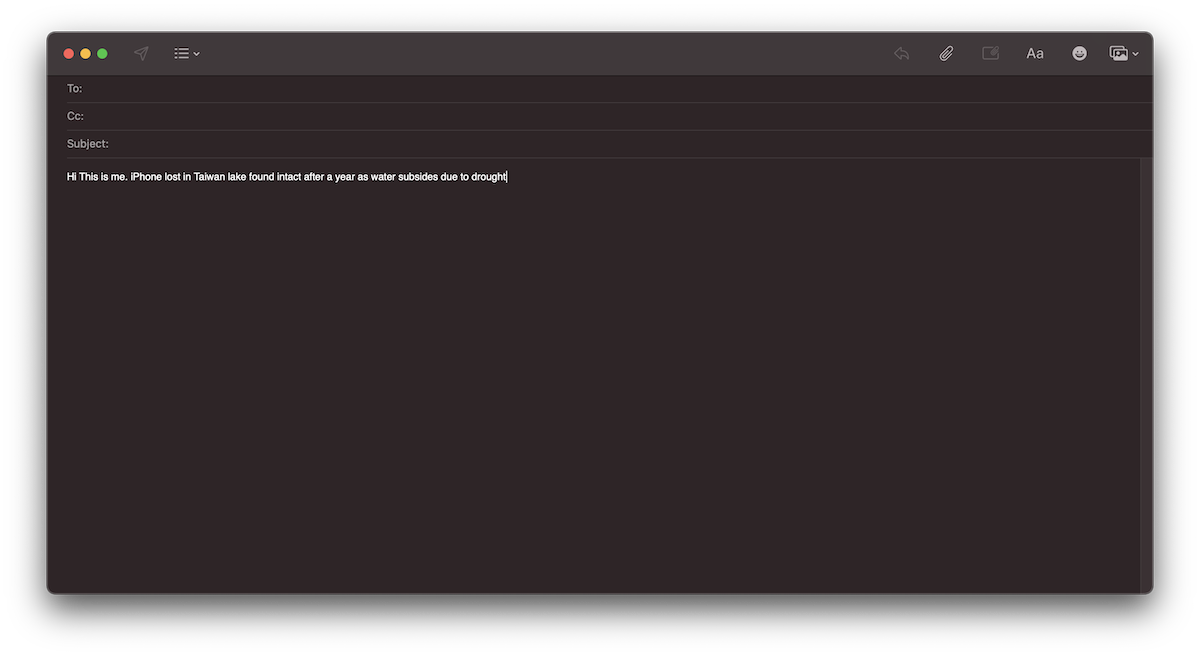
Add a message to the lock screen on Mac
In case your Mac is lost or stolen, you can choose to display a message on the lock screen that could show your contact information and instructions on how to return it.
To add a message to the lock screen, follow the steps mentioned below:
- Head over to System Preferences - Security and Privacy.
- Click the lock button in the bottom right corner of the screen and enter your login password or use your fingerprint to authenticate.
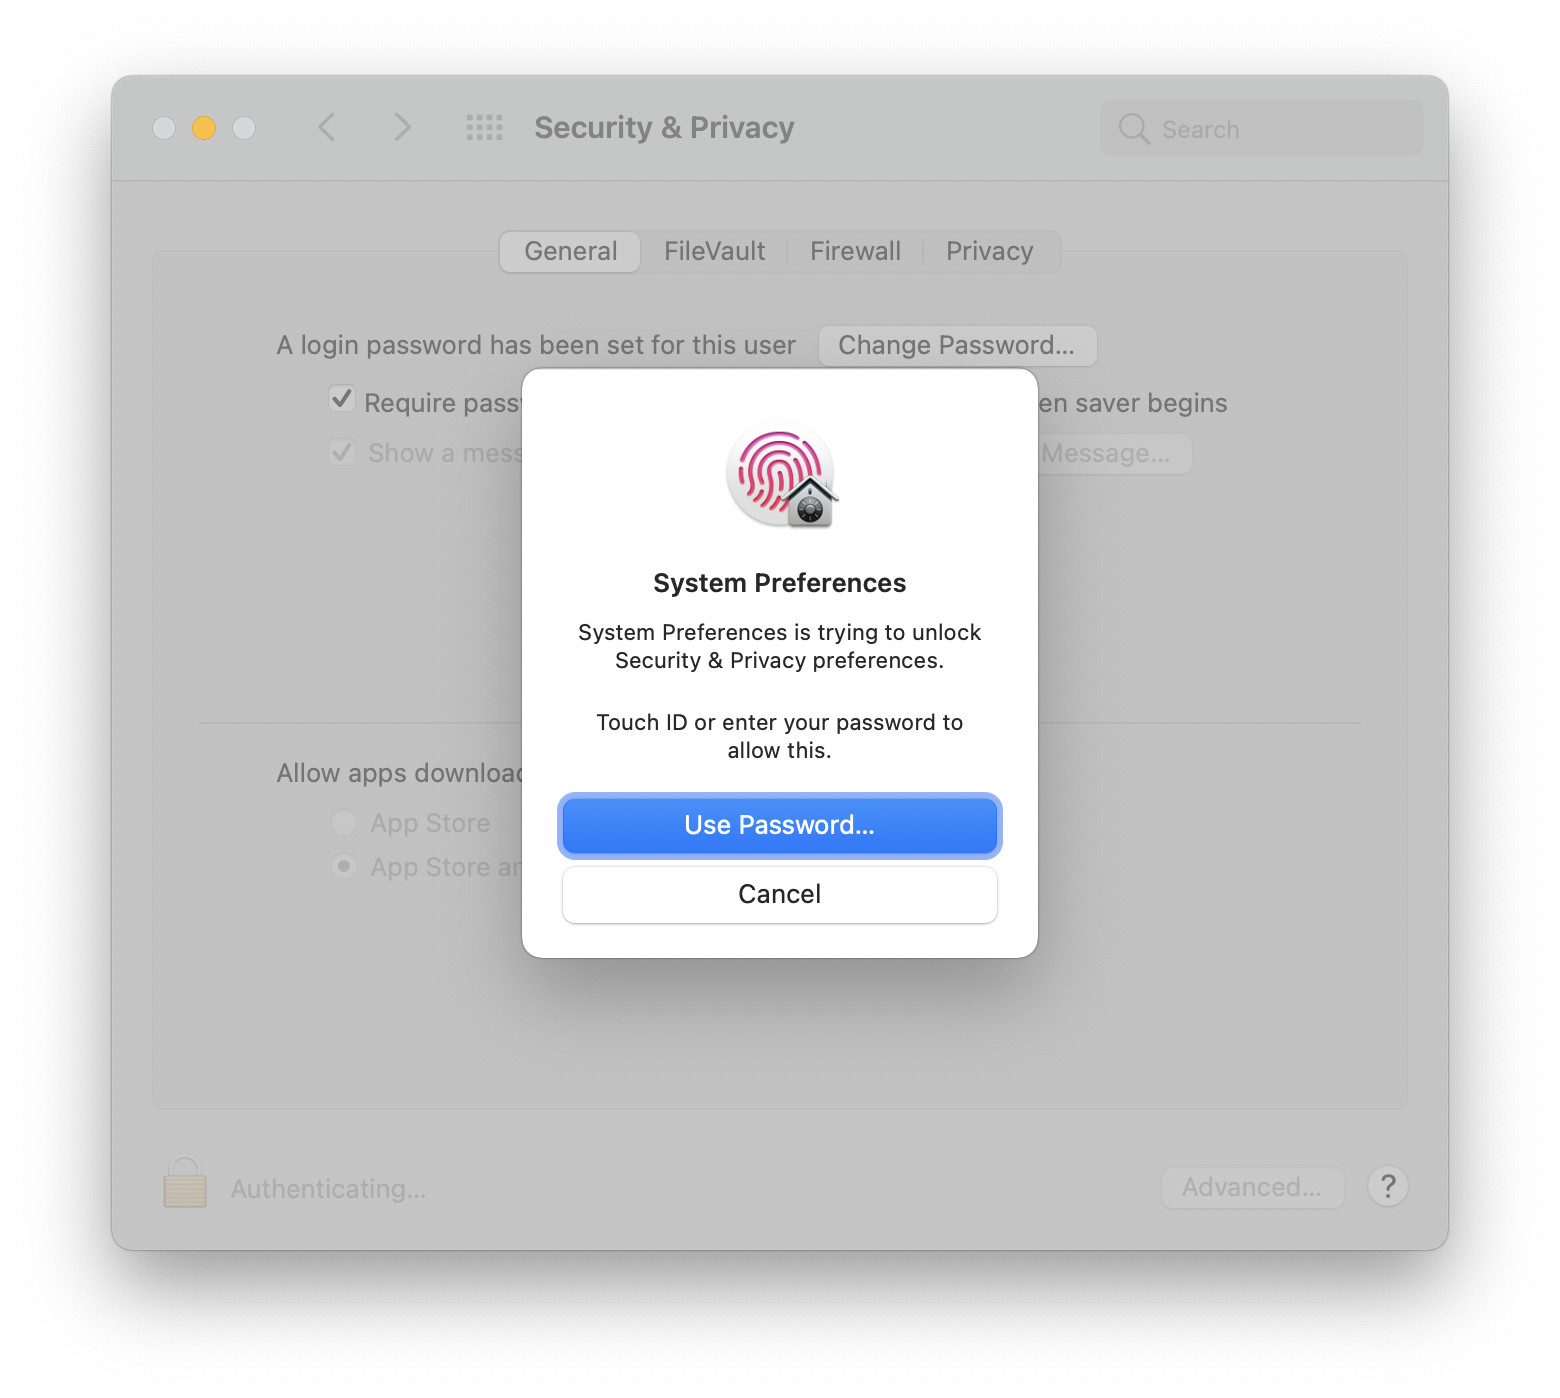
- Then, click on “Set lock message.”
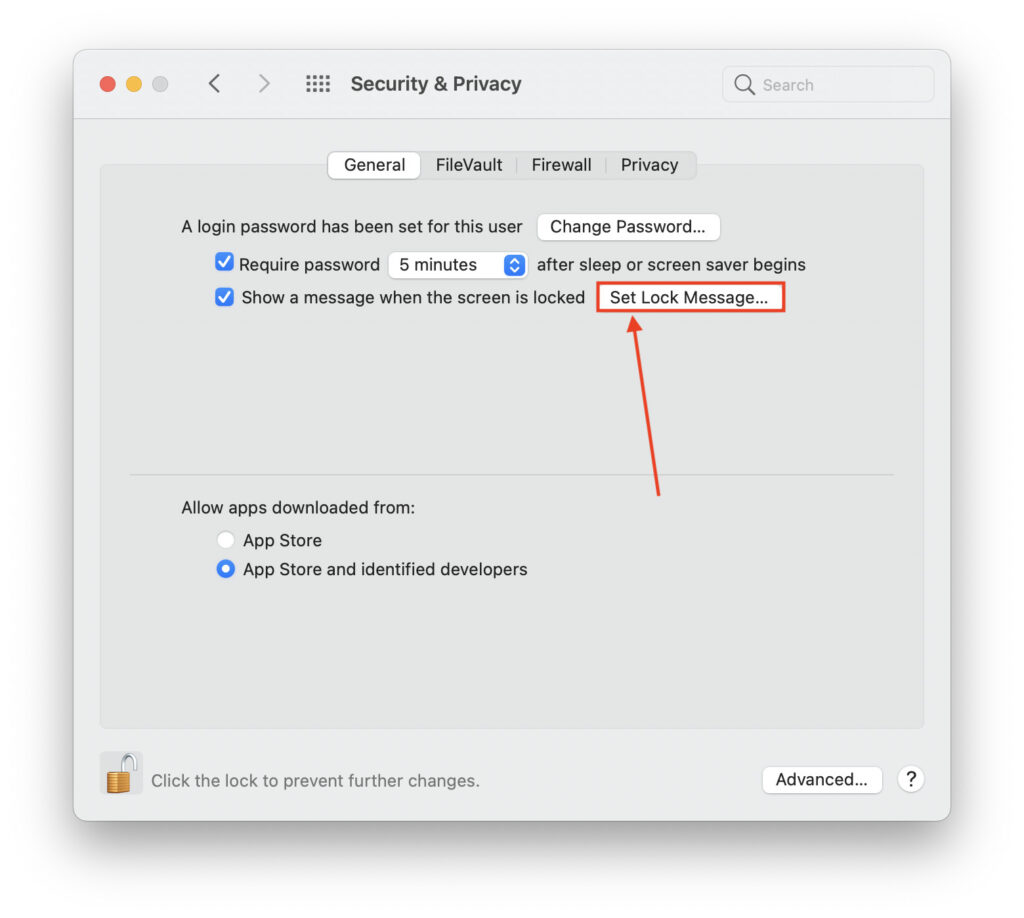
- Finally, type the message you want and click Done.
Other macOS Monterey Guides you should check out:
- How to permanently show Menu Bar in full-screen mode on Mac
- How to share saved passwords on Mac running macOS 12 Monterey
- How to customize the mouse pointer in macOS 12 Monterey
- How to use Tab Groups in Safari in macOS 12 Monterey
- How to use Quick Note in macOS 12 Monterey
- How to AirPlay to Mac from an iPhone/iPad, mirror screen, and stream content
- How to mute notifications temporarily on macOS Monterey and iOS 15
- How to hide your IP Address in Safari on macOS Monterey and iOS 15
- How to enable and customize Focus filters on macOS Monterey
- How to turn on Auto-reply for Focus on macOS Monterey and iOS 15
- How to turn off ‘Shared With You’ in macOS Monterey and iOS 15
- How to add and manage Tags in Notes in macOS Monterey and iOS 15
- How to use Live Text on Mac running macOS Monterey
- How to use Hide My Email to combat spam and secure your email on Mac
- How to use Private Relay on macOS Monterey
- How to add VoiceOver Image Descriptions in the Preview app in macOS Monterey
- How to Enable Low Power Mode on your Mac and How it Works!
- How to enable Mail Privacy Protection on macOS Monterey and iOS 15
- How to change playback speed of Voice Memos in macOS Monterey.
- How to translate any text on your Mac running macOS Monterey
- How to add animated Memoji on your Mac’s login screen
- How to create Smart Lists in Reminders on macOS Monterey
- How to disable Universal Control on macOS Monterey
- How to ‘Skip Silence’ in Voice Memos on macOS Monterey
- 50+ Coolest Siri Shortcuts for your Mac running macOS Monterey
