
The Mac App Store is rife with OCR apps. And Apple’s new Live Text feature has recently arrived to establish dominion over all of them. The sweet convenience of being able to instantly pick out text from photos is an irresistible feature. When that feature is baked right into the system and liberally available, it’s pointless to look for alternatives.
However, if there’s one app that has the potential to compete with Live Text, it’s TextSniper.
Text Sniper is a simple OCR app with powerful capabilities. The keywords here are “simple” and “powerful.” It’s a fruitful combination. It lets you capture any text on the screen and temporarily save it into the clipboard for later use.
Its simplicity lies in the fact that all you need to do to recognize a random string of restricted text is snap a screenshot of the text. Once you do, the screenshot automatically disappears and is not saved onto your Mac. The plain text from the screenshot is then saved into the clipboard from where you can easily paste it into a note or a document.
OCR apps are difficult to implement, regardless of their ubiquity. TextSniper, however, hits the right spot. The process is effortless which is a direct indication of how powerful and neatly implemented this app is.
However, since TextSniper costs $6.99 as opposed to the free Live Text upgrade in macOS Monterey, is it worth enough to spend money on? I’ve tested out the app for you and have some thoughts that will ultimately lead us to an answer. Read along!
Text recognition (OCR)
An OCR app is only as good as its proficiency in capturing text. TextSniper does a decent job in that area.
I was able to capture the text I wanted exactly in the way I wanted nine out of ten times. I tested the app using different kinds of texts. There are a few instances where the developer indicates TextSniper could be useful. Naturally, I had to test out some of them.
The text at a point in a YouTube video was arranged in an orderly fashion—a title and a bulleted list of elements as shown in the image below.
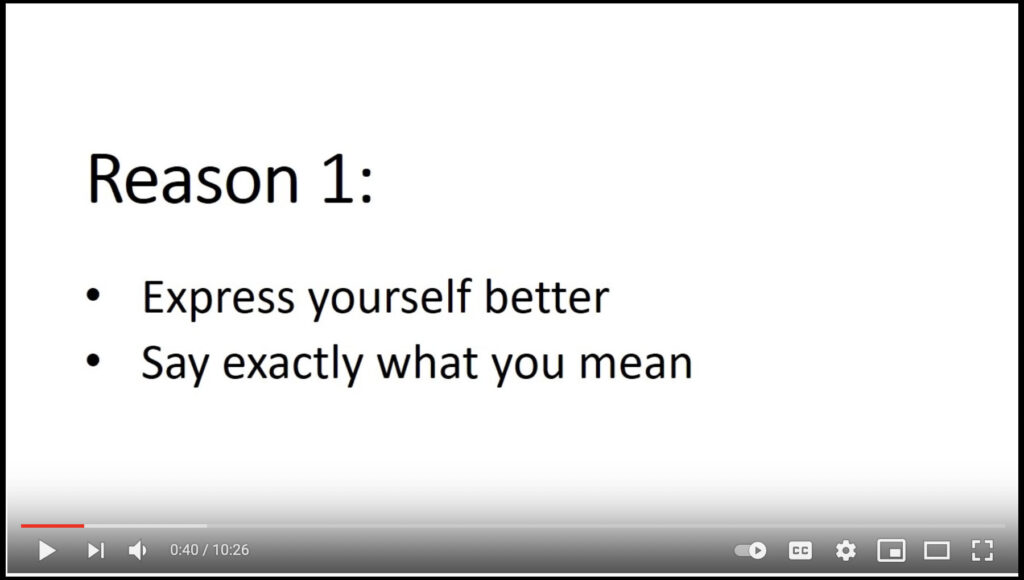
TextSniper managed to copy the text with proper line breaks. The only element it missed out on is the bullets in the list. In some cases, you might want the text to be formatted as it is when you paste it. But, in most cases, it will help if the text isn’t formatted.
TextSniper also offers an option to disable line breaks. This is usually helpful if you’re capturing text that’s arranged creatively in a non-standard fashion. You might want to paste it into a note or a document without its original artistic appearance.
One of the instances where TextSniper could be really useful is while capturing text from photos. This is where Apple’s Live Text feature already thrives.
That said, in my testing, TextSniper didn’t run into any problems while recognizing text from even pixelated photos, similar to Live Text. Aside from proficiency, though, TextSniper has a minor disadvantage: it doesn’t let you select text naturally.
Consider this image below:

Live Text will let you select and copy text normally as if it were a document. With TextSniper, however, there’s a chance that you won’t be able to capture a specific sentence from the image above since there is a chance the rectangular screenshot box may overlap other sentences.
You might find this problem to be elevated with more complex text arrangements. While this might be off-putting, it ultimately gives TextSniper a tactical advantage against Live Text—you can recognize text anywhere. Just snap a screenshot and all the text is yours to meddle with.
Although, an alternate text selection mode would only make things better. This way, TextSniper could also offer smart options such as address and phone number detection and offer actions based on those options.
Besides, TextSniper’s text recognition may even be slightly better than Apple’s Live Text. To demonstrate that point, I got a little courageous. I picked a photo of a paragraph written in someone’s handwriting from Google and tried to run both Apple’s and TextSniper’s OCR on it.
The result: both were inaccurate. However, TextSniper’s result more closely resembled the original text as compared to Apple’s Live Text. Live Text stretched out the sentences in the paragraph with multiple spaces in between while also skipping some words.
It has a built-in QR code and Bar code reader
QR codes are popularly used today by the entirety of the internet as well as the world outside. Usually, you’ll need to point your phone’s camera towards the QR code to decipher it. But what gives when you need to scan a QR code you come across the web while browsing on your Mac?
Well, TextSniper includes a QR code reader that works in the same way OCR does. You can either use the shortcut key you’ve assigned for capturing QR codes in TextSniper or click on the “Capture QR/Bar Code” button in the TextSniper icon on the Menu Bar.
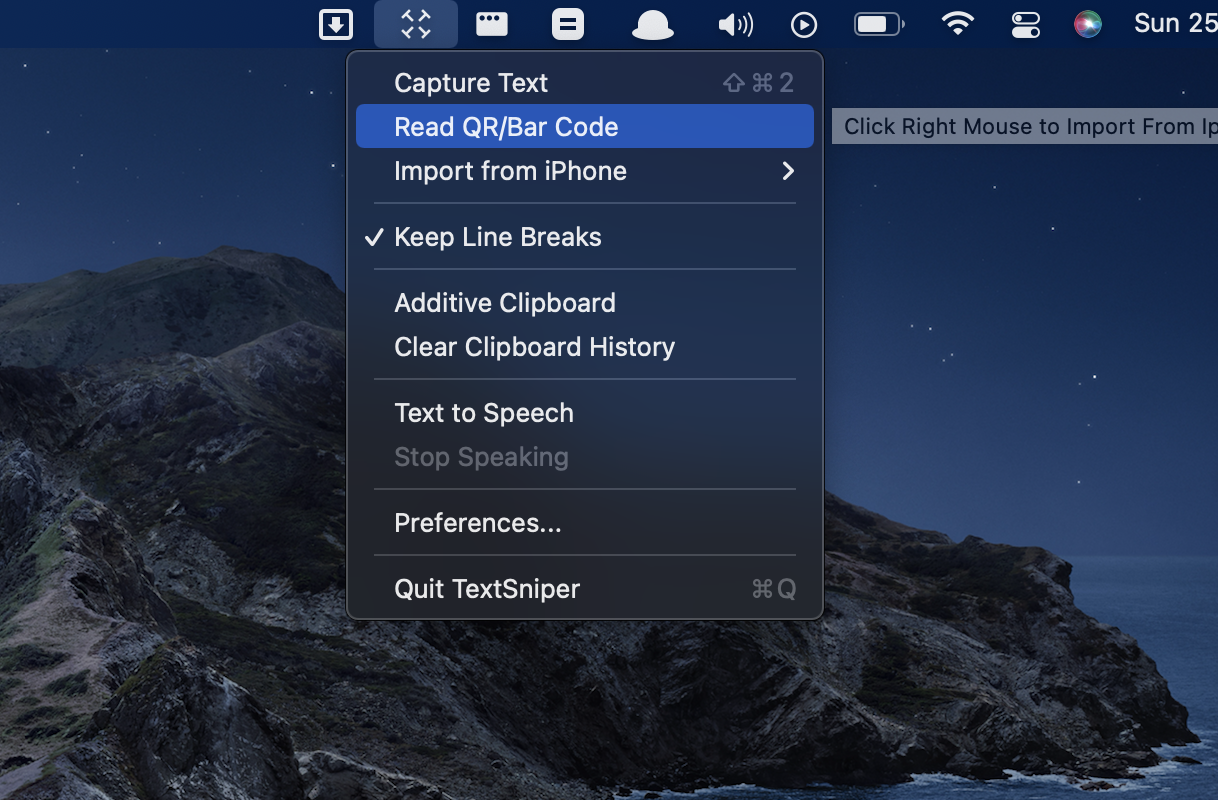
Then, the cursor will turn into a crosshair which is an indication that you can hold and drag to cover the area where the QR code or Bar code is located. As soon as you release the cursor, the app will automatically save the QR code’s address to the clipboard. You can then paste the address into your browser and access the website associated.
This is a fairly decent implementation. However, it would have been better if the app somehow showed a button to jump to the address automatically.
When we look at the competition, Apple’s Live Text feature cannot scan QR codes. Besides, not a lot of OCR apps throw in a QR code or Bar code scanner as well and vice versa. The fact that TextSniper hosts both gives it an edge.
Controls and general usage
On the surface, TextSniper is a simple app. Deep down, though, the app works with the help of the machine learning prowess that Apple’s Vision framework enables. So, naturally, the app is quickly able to recognize text. It’s even faster on M1-based Macs due to the chip’s allocation of more resources dedicated towards machine learning.
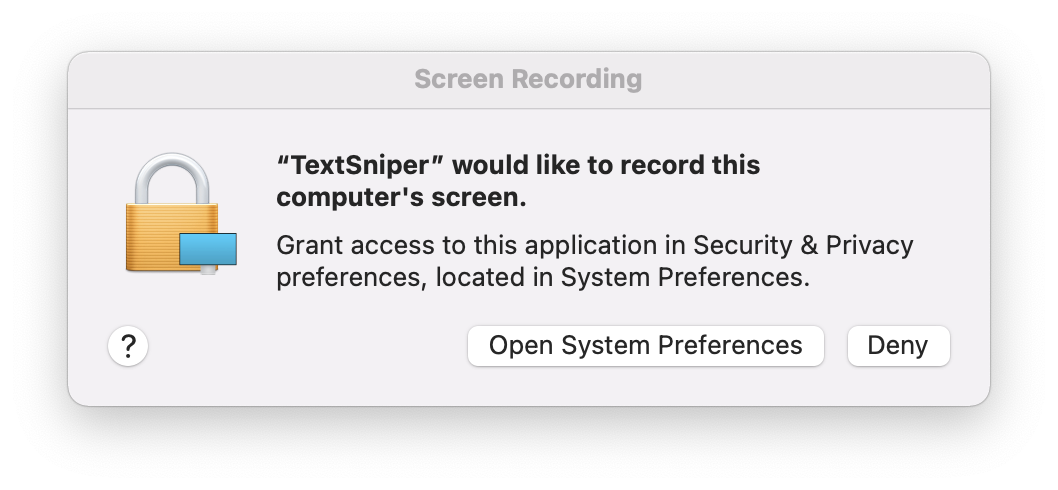
Setting up TextSniper requires you to head over to the macOS Preferences and lend it certain permissions the app requires for functioning. Without giving it these permissions, the app might not work up to its full potential. Once installed correctly, you can choose to let TextSniper initiate upon login so that it’s up and ready to function or choose to manually open it every time you restart your Mac.
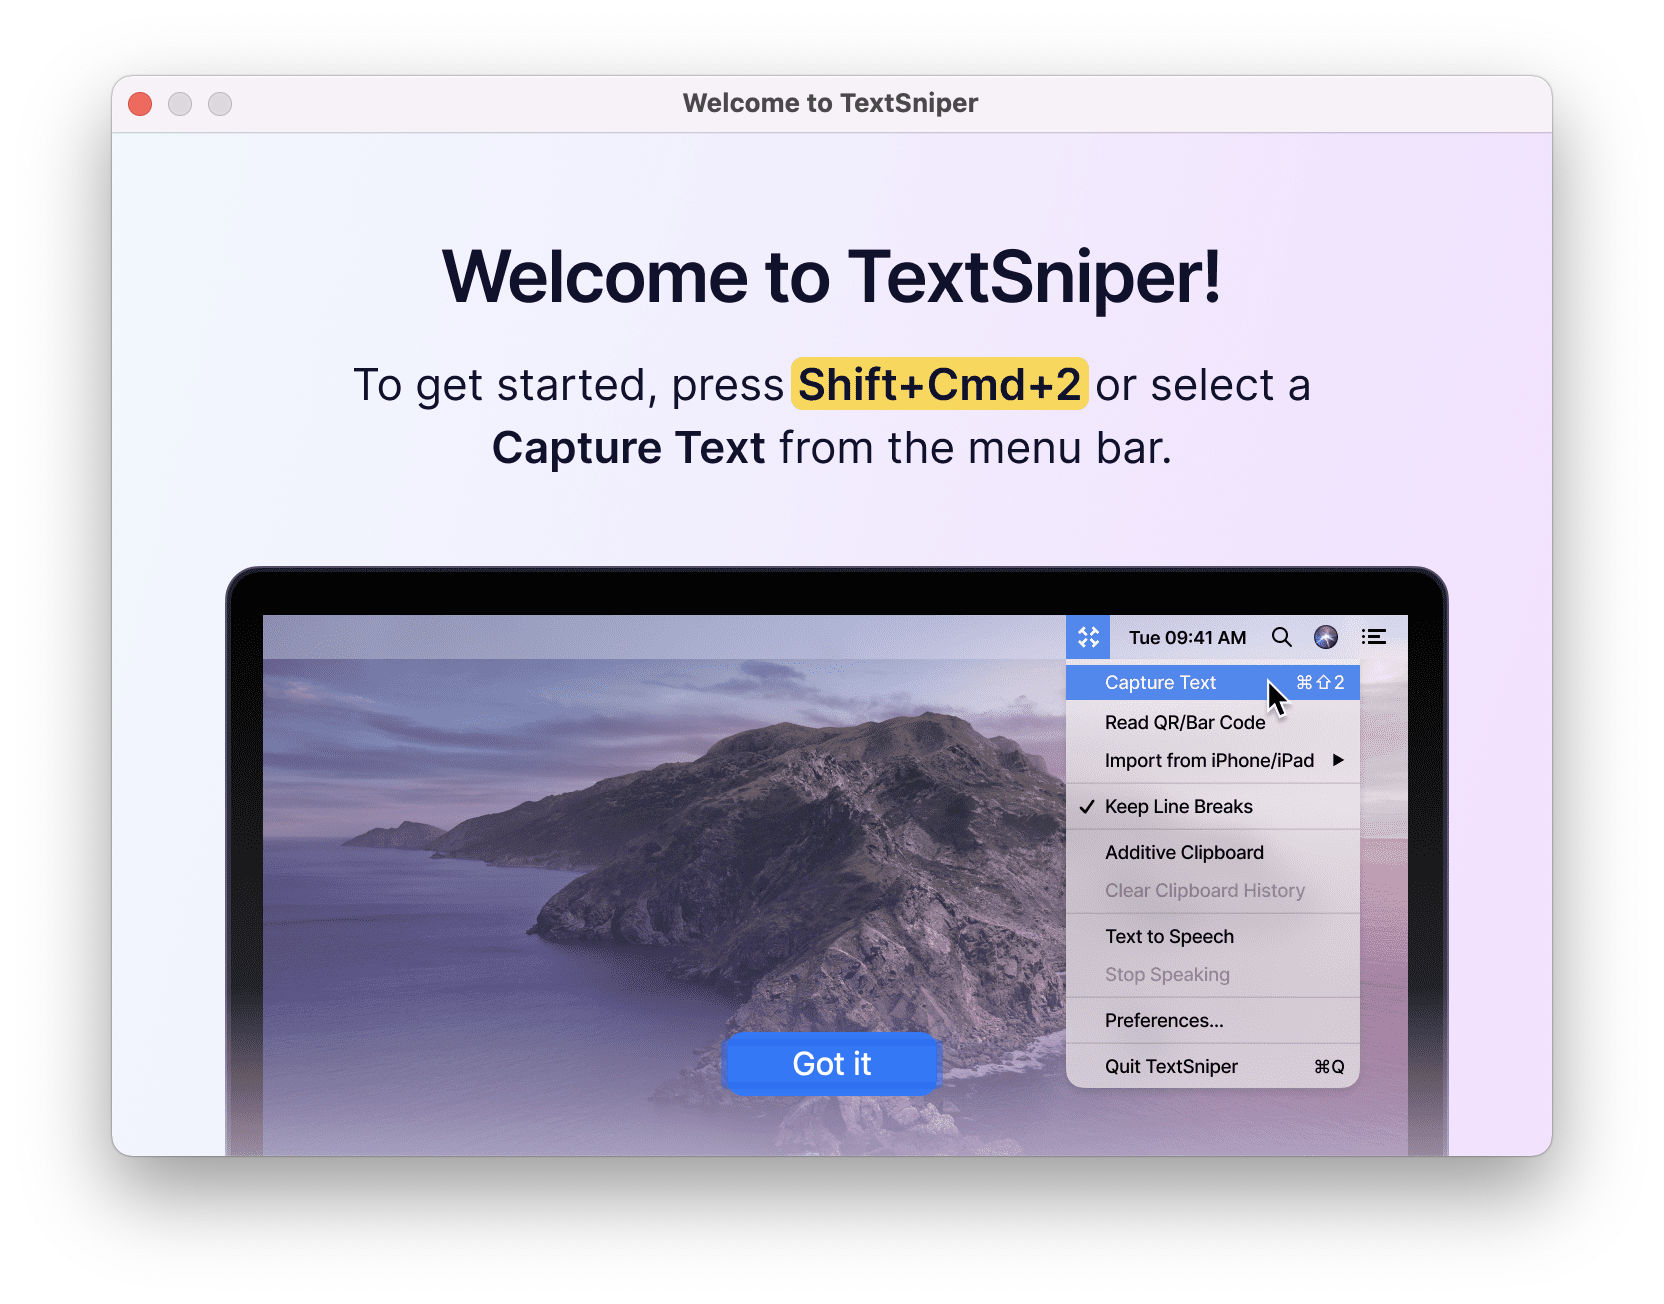
That said, as discussed before, using TextSniper is easy. All you need to do is provoke the app’s text recognition tool either by using the keyboard shortcut assigned to it or from the TextSniper’s Menu Bar icon.
Part of the “simplistic” reputation TextSniper has gained is due to the app’s placement. It does not take up space in the dock like a regular app. Instead, it’s available as an obscure but handy utility in the Menu Bar. Even then, you won’t feel the need to access TextSniper there, thanks to keyboard shortcuts.
TextSniper lets you set keyboard shortcuts for a variety of different functions the app performs. The default keyboard shortcut is Command + Shift + 2 which brings up the crosshairs that you can use to highlight the text you need to copy. Apart from that, you are free to set keyboard shortcuts for capturing text with or without line breaks, capturing the last selection, and more.
You can also toggle preferences like Text-to-Speech easily using keyboard shortcuts even when you are in capture mode (the mode with crosshairs).
The process of text recognition is instant. This is especially true on M1 Macs. This means it’s often difficult to comprehend whether the app actually was able to capture the text. Thankfully, TextSniper has a solution for that: sound and visual cues.
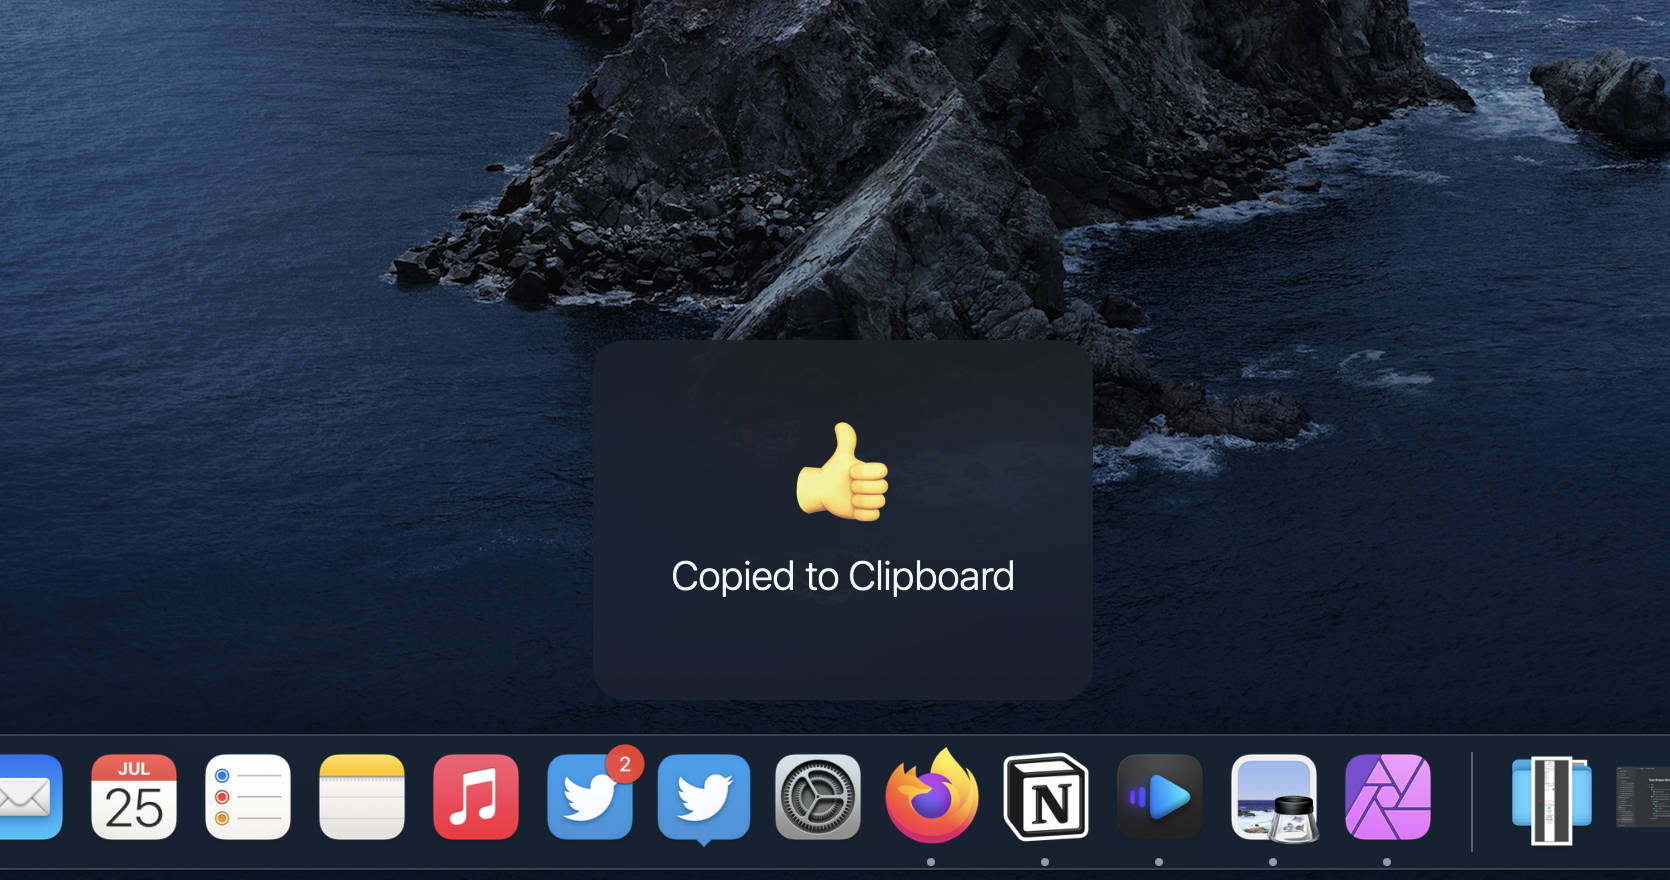
Whenever you capture text using TextSniper, it makes the classic sound of a camera shutter, similar to that of the macOS’ native screenshot tool. This provides an assurance of your action, regardless of how quick it was. Then comes the visual cue. If the text recognition is successful—which it is almost all the time—the app will display a little rounded square with the confirmation text “Copied to clipboard” accompanied by a thumbs-up emoji in the middle of the screen at the bottom.
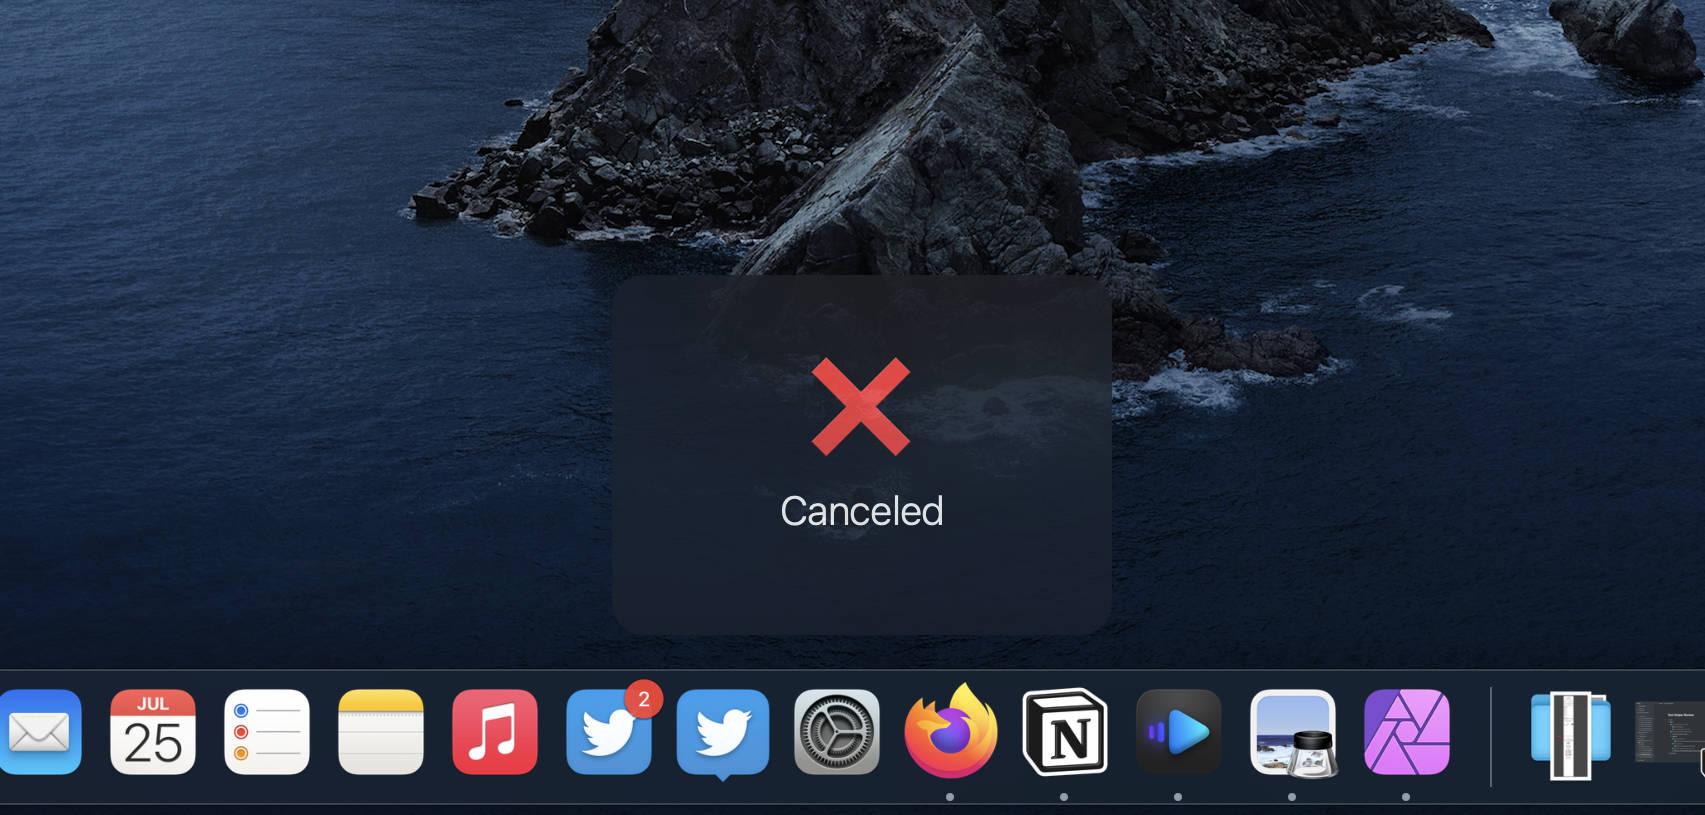
Similarly, if you plan on canceling to capture the text mid-way, you can hit the Escape key and the app will show a “Canceled” square with a red cross.
Of course, if either of these types of notifications seems distracting, you can always turn them off from the app’s preferences. While I’m not a big fan of the shutter sound, I prefer the visual cues.

An underrated aspect I like about TextSniper is its ability to work with multiple languages, albeit not at once. As of this writing, the app supports OCR in eight languages. You can select which language you want to be the primary language while capturing text.
However, each time you come across a text in a different language, you will need to head over to TextSniper’s preferences to switch it. I can see this easily getting cumbersome if you’re working on building a multilingual document. It would be much easier to capture text in different languages if the app offered automatic language detection.
Additional features
The number of features an app offers is sometimes proportional to its quality. In this case, TextSniper offers interesting features that enhance the text recognition process and help manage the captured text with increased efficiency.
Additive Clipboard
Starting off with Additive Clipboard, it’s a time-saver when it comes to capturing heaps of text. Normally, you’d capture a chunk of text and paste it somewhere to retain it. However, if you are working text recognition on a rather large document, the constant dance of copy and pasting the text would easily get repetitive and boring; sometimes, even frustrating.
With Additive Clipboard, you can continue snapping text that’s on the screen without pasting it each time. This way, you can dump the text collectively. Not only this is a more efficient process, but it’s also easy on your patience, I’ve discovered.
You can enable Additive Clipboard either by assigning a key combination or heading over to the TextSniper dropdown in the macOS Menu Bar.
The thing I like the most about Additive Text is its degree of smartness. When you snap up a piece of text and paste it in, say a note in the Notes app; and then, continue to snap some text again and paste it in the same note, it doesn’t duplicate the previously written text. Rather, it merely pastes the new bits of text picked up after the first pasting action.
So, for instance, if I create a new note and try pasting the new text, it pastes it along with the old text that’s already saved in the additive clipboard.
Based on how clipboards work, I think the amount of text you can store is dependent on your Mac’s memory and storage. I tried capturing the paragraphs of this post one by one, and they have stayed in the Additive Clipboard since.
TextSniper also lets you enable an option that automatically refreshes the Additive Clipboard each time you paste using the keyboard combination Command + V.
Comparing Apple’s Live Text with TextSniper with respect to its Additive Text feature is moot. The need for Additive Text only kicks in when you cannot copy heaps of text at once. This is almost always the case with TextSniper as there’s only so much text your Mac’s screen can fit.
Text-to-Speech
A neat little feature TextSniper has is text-to-speech. It aids regular work as well as it’s good for the sight-impaired.
The text-to-speech kicks in as soon as you capture the text. However, I didn’t quite enjoy the lack of immediately visible on-screen controls to pause, play, skip, and increase the speech playback. You can only stop the narration from either a keyboard shortcut or the dropdown menu for the app in the Menu Bar. You can also increase or decrease the speech’s playback speed from within the app’s preferences.
Moreover, the speech itself sounds quite robotic, unlike speech from some modern text-to-speech systems, which sound close-to-natural. And the worst part is, you’re stuck with it. There are no other speech options.
Despite its shortcomings, it’s worth noting and appreciating that TextSniper falls (yet again) among the few OCR apps that support text-to-speech functionality. Even Live Text doesn’t let you speak selected text in photos.
Ability to quickly import photos from iPhone or iPad
For it to work, you’ll need to enable both Bluetooth and Wi-Fi on your iPhone and Mac as well as make sure both devices are in close proximity to each other. When set up correctly, it’s admirable how well it works.
When you click on the “Take Photo” button in the TextSniper dropdown on the Menu Bar, it automatically opens the camera on your iPhone. You can then click a picture of the text you want to copy and paste into a document on your Mac; say, some notes that your friend lent you only for a brief period of time.
Then as soon as you click the photo and confirm that you want to use it, TextSniper automatically copies all the text in the photo and displays the notification box indicating the text has been successfully copied.
It’s worth noting that when you click a picture of a document, any text in the photo will be recognized and copied into memory. I wish there was a cropping interface where I could manually place the focus on the text I want to copy from the photo, thereby disregarding the unimportant chunk of text.
Nevertheless, this collaboration with iPhone rings true even with documents and sketches and is not limited to only photos.
In this case, if we are so brave as to compare TextSniper with Live Text, it would seem like the latter is poised to have the edge. Interestingly, that’s not the case. Let’s consider this scenario. You’ve come across a bunch of papers with text written on them at work. You are the unfortunate person chosen to digitize those papers. Now, you have two options: either use Live Text on your iPhone to point at each paper and copy the text by selecting it with your fingers or use TextSniper to simply keep snapping photos of those pages and let the app do the text recognization for you.
Naturally, you’ll tend to choose the latter option. And this is what makes TextSniper better than Live Text in this case.
Final Thoughts
TextSniper is a solid app based on a solid foundation. It outflanks Apple’s Live Text by a considerable margin when it comes to the versatility of its features. However, I cannot help but point out that since Live Text is built right into the system and is easily accessible than TextSniper, I find myself using it more.
Earlier, it had the amazing capability of capturing text from photos. Now, it’s simply a third-party app that also does that. While it’s difficult to beat Apple’s native implementations of features from popular third-party apps, TextSniper still shines through with its ability to capture text anywhere and the extra features.
Maybe it’s just me. I do not come across many instances that require me to use OCR. But for those who rely on it daily, they’ll notice TextSniper has much better endurance than Live Text.
Of course, there are rough edges to polish. For instance, the text-to-speech system could really use a pair of controls. Automatic language detection could improve the user experience as well.
Despite that, if I were indulging in tasks that require OCR recognition frequently, I would get the app right away.
Note: This story contains affiliate links that may earn The 8-Bit commissions on successful purchases to help keep the site running.
