If you are a macOS user, you might be aware of the fact that Apple doesn’t allow sharing system audio from the get-go. This means that third-party apps have to emerge with their own solutions to do so. Most video conferencing apps including Zoom include the ability to share macOS system audio and video streaming apps like Mega Shows on Windows.
However, some popular apps including Discord—which is popular for game streams—have not supported system audio on Macs for a long time.
Thankfully, that’s changing. According to an FAQ posted on Discord’s support forums recently, the app is adding support for screen sharing with audio on macOS.
Discord also says that it’s slowly rolling out the feature to all users, meaning you should be able to see the feature eventually, if not right away. Moreover, it’s worth noting that Discord’s screen sharing feature only works with audio from individual applications.
Here’s how to screen share with audio using Discord on macOS.
How to screen share with audio using Discord on macOS
- Open Discord
- Head over to the Voice & Video settings which are located within User Settings.
- Under the “Screen Share” section, press Install.
Next, you’ll need to validate the third-party software Discord is using for the feature manually.
However, going further, the process for doing this slightly differs based on the version of macOS you’re on. So follow the instructions according to the macOS version your Mac is currently running.
For macOS 10.13 - 10.15
When you press the Install button a dialog box will appear. Enter your password. Once you’ve done that, you’ll be able to begin sharing your screen with internal audio using Discord.
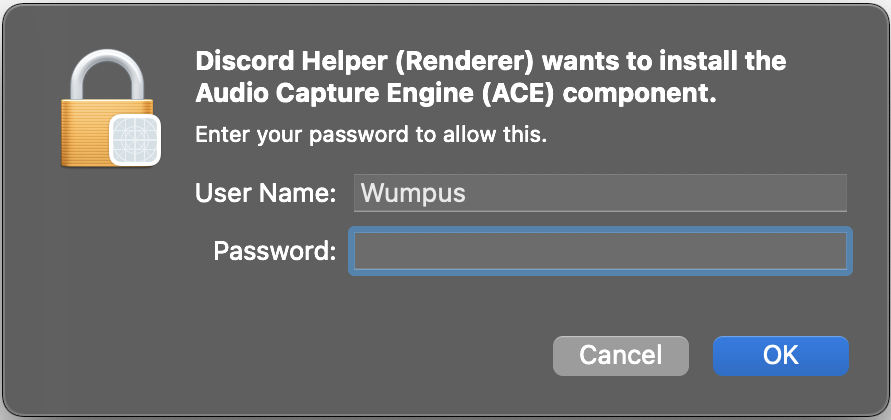
For macOS 11 (Big Sur)
Once you hit the Install button, you should see a popup asking for your system password. Enter the password and press OK:
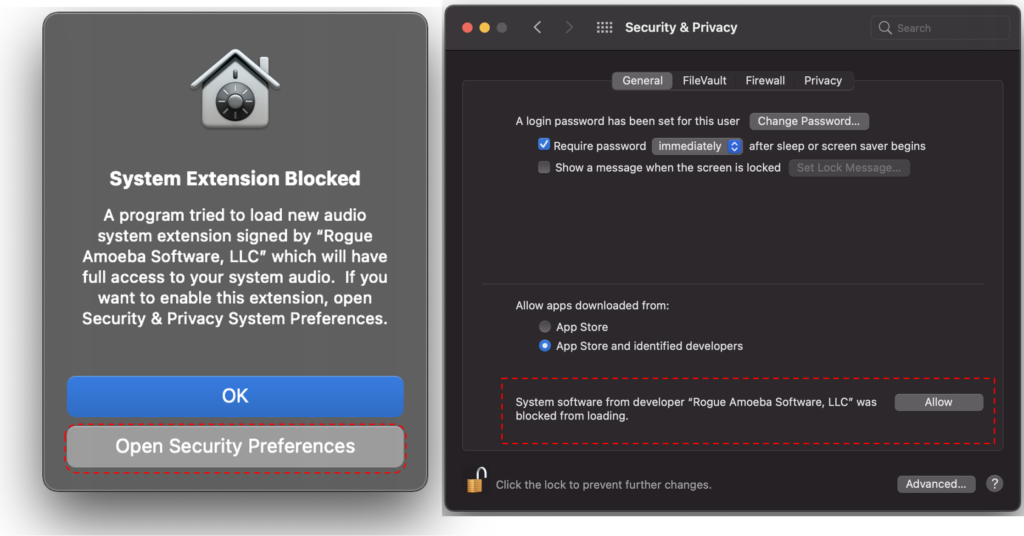
Now, macOS will prompt another dialog alerting you that a System Extension was blocked. This isn’t a reason to worry and only exists due to tightened security on macOS, says Discord.
Now, click on Open Security Preferences and then click Allow in the next window.
Now, restart your Mac.
For M1 Macs
The process of enabling screen sharing with audio on Discord is a bit lengthy as compared to Intel-based Macs due to the security additions introduced by the new M1 chips.
That said, the steps until installing the extension are similar to that of the aforementioned methods. However, the steps involving enabling System Extensions are as follows:
- Click on Open Security Preferences when the prompt appears.
- Click Enable system extensions.

- Shut down your Mac.
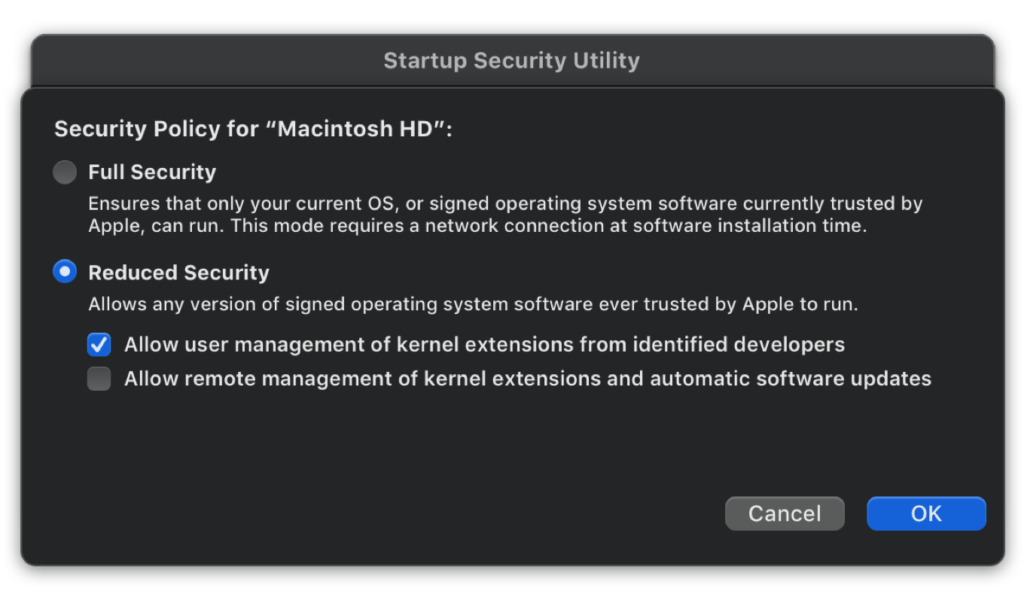
- Boot it into Recovery Mode by long-pressing the power button until you see “Loading Startup Options.”
- In Recovery mode, choose your user account and the hard drive on which macOS is installed. Then, from ‘Startup Security Utility‘, select ‘Reduced Security‘ mode, which will let your computer run extensions from identified developers.
- Discord suggests you tick the checkboxes as shown in the image below:
- Restart your Mac.
- Upon restarting, the prompt for allowing Discord’s extension to run will appear again. Click on Open Security Preferences.
- Then, click Allow.
- Restart once again for the settings to be applied.

